How to Install a Marble Subway Tile Backsplash
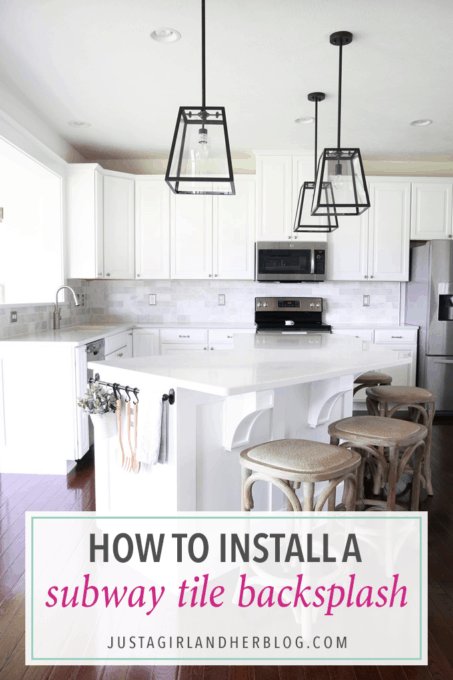
Hey, friends! I’m excited to be jumping back into our kitchen DIY series today! A few weeks ago I shared our updated kitchen reveal and promised to come back to talk about some of the DIY projects that we did along the way. Most of them were fairly simple, but they made a big impact on the space– my favorite type of project! Today I wanted to share the details of how we installed one of my most favorite pieces of the kitchen: the marble subway tile backsplash!
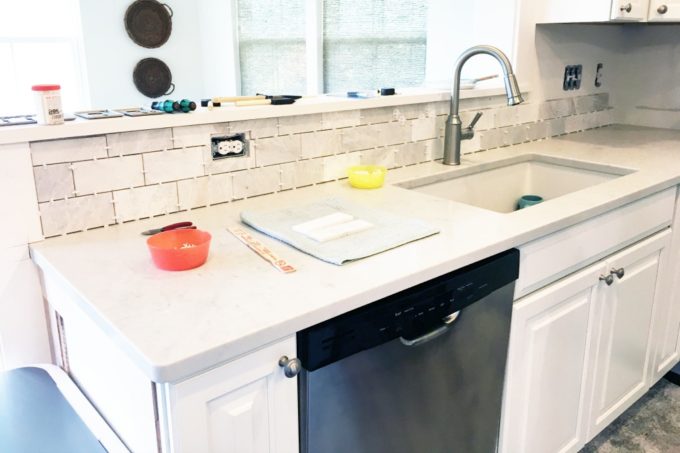
The kitchen was looking pretty bare without any backsplash at all…
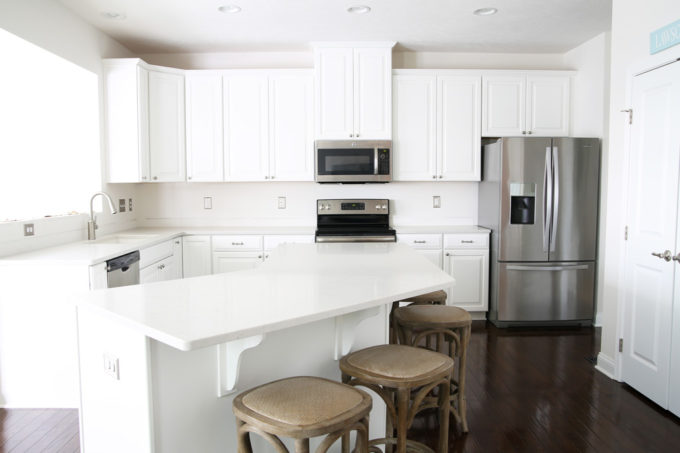
…so we couldn’t wait to add some pretty tile to the space!
We are not complete newbies to backsplash tile installation. In fact, at our last house, Donnie put in a hexagon tile backsplash, which we absolutely loved!
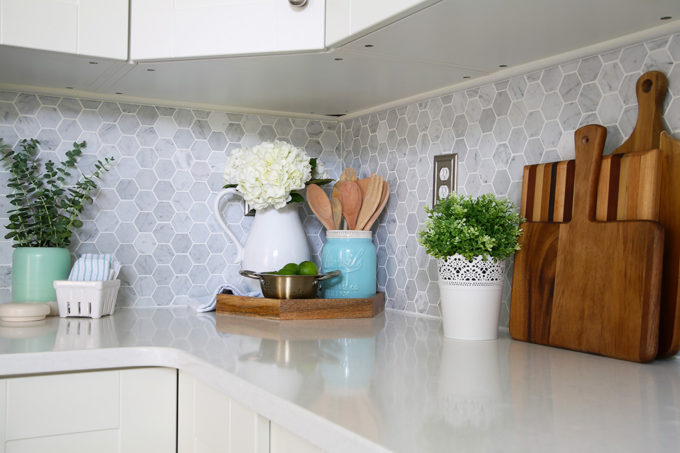
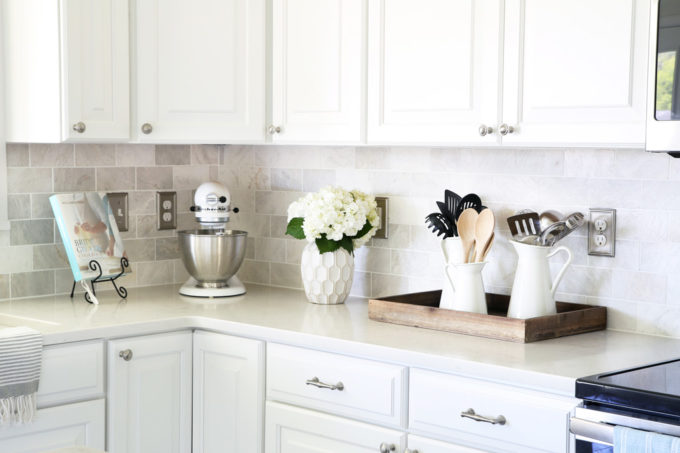
Though the hexagon tile was beautiful, it was a little more tedious to install, so for this house Donnie requested a simpler shape– which was fine with me, because I wanted to go with a more classic look anyway! 🙂 I was thinking subway tile from the very beginning, but when I saw this beautiful Carrara marble subway tile at the tile store, I was absolutely sold! I have always loved the look of marble, and I knew it would look great in our kitchen for a long, long time.
How to Install a Marble Subway Tile Backsplash
Supplies
This post contains affiliate links. For more information, see my disclosures here.
Here are the tools and supplies we used to install the backsplash tile:
- Subway Tile (We purchased ours from The Tile Shop.)
- Ryobi wet saw
- 5/16″ V-notch trowel
- 1/8″ tile spacers
- Painters tape
- Bucket
- Sponges
- Unsanded “standard” white grout
- Grout float
- Caulking
Process
Before we could order the beautiful tile we had picked out, we had to measure to see how much tile we would need. After measuring the needed square footage, we added 15% to come up with the final amount of tile we would order. We were sure to order more tile than we thought we needed just to be safe– we didn’t want to have to go back and order additional tile in the middle of our project!
The extra tiles turned out to be a life saver. What we couldn’t see in the tile samples at the store was that some of the pieces of tile in this collection had veining that had a slightly orange tint to it, which I definitely did not want. It was on so few of the pieces though, that we were just able to weed them out and use the rest to complete our tiling project.
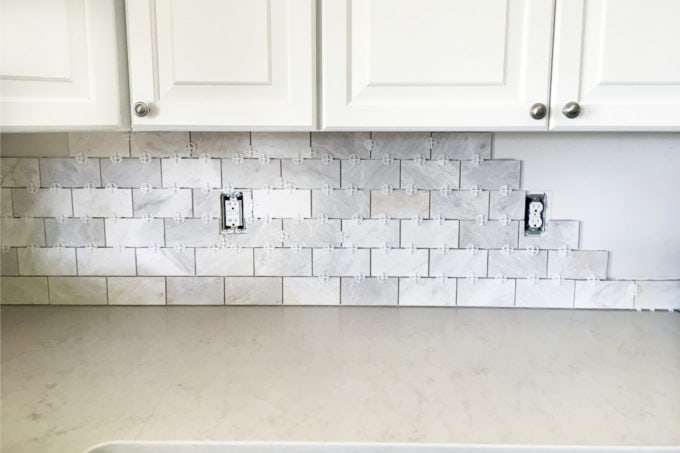
Next, we had to decide where to lay the first piece of tile. This seems like it would be easy to figure out, but we wanted to make sure that we wouldn’t end up with any tiny slivers of tile anywhere that would make the design look odd. To figure this out, Donnie laid out tiles along the countertop starting at the left most point and worked his way down the countertop using the 1/8″ spacers. He just wanted to make sure the tiles would end in the corner of the kitchen without any issues. This preferred layout worked fine, so he started with a full tile on the bottom left of the backsplash — butting up against the newly installed trim work.
Fortunately we had nice, flat drywall to work with, so there wasn’t much surface prep involved. If the surface is too smooth, it’s a good idea to do some scoring on the drywall to give the mastic little imperfections to adhere to. Making little scores or cuts with your trowel will work well.
Cutting the tile with the Ryobi wet saw was super easy. Marble is way less brittle than ceramic so there wasn’t much cracking, and the subway shape is much easier to work with than the hexagons we used at our last house! From a difficulty perspective, marble subway tile is about as easy as it gets.
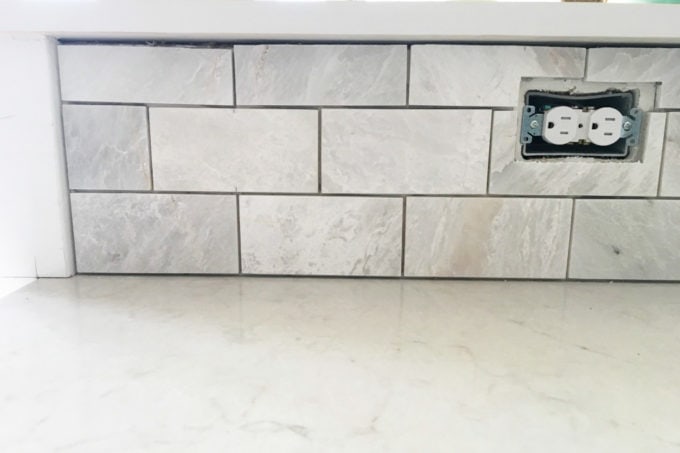
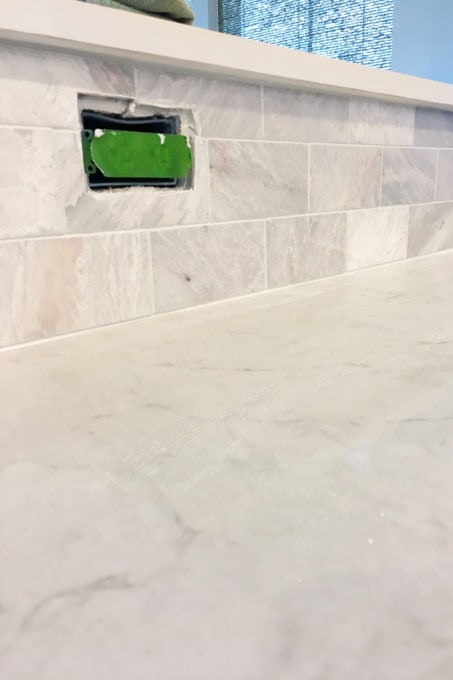
One issue we had was the depth of the outlets. It was easy to cut the tiles to work around the outlet openings but marble tiles are thick, and the significant added depth made it so the outlet covers no longer fit flush with the actual electrical outlet.

To fix this issue, we cut power to the kitchen and then loosened the screws that attached the outlets and switches the boxes. It didn’t take much to bring them out about a quarter of an inch. Now when we put the plates back on, everything sits flush.
On the far left side of the backsplash we had a natural border for the tile — a trim piece. On the far right side, we used marble pencil tile to create a border and finish of the tiling.


After we finished tiling, we added a coat of natural stone tile sealer, waited a day, and then started grouting. We used “standard” white, which is not quite as white as “bright” white because we thought it gave a more natural look.
Our space between each tile was 1/8″, the maximum space for un-sanded grout. Using un-sanded grout on marble is important because it’s very easy to scratch the marble with the course sand. We also like the look of un-sanded grout better– we used it in our last house and it held up well.
Mixing the grout is always tricky. You want a toothpaste consistency, but I feel like it goes from super dry to way too wet very quickly. On our first pass with the grout, we mixed it a bit too went so when it dried, there were little hairline cracks in a few areas. We had to mix up another batch of grout and do another thin coat on those areas. If our mix was a bit dryer, we could’ve avoided that problem.
Grouting is simple but time consuming. We just use the grout float and press it into all the gaps, scrape away as much as we can with the float, and then wipe away the rest with a wet sponge. We recommend using latex gloves for this process because the grout seems to suck the moisture out of skin.
After the grout was completely dry, we used a foam brush to apply another coat of the natural stone sealer. We just brushed it on, waited 10 minutes, and then wiped away any excess with a soft cloth.
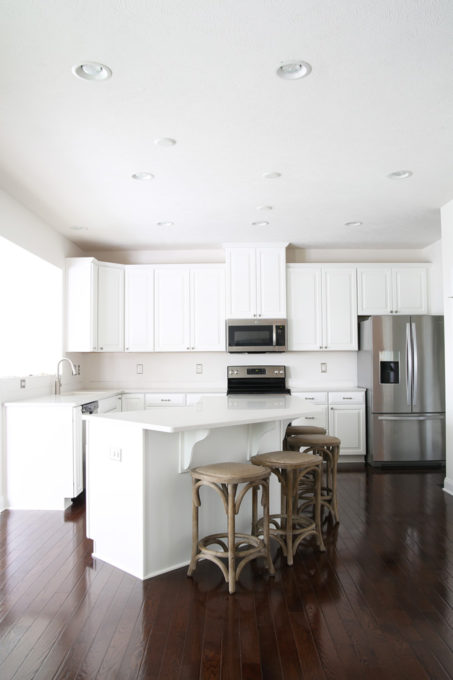
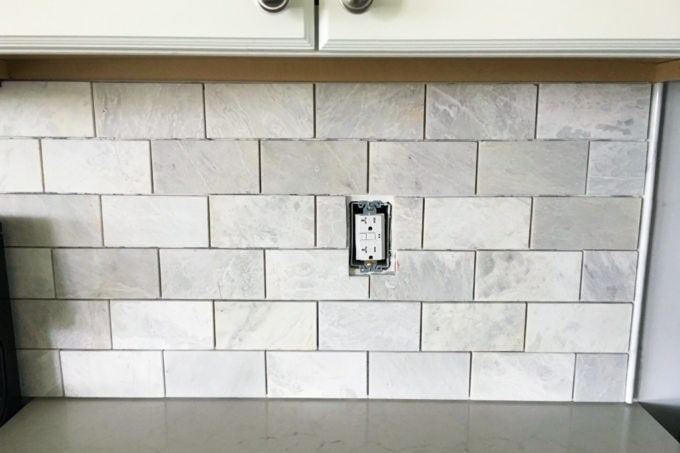
When the grout and tile had been sealed, we had the beautiful marble subway tile backsplash that I had dreamed of! I love how it adds that extra bit of detail and intricacy to our kitchen and gives it a more finished look!
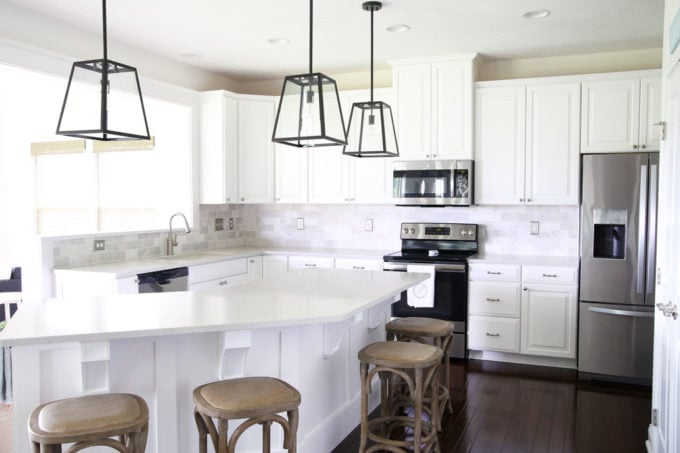
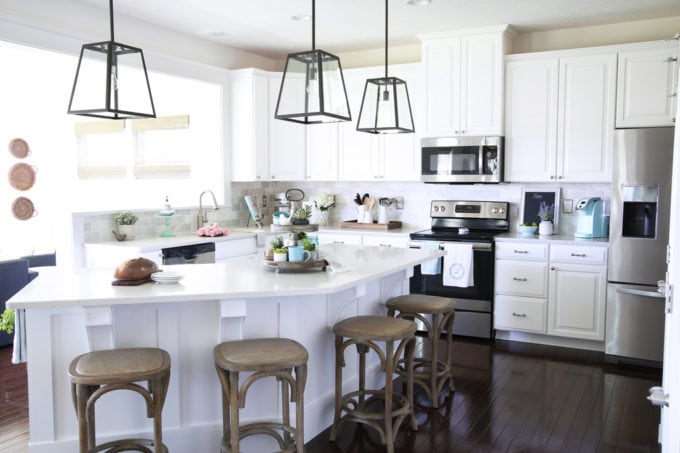

You can see the difference in the before and after pictures…
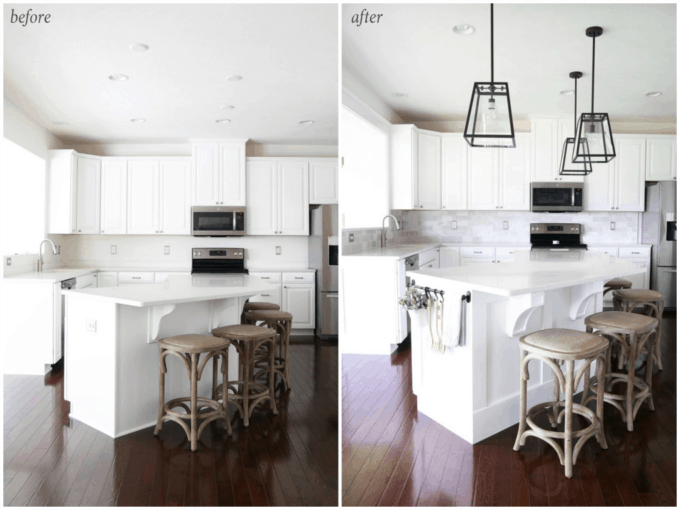
Much better, right?! It is so fun to see the house coming together bit by bit! I will be back next week to share more of our kitchen DIYs!
If you’re looking for more tiling tips and tricks, these posts may be helpful:
How to Install a Marble Hexagon Tile Backsplash
Installing and Grouting Tile: 50 Tips and Tricks
Choosing Kitchen Backsplash Tile
How to Organize Painting and Tiling Supplies
Have you done any tile projects lately? I’d love to hear about them in the comments!
Hope you’re having a wonderful week!

This post contains affiliate links. For more information, see my disclosures here.
ok ok ok this is the THIRD post I’ve read this week about tiling a backsplash… hints much?! haha! And I haven’t even been looking! Just random posts that have popped up in my newsfeed! Would you say it’s definitely worth investing in the tile saw? We want to do 2 bathroom floors as well– but will probably hire it out because of leveling. Backsplashes seem SO EASY it seems silly to hire out.
Definitely worth it to get the wet saw. I’ve used huge and expensive wet saws before but the little light and portable Ryobi wet saw I use is cheap and does just as nice of a job.
This backsplash gives your kitchen that perfect little bit of “pop.” Such a great addition!
I think so, too! Thanks, Leslie! Have a wonderful weekend! <3
~Abby =)
This is the exact tile I want for my kitchen to subtly incorporate the colors together. Do you mind saying the name of the tile you selected? Thank you!
Hi, Stacey! We used 2″ Carrara White Hexagon Polished Mosaic tile. Hope this helps. Have a great week!
~Abby =)
Very pretty! Thanks for sharing. This will come in handy when we go to redo our kitchen. Anything we can do ourselves to help save money!
So glad it’ll be helpful for you, Michelle! Happy Friday! <3
~Abby =)
This looks amazing, Abby and Donnie! Great job! My husband and I are going back and forth about adding a tile backsplash to our own kitchen. Would you care to divulge how much this project cost you?
Hi, Regina! I believe it came to around $500. Best of luck with your project!
~Abby =)
Just beautiful, Abby!
Thanks so much! Have a wonderful weekend! <3
~Abby =)
I love how the back-splash and the counter-top look like they have a similar finish. It really makes it look so cohesive (like a waterfall of stone 😉 )!!! Have a great weekend!
Thanks so much, Brittany! I am loving how it turned out,too! 🙂 Hope you have the best week!
~Abby =)
Your kitchen looks so good! I love that you went with marble! We just finished doing white subway tile in our kitchen and you’re right that the ceramic tends to crack. Good to know that marble is easy to work with! Have a great weekend!
Thanks so much, Ashley! Hope you have a wonderful week! <3
~Abby =)
I think this is wonderful that you did this! What a transformation and a little thing to show that girls can do pretty much anything! Thank you for sharing this great post, what a lovely kitchen!
Aw, thanks Charlotte! I am loving how it turned out! 🙂 Have a great week!
~Abby =)
Your backsplash is beautiful! Isn’t it great having such a talented husband?
I can’t wait to get our backsplash installed. We just installed a new sink and countertop. My hubby is never quite sure he can do the job, but he always does a beautiful job.
I don’t know what I would do without him! Handy hubbys are the best! 🙂 Thanks so much, Melanie! Hope you’re having a great week!
~Abby =)
This is so pretty! We have been in our house over 12 years and I can’t commit to a backsplash I like-you have inspired me!
Yay! Glad it was helpful, Jennifer! It really can be overwhelming… there are so many choices! Good luck with your selection! 🙂 Hope you’re having an awesome week!
~Abby =)
It looks beautiful. We are doing a similar project in our kitchen. Would you mind please telling me what the manufacture was for the unsanded grout? Also, were did you purchase it?
Thank you so much,
Christina
Thanks Christina! I bought the grout at The Tile Shop but I forget what brand I used. It wasn’t special grout or anything like that.
Was the standard white grout tec?
I looove your backsplash and have been looking for something that’s not so stark white! Do you remember the name of the marble you used? Thanks so much!
Hi, Joy! They are Meram Carrara Satin subway tiles: https://www.tileshop.com/product/meram+carrara+satin+3+x+6+in.do?sortby=ourPicksAscend&page=2&from=fn . I hope this helps! Have a great weekend!
~Abby =)
HI. I know this is a post from a while ago, but I was just wondering what your take is on marble tile backsplash as far as maintenance and keeping it clean. I have read that it requires more maintenance than other types of tile backsplashes, but I love it so much that I’m curious if it is worth going through the maintenance. Do you find it particularly hard to care for and keep clean? I am a mom of two small children and I do a lot of cooking, don’t know if that makes much of a difference. Thanks!
Hi, Gianna! We didn’t have trouble with it at all! We just spot cleaned with a rag and mild soap whenever we saw something on it, and it was really easy to keep up with. We just were sure to seal the tile after we installed it so that anything that got on it wouldn’t stain. After we moved out of this house, we chose marble tile backsplash for the kitchen in our current house too, and we love it! Best of luck with your project!
~Abby =)
Hi. I know its been a while since you posted here. But I’m going for the same look in my kitchen. Can you tell me what countertops you used?
Thanks!
Hi, Kathy! Our countertops are Caesarstone London Grey: https://www.caesarstoneus.com/collections/supernatural/london-grey-5000/ . Have fun with your kitchen project!!