How to Organize Photos | Digital Photo Organization
Learn how to organize photos you have in digital format so that you easily find the pictures you’re looking for!
I love organizing rooms. Give me a messy, cluttered office or garage or closet, and I will probably squeal with glee and get right to work sorting, purging, and organizing.
But when it comes to organizing my digital clutter, I feel much less qualified. Organizing my digital photos has been on my to-do list for years now. Years!
I never took the time to sit down and do the work to make it happen because I knew it would take a while and wouldn’t be a quick and easy fix.
And it wasn’t.
Organizing Digital Photos
But now that I have a collection of photos that is not only organized but also backed up and safe, I’m so glad that I took the time to do the work.
I wanted to share the basic process I went through to get all of my photos organized in case anyone else was having the same photo struggle I was! It takes work to get everything sorted out, but it is possible and so worth it in the end.
Backup Bootcamp
This post contains affiliate links. For more information, see my disclosures here.
Part of the way through organizing my photos, I decided to purchase the Backup Bootcamp course from Miss Freddy to help me. Her course had many genius shortcuts that made the process go a lot faster.

Because I don’t want to steal her information, I won’t be sharing her shortcuts in this post, but I will let you know the steps in which she has shortcuts available. If you are looking for ways to speed up your digital photo organizing process, I highly recommend Backup Bootcamp.
[Because she is so awesome, Miss Freddy is offering Just a Girl and Her Blog readers $10 off the price of Backup Bootcamp when you use the code SIMPLE at checkout! Woohoo!]
Step 1- Make a plan.
Before I could just dive into a project like this one, I felt like I had to wrap my mind around it! I have a ton of digital photos and they were all over the place.
I had photos…
- On my laptop (in lots of different folders)
- On my phone
- In Google Drive
- On two different external hard drives
My situation was a little bit unique in that I had two different types of photos that I wanted to organize.
I have a ton of house photos from 7+ years of blogging that I wanted to organize in a way that made them easier to find.
Then I also had a bunch of digital family photos. These are pictures of Donnie and I and our friends and family members from childhood all the way up through present day.
For the purpose of this post, I am going to focus on organizing the family photos, since those are what I think most people are working with.
What’s the goal?
When it came to organizing my family photos, I had to begin with the end in mind. What was my ultimate goal? The way I wanted to be able to use my family photos in the future would determine how I would organize them.
I decided that I wanted to be able to easily look back on the major events of each year. I also wanted to have access to a collection of candid photos that represent our day-to-day life. (Think: those photos I whip out my phone to take whenever my kids are being cute!)

With this goal in mind, I decided to organize my family photos by year and then by month/event. This way I could easily find what I needed whenever I needed it. This would also make it easy to create photo books of any time period or event that I would want to commemorate.

This is how I ended up organizing my family photo files– by year and then by month and event.
Step 2- Bring all photos to one place.
Just like I like to take everything out of a space whenever I’m organizing physical items to see what I’m working with, I wanted to bring all of my photos together to one place. This helped me get an idea of everything that needed to be organized.
Ideally, I would have loved to bring all of my photos over to my laptop and organized them there. But between my family photos and my blog photos, I had a TON. There wasn’t enough space on my computer to store everything.
Using an External Hard Drive to Organize Photos
It was important to me to be able to use and access my photos without having to re-download them onto my computer. So my next option was to use some sort of external hard drive that could hold all of my photos in one place. This way, I would have room for all of my photos in one place and can work off the drive without having to re-download photos to my computer. I decided to go with a Glyph 2 TB solid state drive (SSD) to hold my photos.

Solid state drives are faster than hard drives that have a spinning disk in them. And they are else less likely to fail because there are no moving parts. Donnie has used a Glyph drive for a while now to store his photos and documents. It has worked well for him, so I was confident that it would be a good choice for me as well.
The Glyph drive was a bit pricey, but being able to have my photos all organized in one place will save me hours of searching. So for me, the investment was well worth it.
Once I had chosen the location where I wanted to organize my photos (what the photo organizing pros call the “Digital Photo Hub”), I started the process of getting all of my photos from any devices or clouds onto my Glyph drive.
This took a LONG time. Moving photos from one location to another can take hours. This is a good project to do when you can initiate the move, then walk away from the computer and do something else for a while as it’s working. When it’s done processing, then I can come back and move the next batch of photos.
Moving Photos from My Laptop and External Hard Drives
Because my first step was just to get all of my photos onto my Glyph drive, I didn’t even try to sort or delete any photos yet. I simply created a folder on the Glyph drive indicating where each batch of photos came from.
So, for example, I created a folder called “Laptop” and dragged and dropped all of the photos from my laptop into that folder.

I also had photos on two other external hard drives. So I created a folder on my Glyph drive called “Hard Drive 1” and a folder called “Hard Drive 2.” Then I dragged the photos from the hard drives into their respective folders.

Moving Photos from My iPhone
There are several different ways that I could have moved my phone photos to my computer. I ended up moving them with Amazon Photos because I planned to use Amazon Photos + Amazon Drive as my cloud storage once my photos were organized.
I had already downloaded the Amazon Photos app on my phone and synced my phone photos to it. And I also downloaded the Amazon photos app on my laptop.

From that app on my laptop, I was easily able to download the photos that had been on my phone to my Glyph drive. I placed them in a folder called “iPhone.”
The nice thing about downloading my photos from Amazon Photos was that it automatically put the date that the photo was taken in the file name. This made the photos easier to sort out later.
Moving Photos from Google Drive
Perhaps the trickiest part of moving all of my photos onto my Glyph drive was extracting the photos that I had stored in Google Drive.
To be honest, I had a bunch of photos in Google Drive because I was lazy. When the storage on my laptop would start to get full, I would dump a bunch of photos into Google Drive because it was quick and free. I could easily re-download individual photos from Drive onto my computer if I needed them.
Downloading one photo at a time from Google Drive is easy. Downloading a huge number of them was trickier. After trying some unsuccessful strategies, I ended up using Google Takeout to download all of my Drive photos at once.

Because I had so many photos, it took Takeout several hours to prepare my files. They broke them into zip files of 50 GB each. I ended up with five separate zip files due to the large number of images I had.
The tricky thing about this method was that I then had to re-consolidate the contents folders that Takeout had split up when it did the download. This process took me a few hours. But it was still much quicker than trying to download folders from Drive individually.
Step 3- Organize photos into folders chronologically.
So once I finally had all of my photos in one spot– on my Glyph drive– I began sorting my family photos by year, and then by month and event.
Remember those shortcuts I mentioned from Miss Freddy? She has one for this process that was absolutely huge. I was able to use her shortcut to get my photos automatically divided by year and then by month, saving me hours and hours of work.
[Note: I did not have her shortcut do this to all of my photos at once. Some of my pictures were already divided into year/month/event folders that made sense, so I only used the shortcut on the folders that were kind of a mishmash of dates.]
If simply having photos divided by year and then by month is enough for you, you can use the shortcut and stop there!
I knew that it would be easiest to find the photos I was looking for if I broke them down further by event, though. For example, I may not remember that we took our kids to the zoo in July of 2017, but if I have a folder called “2017_7 Zoo” rather than just “2017_7,” it will be a lot easier to find our zoo photos. And I will be a lot more likely to actually look back at them and use them in a photo book or in another way.

So after using Miss Freddy’s shortcut to divide my photos by year and then by month, I took the extra time to manually break them down even further by event. This allowed me to quickly scan and find the exact set of photos I was looking for.
Photos that Don’t Have Correct Metadata
For every set of photos that I was able to automatically sort into year and month, there were inevitably some photos that didn’t have the correct date coded into their metadata. These photos were sent to an “other” folder.
I then ended up going through the “other” folder manually and placing the photos in the correct year/month/event.
What About Candid Photos?
While organizing my photos, I came across several folders that had been part of an “iPhone dump.” Wanting to make room on my phone, I dropped all of the photos into a folder on my computer and forgot about them.
Most of these iPhone photos didn’t belong to a specific event but were shots of ordinary, everyday life. Some of the candid photos of my boys that were in these “iPhone dump” folders were the best ones!
Since these candid photos didn’t belong to any particular event, I simply created an “Abby’s iPhone” folder for the year. I then used Miss Freddy’s shortcut to divide the photos by month so they were a little more organized.

If I found a series of photos from the iPhone folder that belonged to a specific event, I would create an event-based folder for them.
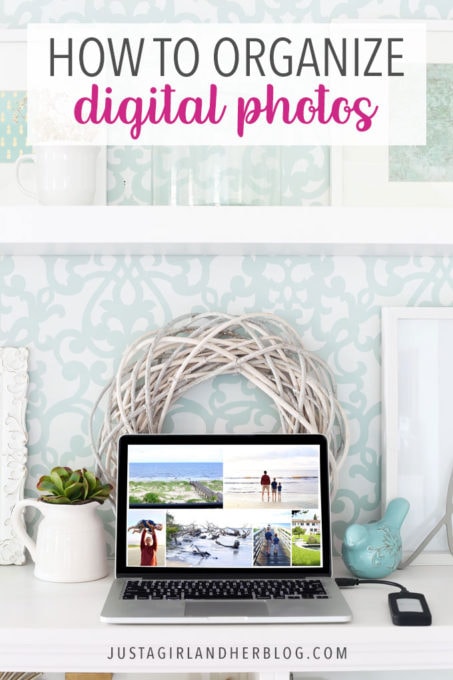
For example, all of the photos that eventually ended up in the “2018_7 Haven” folder shown above were once in my “Abby’s iPhone 2018” folder called “2018_7”. When I realized that I had a bunch of photos from Haven, I gave them their own folder. Then I could find those specific photos more easily.
Step 4- Do a clean up, removing photos that are no longer needed.
Whew! Miss Freddy’s shortcut helped me sort my photos into year/month folders. But even so, getting all of the images separated by date and event took hours and hours of work.
While I was sorting, if I came across a batch of photos that I obviously didn’t need (like 37 selfies that my kid had taken of his nostrils, lol), I would trash those photos. But for the most part, I left the photos as they were.
Once the pictures were all sorted into their correct date/event folders, I went through each folder and cleaned it up. I deleted photos that were blurry, irrelevant, or unneeded.

This process can be very tedious on a Mac. But again, Miss Freddy came to the rescue with another shortcut that helped me to delete unnecessary photos more quickly. (It still took a good amount of time even with the shortcut. But it was much, much quicker than it would have been without it.)
Step 5- Back it up.
Whew! I did so much hard work to get my photos neat and organized. I wanted to make sure it didn’t go to waste! So I have a couple layers of backup in place. Even if my Glyph drive with my Digital Photo Hub would get lost or destroyed, my photos would be safe.
Synology NAS
First, we have a Synology NAS that we purchased a few years ago because we had a lot of video files that we wanted to store for our business. A “NAS” is a network attached storage device. The easiest way to think about it is a bank of external hard drives that are accessible through your own private network.

Every month I have a reminder on the calendar to back up my Glyph drive to the NAS. I’ve created shortcuts on my MacBook desktop that link to my NAS device.

Backing up is as easy as copying and pasting entire folders. The transfer speeds are not as fast as directly connecting my Glyph external hard drive, but it’s still fast. Once the backup is complete, I delete the previous backup from the previous month to avoid unnecessary duplicate files.
Amazon Cloud Backup
Along with the NAS, I also wanted to make sure I had a cloud backup in place. As I mentioned earlier in the post, I ended up using Amazon Photos + Amazon Drive for this purpose.
[A note about Google Photos: I originally thought I would back up my photos with Google Photos. I already had the app on my phone and it was free. But after digging into Google’s service a little bit, I realized that with the free account, they reduce the size of your photos.
According to the research I did, it can also be a challenge to get photos from Google Photos onto another device like a laptop to be able to utilize them in different ways, which I didn’t want to deal with. So ultimately, I decided against using Google Photos.]
Since I am an Amazon Prime member, I have unlimited photo storage and an allotment for videos with Amazon’s system. I ended up paying a $20 yearly fee to expand my video storage. To me, it was well worth it. Amazon also has an easy process for downloading your photos onto devices from their system.
Another feature I liked with Amazon is how they organize your images for you. With Amazon Photos, I can use their facial recognition feature to sort my photos by person.

I can easily jump to a specific date and look at my photos chronologically. Or I can sort by location too, which comes in handy.

Finally, I can even search by keyword, like “water” or “sunglasses”. Amazon Photos will pull images it recognizes has those elements.

Amazon Drive backs up my photo library and maintains the same folder structure I have on my Glyph drive. So if it’s easier for me to search for a specific photo that way, I have that option too.

Step 6- Go into maintenance mode.
It will be easy to maintain my system going forward since I have my photos organized and my folder structure set up.
When I add any new photos from future events, I can just pop them into the correct year. I then name the folder with the year, month, and event.
My photos on my phone are automatically backed up to Amazon Photos + Drive. The folders that I have selected to be backed up to Amazon can be easily synced when my Amazon Photos app is open on my laptop and my Glyph drive is plugged in.

Something that this photo organizing process taught me is that I end up with many “junk” photos on my phone. (A screenshot of something I wanted to show someone one time, blurry photos that didn’t turn out, etc.)
I don’t want to wait another decade to weed out those photos that I’ll never need again. I have a reminder set to go through my camera roll once per month and delete anything I don’t need. This should only take me a few minutes per month. No more hours and hours and hours I had to spend going through a decade+ worth of photos!
Yay for Organized Photos!
I’m not going to lie– this project was a BEAR! It took way longer than I expected. And I definitely had some moments of frustration along the way.
The nice thing is, though, that once I had my process down, the work was pretty mindless. It was something I could do while watching a show or listening to an audiobook. I was able to plug away at it a little bit at a time over the course of a few weeks and get it all done. (And I listened to a lot of audiobooks and watched a lot of West Wing in the process!)
Even though it was a tricky and time consuming project, the payoff of having neatly organized photos is well worth it! It’s amazing to be able to look back at our family’s most fun experiences from the past several years and re-live them over and over again through our pictures.

Again, if you’d like to go through the photo organizing process, I highly recommend Miss Freddy’s Backup Bootcamp course for some helpful shortcuts. She also offers support that comes along with the class via her Facebook group. It really made an overwhelming task so much easier and saved me a ton of time as well.
[And don’t forget that Miss Freddy is offering Just a Girl and Her Blog readers $10 off the price of Backup Bootcamp when you use the code SIMPLE at checkout! Yippee!]
Looking for more digital organizing ideas? These posts can help:
Thank you so much for following along! Happy organizing!

This post contains affiliate links. For more information, see my disclosures here.
This is a huge win! I try to keep mine organized as I go, even though it’s a pain and I don’t always do it. I’d definitely say a good hard drive is worth the investment.
Absolutely! Feels great to have this project finished for sure! 🙂 Have a great weekend, Ashley!
~Abby =)
Some great tips here. Thanks! This is something I need to tackle myself. We are good about moving photos onto our hard drives, but they could definitely be organized better. I’ll be saving this post to reference later. 🙂
So glad it will be helpful for or you, Amy! Love to hear that. Have a great weekend! <3
~Abby =)
I really appreciate this information. I never even knew Amazon had photo storage available. We’re Prime members. There is sooooo much that Amazon has that I need to check into! I am OLD…and have photos on my PC from 2005 to present. I love all that you’ve shown us here. Don’t know for sure that I’ll jump over to the Miss Freddy class. But we’ll see. I really need to get these photos organized and off my computer if I can. I have 4 grown and married children…11 grandchildren…and the 7th great grandchild on the way. I want to get all the photos I have of their families organized and off to them. It would be such a shame to have them in such disarray if something happened to me. So, I’ll jump into this in the Fall. Thanks. I came across this blog post in my email from Bloglovin’ Daily Digest. So happy I did.
Yay! So glad it was helpful for you, Sherrie. Love to hear that. You can do it! 🙂
~Abby =)
I have been wanting to organize all my photos since the last year but have been putting it off for so long. Reading about how you did it, gave me great shorts and ideas and also motivated me to work on mine too. I am so energized now. Thank you.
Yay! So glad it was helpful for you, Ria! Love to hear that!
Happy organizing!
~Abby =)
Thank you for such a HUGE amount of much needed, genuinely precious info!!
So glad it was helpful for you! Have a great week!
~Abby =)
Hi Abby, Do you think Backblaze would be good as a digital backup? We started using their service after reading your post about going paperless (love Evernote!). Thanks so much, jessica
Yes! We use Backblaze and it has been great for us!
I am so excited! I’ve wanted to do this forever.
I’d photos were in a folder did you pull them out? If, my free agent disc has a folder2008-10-11, a second backup old pics. When I create free agt hard drives 1 do I bring the individual pics over?
Hi, Gwen! I made a new folder system when I set up my photos, so I took photos out of the old folders and put them in the new ones. If you want to keep the same folder structure that you already have set up, you wouldn’t need to move the photos from one folder to the other. Have a great week!
Hi Abby:) I am NOW motivated and better informed on how to get started on this big project of organizing photos. Your system makes a lot of sense, and thanks for breaking it down so clearly!
Just curious… did you consider iCloud as your cloud backup? Pros and cons vs Amazon?
Also, I’m guessing the Glyph drive takes the place of the photo backup sticks that are out there?
Thanks again!
Hi, Carol! I didn’t use iCloud because they specifically say themselves that it is not meant as a backup program. It’s more for accessing your stuff from multiple devices. Amazon Photos/Drive is specifically for backing up, which is why I went with them! And yes– the Glyph drive would take the place of a thumb drive-type device. I have TONS of photos from blogging, so I probably wouldn’t have been able to find a thumb drive that was big enough to hold everything. I hope this helps! Have a great day!
Thank you for this helpful post, Abby! I’m looking to back up and organize our pictures and this is super helpful when considering Google photos versus Amazon. (Now if someone could just please come watch the three children I can’t stop taking pictures of, it would make this process a lot easier! 😜)
Lol! Good thing they’re so cute, right?! So glad the post was helpful– have fun with your project!
So glad I came across this post, in my search for digital photo org! Thanks for your consolidated tips and sources.
Wondering, as it’s something I’ve always gone back and forth on – what’s your process for keeping photos on your iPhone, once you have them backed-up and organized? Do you keep them on your phone? Or remove them as soon as you back them up?
Thanks again!
Hi, Katya! I keep them on my phone. I have plenty of space on there, and I’ll often use my previous photos for things on Instagram or other social media, so it’s just easier to keep them there. Hope you’re having a great week!
Hi Abby! Thank you for this amazing post! I too am working on this huge task and feel so lucky to have found your post! I just purchased an SSD as you suggested to use as my “digital photo hub”. I have about 30,000 photos on my Macbook (I do have these backed up on an external hard drive with Time Machine). I have began the process of making albums and smart folders with the specific year, etc. on my Macbook to move to my SSD. I have a couple of questions I was hoping you wouldn’t mind answering as this is where I get nervous and stop. 1-I have not set up the SSD yet as I worry if it will take off like a backup. Do you have any suggestions on how to “start”? 2-Do I just drag and drop the albums to the SSD? I don’t want to lose any quality or metadata. Thank you for your time!!
Hi, Dawn! Our SSD came already formatted to work with my Mac, so I didn’t have to do anything to set it up that way. And yes, I was just able to drag and drop my items into the folders I created in the SSD. Once I was sure that everything had moved over, I could delete the files from my computer. Moving them to the SSD did not hinder the quality at all. I hope this helps!
Thank you so much for your time Abby! One more question pretty please! Are you able to see your metadata (specifically the date photo was taken) once you moved photos to your SSD? I know you can relate to how much time and effort goes into correcting dates on photos that you have already lost the metadata to once. I am curious if the metadata from photos stored on CDs (my storage way back when) will remain once moved to the SSD? I appreciate you!!
Hi, Dawn! I just checked, and all of the photos still have the date they were taken in the metadata. All of the photos that were straight out of the camera and not edited in Photoshop still have the camera settings metadata attached to them as well. I hope this helps!
Did you use software to get rid of duplicates?
Yes! That was one of the hacks I used from Miss Freddy’s course! It made things go a lot quicker. 🙂
I recently lost access to my google account and it was a mess. Learnt my lesson and now investing in a NAS drive and also making sure that I have at least 3 different backups in different places.
This article was very helpful.
Thank you