How to Organize Paint Supplies
Learn how to organize paint supplies in the basement or garage using these helpful tips and tricks.

Our basement organization project is getting closer to completion every day, and I am so thrilled about it! Because our basement is fairly large, Donnie’s workshop and all of our DIY supplies are stored in this space (You can see what we store in the garage in this post.), and I was anxious to create a better system for organizing our paint supplies and tiling supplies.
This corner had been one of those “do the best you can with what you have” situations– I had taken a shelving unit we used to use for the boys’ toys and some stacking bins and tried to create some semblance of order.
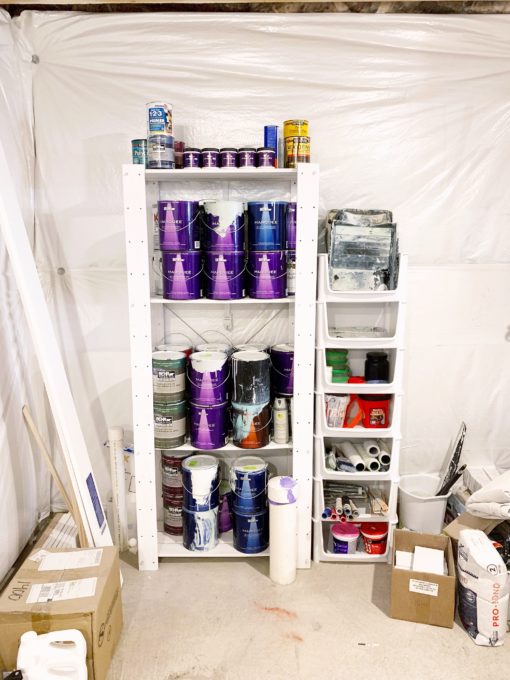
We still had a bunch of tiling supplies in random boxes on the floor, though, and I wasn’t 100% confident in the sturdiness of the storage unit we were using due to the weight of the paint cans, so when we decided to tackle the basement, I knew we could come up with a better solution for this spot.
How to Organize Paint Supplies and Tiling Supplies
This post contains affiliate links. For more information, see my disclosures here.
Supplies Used for This Project
- Gladiator shelving units
- Stacking bins (similar)
- Clear containers for smaller items
- Small latching bins
- Medium latching bins
- Large latching bins
- Silhouette Cameo cutting machine
- Adhesive vinyl
Choosing a Sturdy Shelving Unit
Because we were dealing with heavier paint and tiling supplies in this corner, we wanted to make sure we had sturdy shelving that could easily take the weight without bowing or breaking.
We decided to go with Gladiator shelving throughout the basement because we were confident that it could hold up to just about anything we decided to throw on top of it! It was a bit of an investment initially, but we know the shelves will hold up for decades, and we won’t have to replace them.
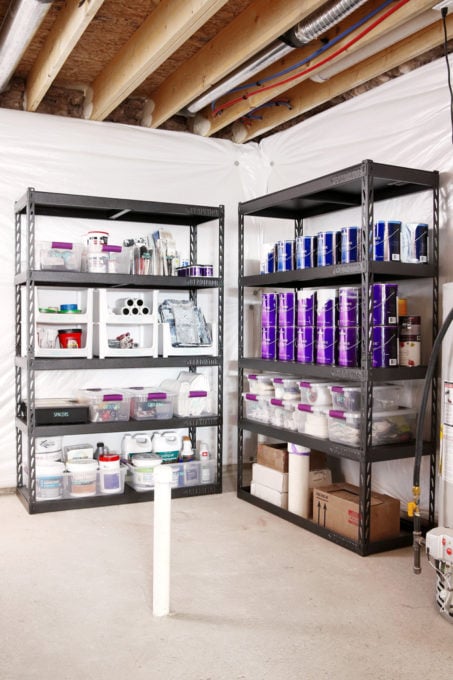
In this corner we are using two units that are 18″ deep and have solid surfaces for holding all of our supplies. In other areas of the garage where we are storing deeper bins, we went with 24″ deep shelving units with wire surfaces.
We ran into a bit of a snag when we went to put the second shelving unit into place in this corner. There are pipes sticking up out of the ground that are rough-ins for a future bathroom down here if we choose to add one, and one of the pipes was right in the middle of the space where we wanted to put the shelf.
For a hot minute, we thought we were going to have to completely rethink our plan, but then one of my Instagram friends suggested that we simply remove the bottom shelf and lift the unit over the pipe. Duh! That strategy worked perfectly, and we were able to store our extra tile right on the floor around the pipe.

Organizing the Paint Cans
After we had our shelving units in place, I went to work organizing our cans of paint first.

When I showed a sneak peek of this corner on Instagram the other day, I had several people ask, “Why in the world do you have so much paint?!” so I thought I’d address the elephant in the room before I went any further! 😉
When we moved into our house about 2.5 years ago, the builders had painted all of the walls a flat white-ish color. (Since we built with a community builder, we didn’t have a choice in this; it’s just what they do.) The color they picked was fine and workable temporarily, but I knew that eventually I wanted to paint each and every room, so that’s what we have been working on slowly but surely over the past few years.
The majority of the paint we have is in one of the five main paint colors we’ve used in our house:
- Behr Marquee Silver City
- Behr Marquee Silver City at half strength
- Behr Marquee Cameo White
- Behr Chain Reaction
- Sherwin Williams Rainwashed (color matched in the Behr Marquee paint because, if you couldn’t tell, it’s my favorite 🙂
The few cans that aren’t in those colors are accent colors we’ve used in a few places, ceiling paint, and some heavier duty primers that we’ve needed for a various projects. Once we’ve finished painting every room in the house (Maybe by the end of 2019? Fingers crossed!), I’ll feel more comfortable taking our paint collection down to just the essentials for touchups, but until then, it doesn’t feel smart to get rid of colors that we may use only to buy them again when we need them.

To organize the paint, I separated it by sheen– the blue cans are satin, and the purple cans are eggshell– and then within the sheen I put like colors together. All of the Silver City is together, all of the Cameo White is together, all of the Rainwashed is together, etc.
I also whittled down my paint samples to my most used colors that I could see myself using for future smaller projects and lined them up into two rows so I can grab them easily.
Organizing Rollers, Brushes, and Other Paint Supplies
I actually really like the stacking bins that I had been using to organize our painting supplies, so I decided to continue to use them on the new shelving unit as well.

Believe it or not, I bought these stacking pantry bins at Walmart about 12 years ago, right after we got married, and they are still going strong! I’ve used them to organize everything from shoes to workout equipment to toys to actual pantry items and more. These exact bins are no longer sold, but these ones are similar.
In most cases, I was able to stack two bins to maximize the use of my vertical space. For smaller items like paint brushes, foam brushes, scrapers, and stirrers, I picked up a few of these clear containers to corral them so that they could be easily accessible.

I labeled each bin and container with adhesive vinyl that I cut with my Silhouette Cameo machine. (You can see that process in this post.) I love the look of the vinyl, and when I wash the bins, the labels will stay in place, which is a definite plus in a dusty basement!
Organizing Tiling Supplies
I also needed to create some space for tiling supplies and some other DIY-type items on these shelves. We used many of these items when we tiled our kitchen backsplash, and we will most likely be doing some tiling in our laundry room later this year. (And maybe some bathroom tiling down the road, but you didn’t hear that from me… 😉 )

Since there were a bunch of little groupings of supplies and I wanted to make sure we could find them easily, I decided to use small latching bins to corral each grouping. I already owned several of these bins, so I only needed to pick up a few extras to make sure everything had a spot. (I used this small size, this medium size, and this larger size on our shelves.)

Again, I used my Silhouette machine + adhesive vinyl to make labels.
Shop the Post

So that’s our system! We’re using it in the basement, but it could easily be replicated in a garage area as well if that is where you prefer to store your paint supplies.
We just have a few more areas to finish up, and then our organized basement will be complete! I can’t wait to share the finished product!
What is your favorite way to organize paint supplies? I’d love to hear your ideas in the comments!
If you’d like to follow along with the rest of our basement organization posts, you can find them here:
The 2 Big Organizing Projects I Want to Tackle in 2019
The KonMari Method: Organizing Sentimental Items
How to Start an Overwhelming Organizing Project
Top 10 Best Tool Storage Systems for Organizing Your Workshop
[Psssttt… Don’t miss our top 100 tips for organizing every single room in your house!]
Have a wonderful week!

This post contains affiliate links. For more information, see my disclosures here.
Love all you organization ideas, but what do you do when you don’t have a garage and more importantly a basement in which to store paint? This is a real problem for me because I have been and continue to be doing a lot of work on my house and I have a ton of paint that I need to keep until I finish the whole place. Any ideas? Not many places to store anything including small power tools and handheld tools.
Hi, Michelle! It’s hard to know without seeing your house, but some ideas might be the laundry room, coat closet or linen closet? Not sure if any of those would work for you. Hope you’re having a great weekend!
~Abby =)
Glad to see this article! Just finished the bedroom, Christmas decor is next, then the tool room where all the paint is stored! Thanks for the ideas!
So glad it was helpful for you, Linda! Have a great week!
~Abby =)
Oh, this is inspirational! We’re moving, and I just cleaned out old paint cans from our basement. I left the paint that matches the current paint in the rooms and still had to dispose of over 80 cans of paint! Yikes. We have lived here 27 years, but still. I’m going to use these pics when we get to our new house and start painting! 🙂
So glad it was helpful for you, Karen! Enjoy your move! 🙂
~Abby =)
Waw! Looking at that gladiator shelving and the neatly arranged stuff, mine just looks like a child’s play. Lol! This is nice, I just think “space” is what truly makes all the difference here.
Thanks so much, Kimberly!
~Abby =)
Thank you for this post! We have done many projects and I need to organize all the same supplies. Now I have a good idea of what I can do in my own basement.
So glad it was helpful for you, Mary! Hope you’re having a wonderful weekend!
~Abby =)