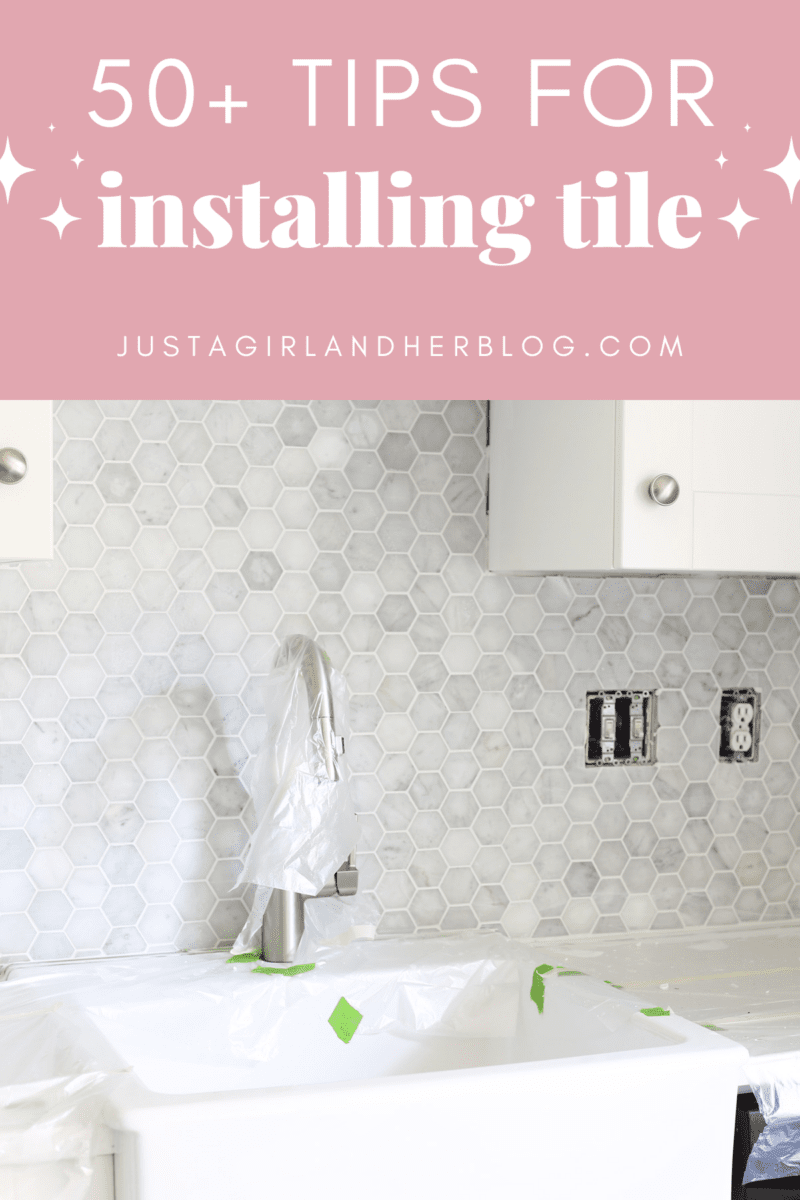
Installing and Grouting Tile: 50 Tips and Tricks
Install and grout tile like a pro with these 50+ helpful tips and tricks! Whether you’re installing and grouting tile in the kitchen, bathroom, laundry room, or some other space, these ideas can make it easier!

Tiling a kitchen backsplash can be kind of an intimidating process, but it is totally possible to DIY. So to help, we’ve been walking through our tiling project and sharing everything we’ve learned in the process!
We started with choosing tile, then walked through the installation step by step. Today we’re back with 50 quick tips to help make your next tile project easier and hassle-free!
Since Donnie does most of the grunt work around here, I’ll let him take over…
50+ Tips and Tricks for Installing and Grouting Tile
A huge thanks to build.com for providing the tile for our kitchen renovation! Our favorable opinion of beautiful, high-quality tile is 100% our own. 🙂 This post contains affiliate links. For more information, see our disclosures here.

I’ve certainly learned a lot while doing tile projects throughout the years, so I’ve tried to compile all of the little tips and tricks I’ve learned all in one place!
These tips don’t just apply to tile backsplashes but all types of tiling. I’m not a tiling expert, but I’ve done several big tiling projects, and these tips are going to make your next tile project a lot easier.
Tools & Supplies Mentioned
Before You Tile
1. Look at a lot of photos.
Both when you’re choosing your tile and deciding on things like trim pieces, alignment, and tile placement, take the time to look at several examples of similar tile projects on Pinterest or in a Google image search.
Many times doing this will help you nail the look you’re going for in your own home and save you from making costly mistakes.
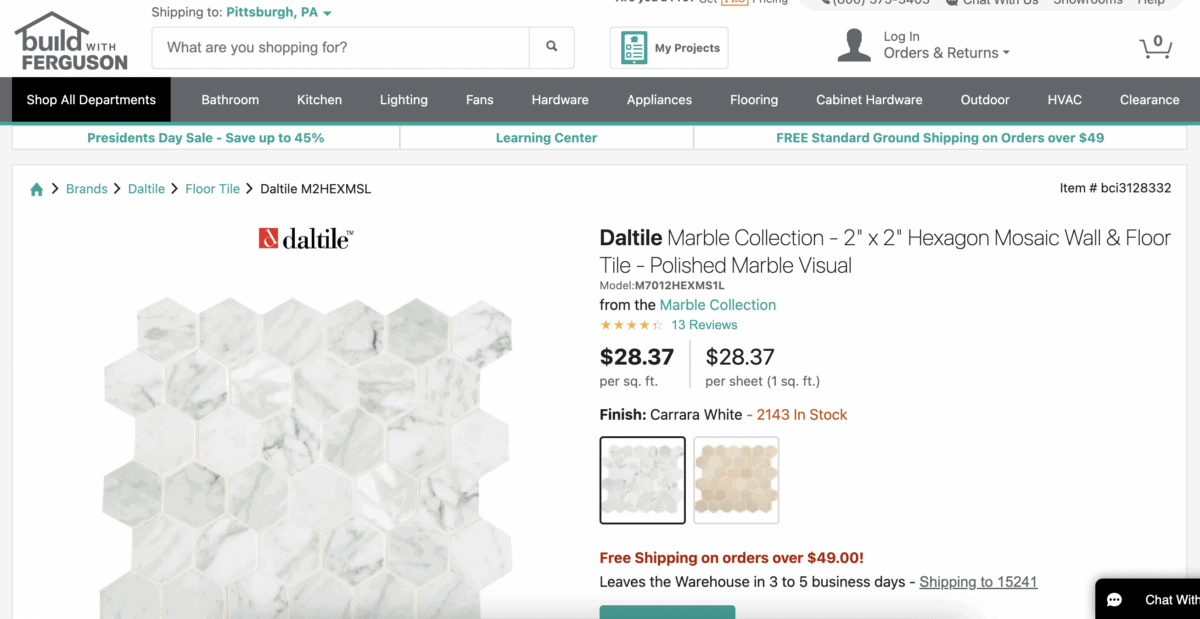
2. Don’t rule out online retailers.
The options at some online retailers like build.com will dwarf the selections at many of the brick and mortar stores. Ordering tile online is not scary at all. I would rather have the tile show up at my doorstep than have to lug boxes around a store and out to my car.
3. Plan your tile layout carefully.
It’s easy to work yourself into a corner or end against a wall only needing a tiny sliver of tile that looks out of place and unplanned.
Shower enclosures in particular require lots of layout planning to make sure everything looks right. Think through how the decision of the first tile will affect everything else.
4. Consider angles for layout pattern.
After tiling our small bathroom floor, Abby and I wished we would’ve used a 45 degree angle layout for our rectangular tiles. This makes cutting a little more difficult, but little details like the orientation of the tiles can make a big difference.
5. Don’t trust the walls.
Walls are not always true. If you start a tiling project by following the wall, you may end up with a wavy pattern by the time your reach the middle of the floor. Instead, make a perfectly straight chalk line in the middle of your floor and start there.
6. Or better yet… boards are better than lines when starting a project.
Even better than a chalk line, hammer a 2×4 to the floor to give yourself a nice straight line that won’t be covered as soon as you start spreading mastic. Plus, you can use spacers up against the board to get a perfect first row. After the first row is placed, simply pry up the board and continue!
7. Think about transitions before you start.
Tiling walls and backsplashes present a lot of transition challenges. Do you have bullnose or pencil tiles? How will the transition areas look? How can I prevent an exposed edge of a tile? Think about these things before you start to save yourself the hassle later.
8. Don’t be afraid to ask the pros.
If you’re unsure of a step during your tiling process, don’t be afraid to ask the professionals before you continue on!
When I was installing our kitchen backsplash tile, I was unsure of when and what type of sealant to use. We got our tile from build.com, so I called their customer service product experts. They were able to connect me directly with the tile manufacturer, who answered all of my questions and saved me from messing up the tile job I had just worked so hard to complete!
The Best Tools to Use When Installing Tile
9. A wet saw is superior to the “score and snap” or “nipping” methods.
Do you want your cuts to be straight and not waste too many cracked tiles? If so, you need a wet saw. Bigger isn’t necessarily always better when it comes to a wet saw. I use a small tabletop wet saw that was only $130. Love it!
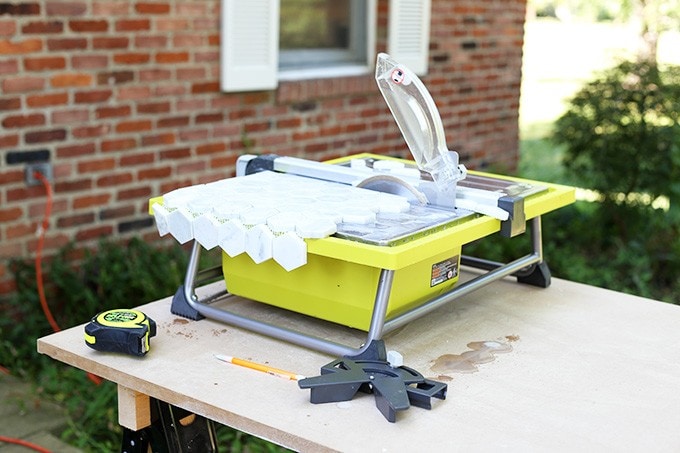
10. Use a NEW diamond coated blade.
An old blade is a bad idea when using your wet saw to cut tile. It’s a good idea to buy a new $30 diamond blade for each new major tile job. A new blade will crack fewer tiles and save you a tremendous amount of time.
11. Set up your wet saw near your work area.
When I did tile work in our primary bath, there were two flights of stairs to access the wet saw. Going up and down the stairs all day to make quick cuts will make your project drag on and on. I know sometimes this is unavoidable, but try to limit your distance from the saw.
12. Consider an angle grinder on location for cutting tile.
Electric angle grinders with a diamond blade can be purchased for under $50 and are a handy solution of you don’t own a wet saw or have a lot of difficult cuts to make.
You can cut tiles right on the spot. And an angle grinder opens up new “plunge cutting” options for tiles that require a hole or opening in the middle of the tile. You’ll crack more tiles with this method, but it works well for some materials.
13. Replace broken tiles with a Dremel tool.
If you only need to replace one tile, use a smaller Dremel tool with a “grout removal” carbide bit and a fence to work your way around the broken tile. Then delicately pry up the old tile. If you’ve done it right, it should pop right off!
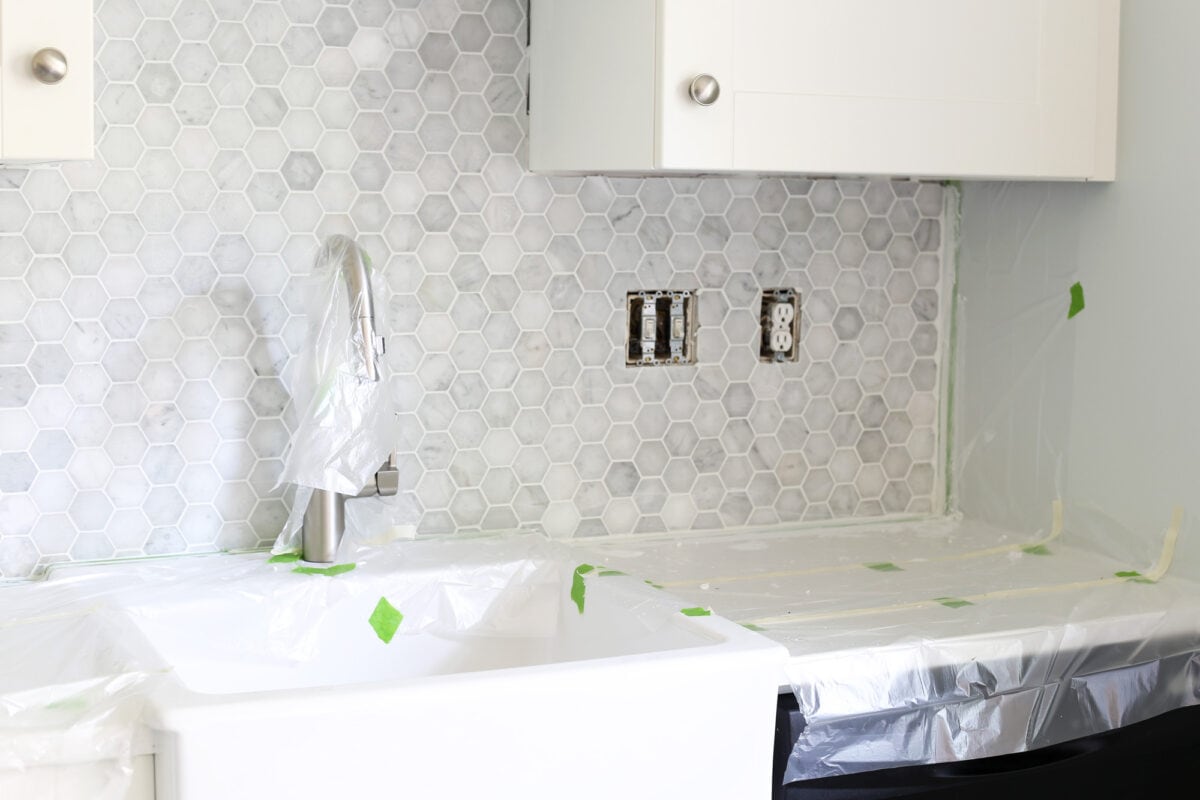
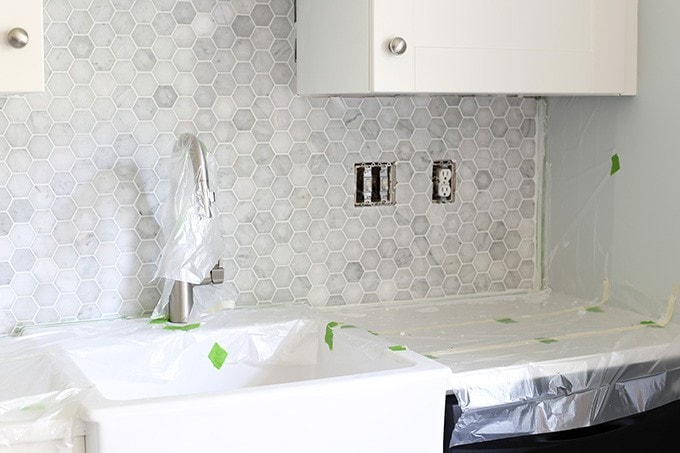
14. Cover everything with plastic.
This is especially true if you are working near a new countertop or cabinets. Grout can stain and mastic dries incredibly fast. I use a combination of Tape-N-Drape as well as painter’s tape to get everything covered and protected before I start tiling or grouting.
15. Use good lighting.
You’ll spot imperfections and mistakes better with a well lit work area. Work lights or even a nice headlamp can be a huge help.
16. Use a mini level.
If you’re tiling a backsplash, wall, or shower enclosure, keep a mini level on hand to make sure things aren’t getting out of whack as you move up the wall.
Tips for Cutting Tile
17. Use a wax crayon for marking tiles.
I used to mark the top of tiles with a pencil prior to cutting. As soon as I would turn on the wet saw the line would wash away. A wax crayon will leave a straight line that will withstand the flood of water from your saw but will not permanently mark most tiles.
18. Notch the end of the cut to avoid cracking.
Some tile materials (ceramic, in my experience) tend to chip and crack more than others.
If you’re finding that all of your cuts on your wet saw prematurely crack at the end of the cut in a diagonal line, flip over the tile and notch the end of the cut first. This way, when the tile wants to crack near the end of the cut, it will crack in a straight line toward your notch.
19. Don’t be afraid to cut tile off of the sheets.
Many times it’s easier to cut and work with individual tiles rather than entire sheets. If you are making a lot of intricate cuts, don’t hesitate to use a utility knife to remove some of the individual tiles.

20. Some mesh tile backing disintegrates when wet.
If you’re cutting tile sheets with a wet saw, the tiles can slip and pull away from the backing when wet.
As mentioned above, use a utility knife to remove the individual tiles that require cutting. This will keep your mesh backing dry and save you some grief.
Alternatively, let the sheets dry completely in the sun before you attempt to install them.
Tricks for Working with Mastic
21. Use white mastic if using white grout.
The pre-mixed mastic I purchase comes in white and gray. I buy the white if I’m using a white or light colored grout. That way if there is a tiny bit of mastic on the side of the tile, it won’t be as noticeable next to the white grout.
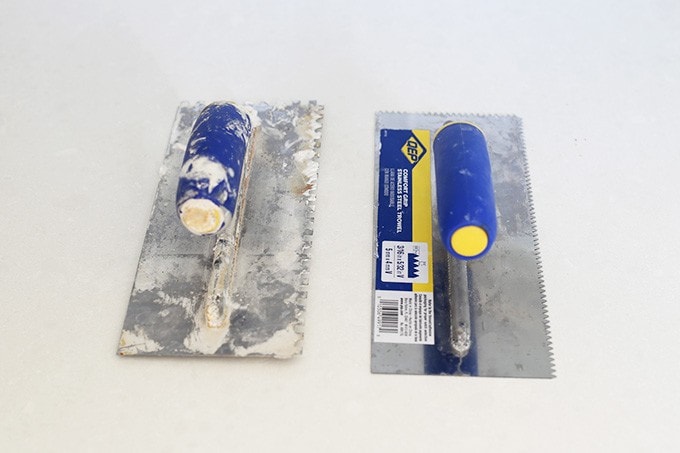
22. Match your trowel to project.
Big square notch trowels are preferred for big tiles to get the proper set. Smaller v-notch trowels work better with smaller tiles so you don’t create an absolute mess with too much mastic oozing up between the tiles.
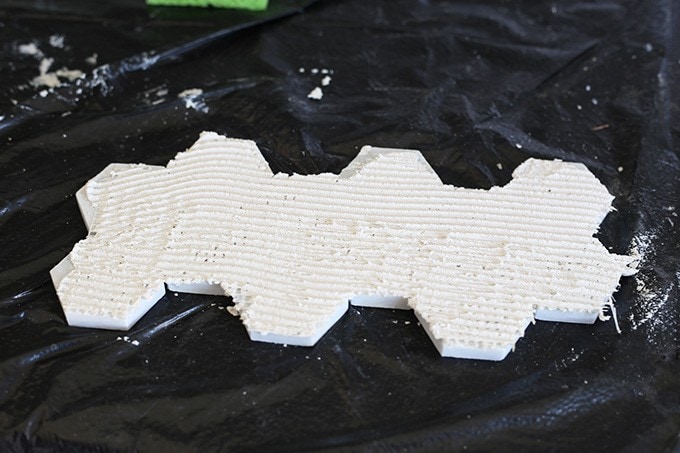
23. Apply mastic to back of tile for odd shapes.
With hexagon tiles in particular, it’s difficult to use a standard size trowel to apply mastic with the proper ridges. You just can’t get the trowel in next to the odd shapes of the tiles already on the wall. For this reason I prefer to spread mastic directly to the back of the tile and scrape off the excess with a square notch or v-notch trowel.
24. Press each individual tile on the sheet into the mastic.
It’s not good enough to just stick a sheet of tile to the floor or wall. Make sure you press each individual little tile into the mastic to ensure you have a strong base and to avoid cracking later.
25. Wiggle to set a tile.
Sometimes pressing firmly isn’t enough to get a proper hold. Wiggling the tile a bit seems to do the trick to firmly set the tile.
26. Wipe off mastic as you go.
There’s nothing worse than finishing your tiling job but having to spend a few hours with a screwdriver to scrape off dried mastic from the top edge of your tiles. Mastic dries quickly, so make sure your freshly laid tiles are clean before moving on.
27. When in doubt, use a smaller spacer.
What looks old and dirty first… the tile or the grout? The grout! Use a thin grout line to minimize the use of hard-to-clean grout.
28. Pull out spacers before everything is completely dry.
When I tiled our bathroom, I left some of the spacers at the bottom of the shower enclosure stuck in there for days. They were practically permanently affixed to the mastic!
It’s no big deal to wait a day to remove the spacers, but any longer than that and they may be difficult to remove.
29. Clean tiles before grouting.
It’s always a good idea to clean your tiles before you start the grouting process. A little bit of dried mastic on the edge of the tile may not be noticeable now, but once you start grouting it will be noticeable and will look bad.

Tips for Working with Grout
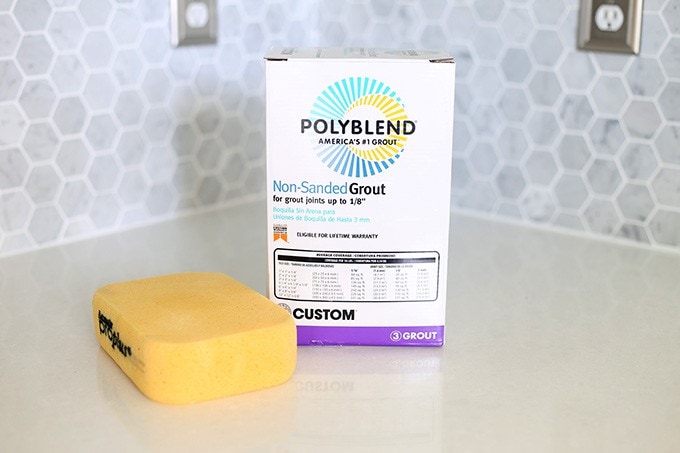
30. Buy pre-mixed mastic and unmixed grout.
Pre-mixed mastic is not as expensive as pre-mixed grout. I like to spend a little extra for the convenience of pre-mixed mastic, but I save significant money by purchasing unmixed grout.
31. Don’t scratch natural stone with sanded grout.
This isn’t universal, but some sanded grout (whether silica sand or quartz sand) can scratch some natural stones. The safer bet is with unsanded grout.
32. Choose sanded grout for large joints, and unsanded grout for small joints.
Use sanded grout for spacing of 1/8” inch or greater, unsanded for smaller spacing. Of course you also need to consider the material to ensure that sand won’t scratch the stone or ceramic tile you’re working with.
33. Use a mixing drill bit for your grout.
You need a powerful drill (usually corded), but your grout will turn out better if you use a long mixing bit to stir your grout.
34. Use gloves to keep grout off of your hands.
I swear you’ll get dehydrated if you dip your hand in grout! It seems to just suck every last drop of moisture right out of you. I like to use thin latex gloves when working with grout.
35. Don’t let your grout “effloresce” if your water is bad.
If you are using a darker grout, it’s possible that mixing minerals and other deposits into your grout (particularly in well water) will leave a difficult-to-remove white haze on the surface of your grout after drying.
Buy a few gallons water at the grocery store if you are concerned about the quality of your water.
36. Don’t mix grout too wet.
It’s easy to go overboard with water when mixing grout. Sure, it’s easy to smush wet grout into cracks, but there are some problems with this.
Wet grout does not dry as hard, and the final product won’t look as nice because of the bubbles that too-wet grout can create. Plus, if you’re grouting a wall or backsplash, grout with too much water will droop and run down.
The pros mix grout drier than you would think.
37. “Slake” the grout.
After the initial mix, let the grout sit for 5 to 10 minutes to let all of the little dry sections of the grout absorb water. Remix after slaking, and you are ready to apply.
38. Mastic dries quickly, grout slowly.
I’m making this point so you go slowly and do a good job with the grout. There’s no rush.
39. Grout small areas before moving on.
Grouting is a multi-step process. Grout a “10 minute” area before moving on. This will ensure that your timing for waiting 10 minutes to wipe off the grout will be perfect.
40. Keep multiple buckets of water handy for cleaning sponges while grouting.
Wiping grout “haze” from tiles becomes more of a challenge as time goes on. The water you are using to rinse your sponge becomes cloudy with grout. It’s better to have multiple small buckets of fresh water by your side than one huge dirty/cloudy bucket of water.
41. Use a dryish sponge to wipe off grout haze.
It’s tempting to really clean off those hazy looking tiles with a sopping wet sponge. Don’t! Even a little too much water can ruin your grout job. Wring out the sponge as much as you possibly can before rubbing down your tiles.
42. Don’t grout the intersection of two horizontal planes.
Things shift and settle over time, so if you decide to grout a corner or any place where two horizontal planes meet, the grout will eventually crack. It’s a not a huge deal, but 9 times out of 10 within a year you’ll see a hairline crack. Use matching caulking instead.
43. Remove grout from corners to prep for caulking.
You hear over and over not to grout where to adjoining planes come together lest the grout crack after a few months. Well this is all well and good, but how do you prevent grout from getting in the corners? You don’t!
Instead, don’t worry about the corners and just scrape them clean after the grout has started to dry a bit. It doesn’t have to be perfect; you just have to leave enough room for a bead of caulking.
44. Match caulking to grout color.
A white caulking bead looks terrible in the corner of tile with gray grout. Buy caulking that closely matches your grout color for a more professional look.
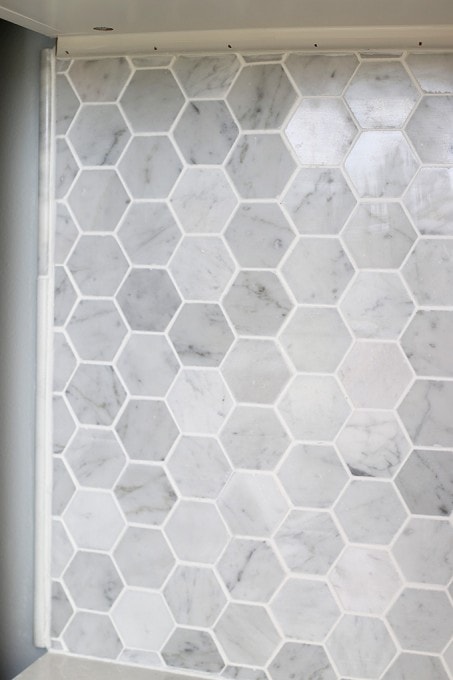
45. Marble tile absorbs water.
Don’t panic if your tile looks darker after grouting and wiping clean. Abby confessed to me after the fact that she quietly freaked out when she saw the grouted tile until she realized that the marble would dry and return to its original color.
Tricks for Sealing the Tile
46. Seal porous tile before applying dark grout.
If you’re using an absorbent natural stone tile, it’s possible that your dark gray grout can permanently stain the stone. In these cases, it makes sense to seal your tile before you grout. Then, seal the tile and grout all together when you’re done.
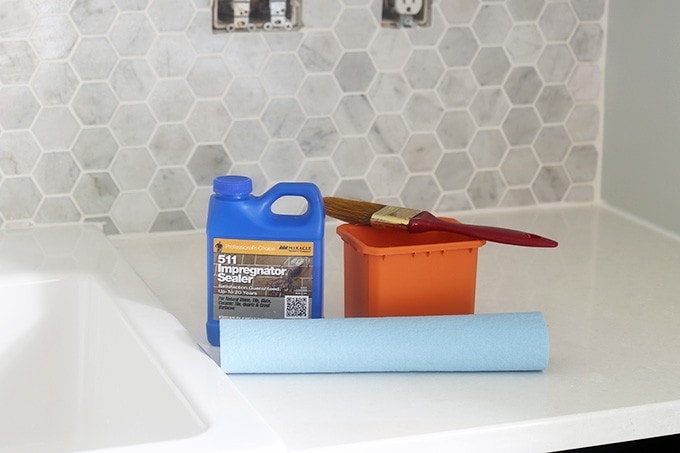
47. Test sealant with drop of water.
Not sure if your sealer is working correctly? Drop a little bit of water on both a bare and sealed tile. The water should bead up and run off of the sealed tile whereas unsealed marble and other natural stone will slowly absorb the water.
After You Finish Your Tiling Project
48. Don’t rinse out buckets in a sink or utility tub.
Mastic seems to have the magical ability to stick even when wet or damp. For this reason, I would never rinse out buckets of mastic in a sink or utility tub. I just have visions of the stuff turning to cement in my drain pipes. Instead, I use a garden hose and rinse out the buckets outside.
49. Save extra tile.
During our kitchen renovation, I removed an awkward little half wall, leaving a bare, untiled area on our floor. Fortunately, the previous homeowner left a box of the old tile, so it was easy to to replace a few squares and match everything up.
Be a good neighbor and leave a box of your tile behind when you sell because you just never know when the new owner might need it.
50. Use OxiClean to clean tile and grout.
White tile and grout looks amazing, but it can also be difficult to clean. Abby has found that using OxiClean is a lifesaver for scrubbing the ceramic tile and grout in our primary shower to restore to their original color.
Installing Tile: Final Thoughts
Whew! That was a lot, but hopefully you feel well equipped to tackle your next tile project! We could not be more thrilled with the way our kitchen tile turned out and are excited to enjoy our new space for years to come!
Installing and Grouting Tile: Frequently Asked Questions
Want to save this post to revisit later? Be sure to pin the image below so you can find it easily!
Thanks so much for following along! Have a wonderful day!

A huge thanks to build.com for providing the tile for our kitchen renovation! Our favorable opinion of beautiful, high-quality tile is 100% our own. 🙂 This post contains affiliate links. For more information, see our disclosures here.
Excellent! The best tips I have seen about tiling.
Love this tile! I wish I were a more crafty person so that I could make this kind of projects!
The irony is I will be tiling our shower in the next week or two. These tips are super helpful, THANK YOU! 🙂
You mentioned that tile looks darker after grouting and wiping clean. When my husband and I decided to put tiles in our master bathroom this past fall, I may have quietly freaked out as well when I saw that the tile looked darker and then came back to my senses when it dried and returned to its normal color. I will be sharing these tip with my husband in the case that we decide to tackle another tile project.
So glad it was helpful, Deedee! 🙂
~Abby =)
We are using same tile and started this weekend. Your tips sure made our job easier. It is not an easy job but worth the time. Putting the adhesive on back of sheet of tile was a big time saver. Great instructions. Thank you Shirley & wayne
Yay! So glad it was helpful for you! We love to hear that!
~Abby =)
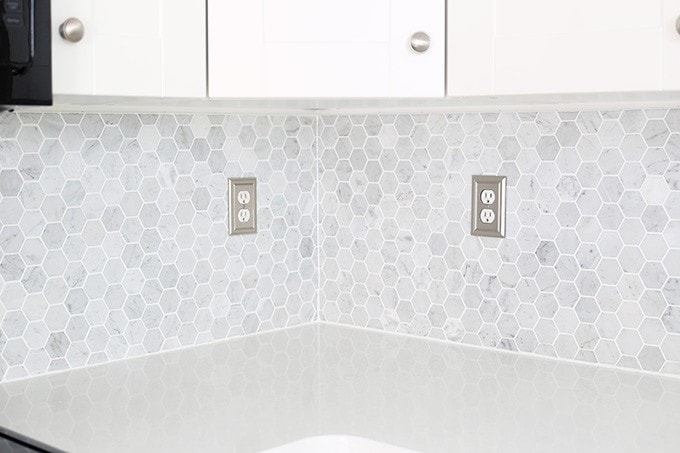
I was wondering what to do around electrical plug ins. I find it hard to cut out and also to put the covers back on. I have tiled my bathroom floors with the hexagon marble tiles. That went ok. When I did my kitchen back splash I had a real problem with the plug ins. They look terrible.
It wasn’t an issue for me. I just removed the plates and tiled around the box but left maybe a quarter inch all the way around. In some cases you may need to adjust the screws on the actual socket to bring it slightly more forward to account for the tile depth.
Beautiful work!!! Truly talented!!
Thanks so much, Kathleen!
~Abby =)
Very informative tips. Just to add up, don’t buy the tile yourself. If you have no idea which are the best ones I recommend to ask an advice from the expert. There are a lot of technicalities and ratings that your installer will understand better than you. You don’t want to end up with a tile that isn’t suited to your application so let him or her handle the purchase of the tile. Plus, when you let your installer handle the tile, you won’t be responsible for any problems with the materials. It will fall under your installer’s guarantee.
Great tips, Jeremy! Thank you!
~Abby =)
Thank you as well Abby 🙂 I always follow your blog because I find it interesting and it gives me a lot of ideas too. That is why you are part of my bookmark. I am excited to read your next post. Keep up doing a great job and more power to you 🙂
These are surely useful tips for tiles & grouting. I would like to appreciate it for the endeavors you have made in writing this content. These days, it has become essential to find reliable and honest service provider. They show something on their website (photos) and the actual condition was different. These things happened to me once, so I suggest being careful while choosing a service provider.
If your grout application doesn’t work out canyou reapply new grout over top of grout you just applied to your walls?