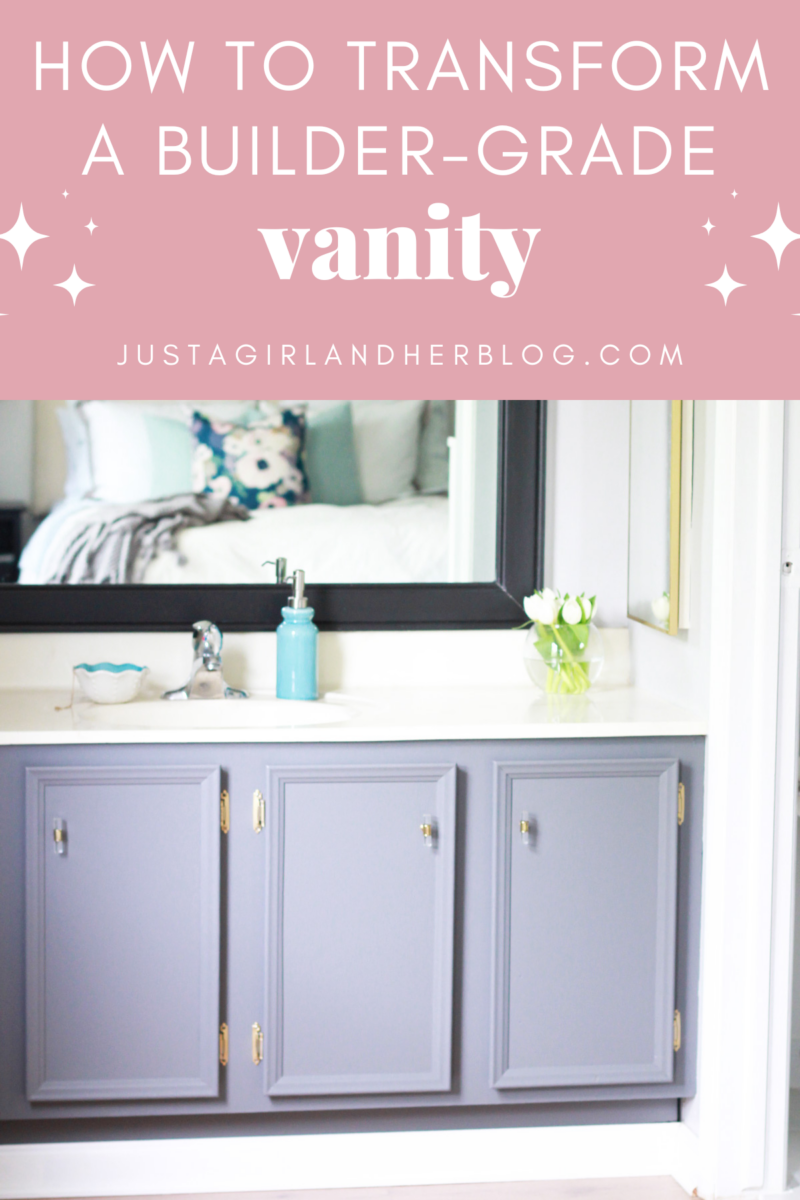
How to Transform a Builder-Grade Vanity
Learn how to transform a builder-grade vanity with paint and new hardware, giving the bathroom a chic, updated look!

When we moved into our house six years ago, it wasn’t exactly pretty. Sure, the house was in a great location and was the perfect size for our little family, but cosmetically, it needed some help.
The vanity in our primary bedroom/bathroom, for example, was kind of an eyesore with its cheap faux-wood finish.
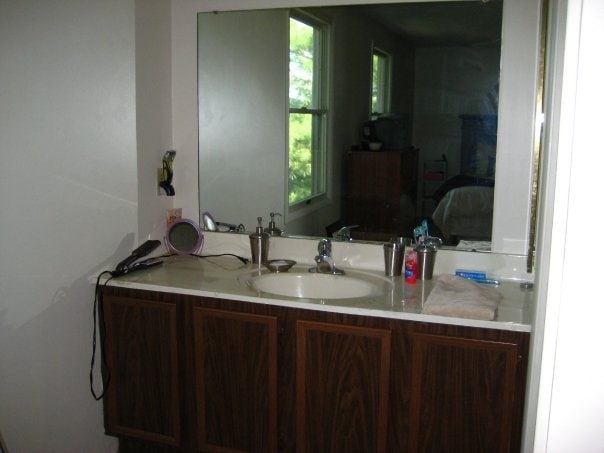
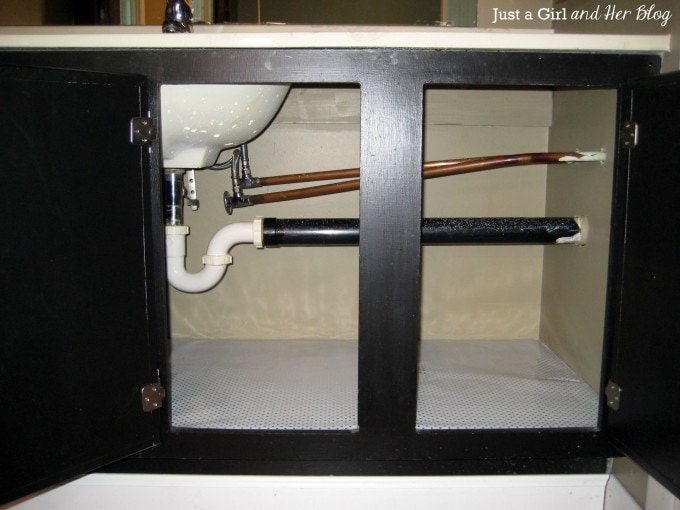
I would have loved to just rip it out and replace it, but since we are in a townhouse, we have awkward plumbing that runs to the side rather than to the back, and finding a new vanity that would work for this space would be difficult, not to mention expensive.
Since replacing the vanity would have been tricky, we opted for a much more inexpensive option: paint. Shortly after we moved in, I painted the vanity black and framed in the mirror above it. That actually made the space a little better… for a little while. A few years later though, it was looking pretty beat up and in need of some TLC yet again.

Transforming a Builder-Grade Bathroom Vanity with Paint
This post contains affiliate links. For more information, see my disclosures here.
I’ve learned more about my decorating style since first painting this vanity, so I knew I wanted to go lighter and brighter than the current black.
A few months ago I did a little gray and gold console table makeover for my sister, and ever since then I’ve been looking for a way to incorporate some sort of gray and gold piece into our home because I loved the color combo so much.
Instead of just repainting the vanity black then, I decided to go with Behr’s Iron Mountain so I could get the gray and gold look I wanted.
Before I could get painting though, I needed to gather my supplies…
Prepping the Bathroom Vanity for Paint
With my paint color chosen, it was time to get to work on prepping the surface for paint.
The first time I painted the vanity and was working with a slippery faux wood surface, I cleaned the whole thing with gentle soap and water, then primed it with Zinsser B-I-N, which is a heavy duty primer. I was then able to add a few coats of paint, and it stuck nicely to the surface.
Since I was starting with a surface that was already painted this time, I didn’t need to prime again. I just removed the hardware and used a light sandpaper to scuff up the surface a little bit. I cleaned the base of vanity well with mild soap and water.
The base of the vanity was ready to go, but I removed the doors so I could update the hinges and work on…
Filling Hardware Holes
I had been using pulls that required two holes for installation, but my new hardware only needed one hole. So before I could start painting, I had to fill one of the holes on each cabinet.
To fill the holes we used wood filler (even though our cabinet was a cheap laminate).
Once the holes were filled, we sanded them down until they were perfectly smooth. Then I was sure to clean the doors really well before I started painting.
Painting the Bathroom Vanity
I used a brush to paint the beveled edges and sides of the vanity doors. But for all of the flat surfaces, I used a small foam roller to get a nice, smooth finish.
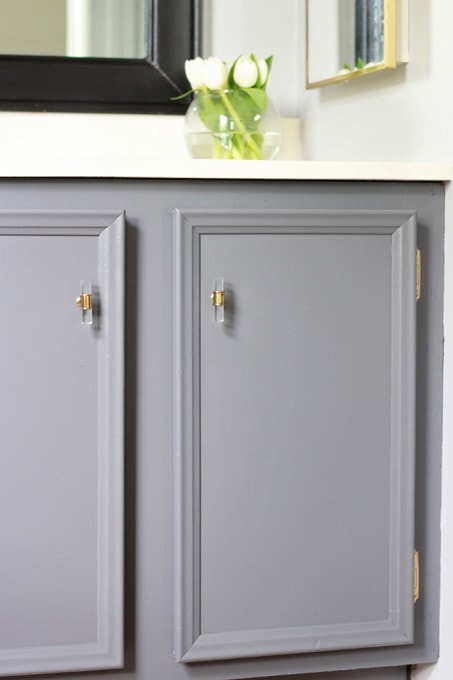
I did two coats of paint just to make sure I was covering up the black completely, and I was absolutely thrilled with how the color turned out!
To give the vanity a protective finish, we waited until it was completely dry, gave it a light sanding, wiped it down, and then applied polycrylic to the surface. This will keep the paint from chipping and wearing off.
Bathroom Vanity Hinges and Hardware
Because I am cheap resourceful 😉 , I used the hinges I already had and spray painted them gold. Once they were dry, I was able to use them to reattach the doors to the vanity.
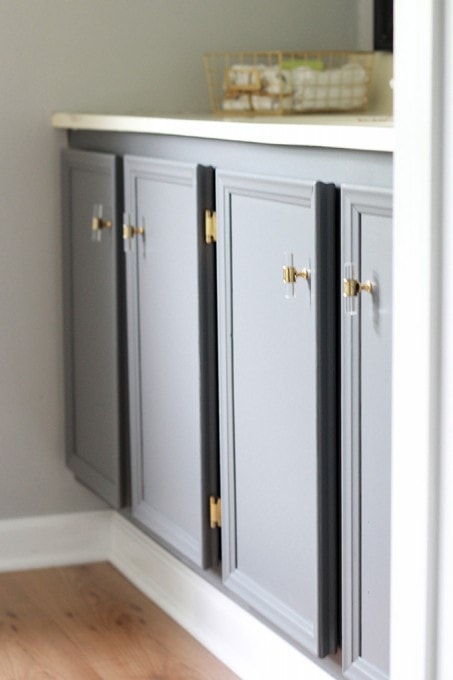
I found the perfect pulls at Hobby Lobby and snagged them for $2.50 a piece since it was 50% off day– yippee! I don’t think they carry these exact pulls anymore, but they always have a selection of unique and beautiful knobs and pulls there.
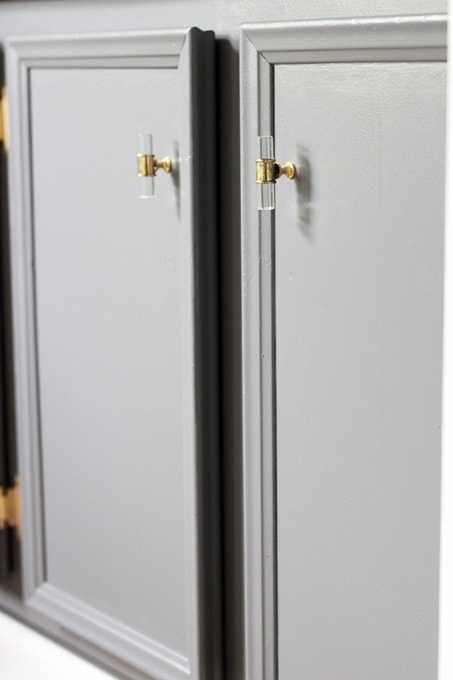
Once the hardware was installed, our vanity makeover was complete!
Builder-Grade Bathroom Vanity Transformation: Final Thoughts
I’m always amazed at how something as simple as paint can transform a piece like this! After getting rid of the black on the vanity, I’m itching to repaint the mirror frame as well, so that will probably end up looking different soon too.
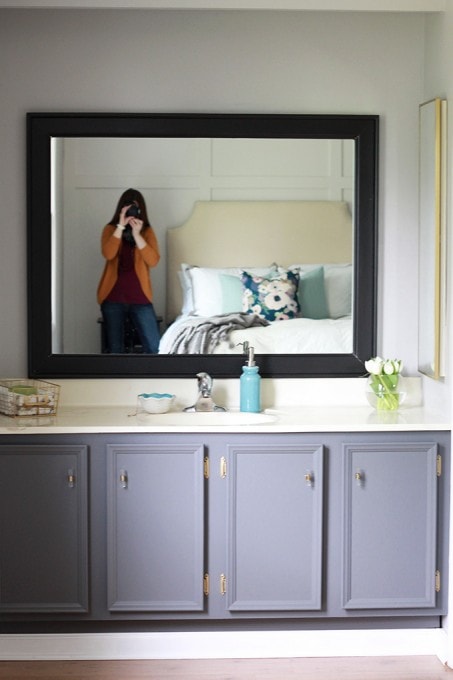
(Oh hey there, Abby taking pictures! That’s the tough thing about mirror pictures– it’s hard to get out of the shot!)
Let’s take a look at the before and after! (Always my favorite part!)
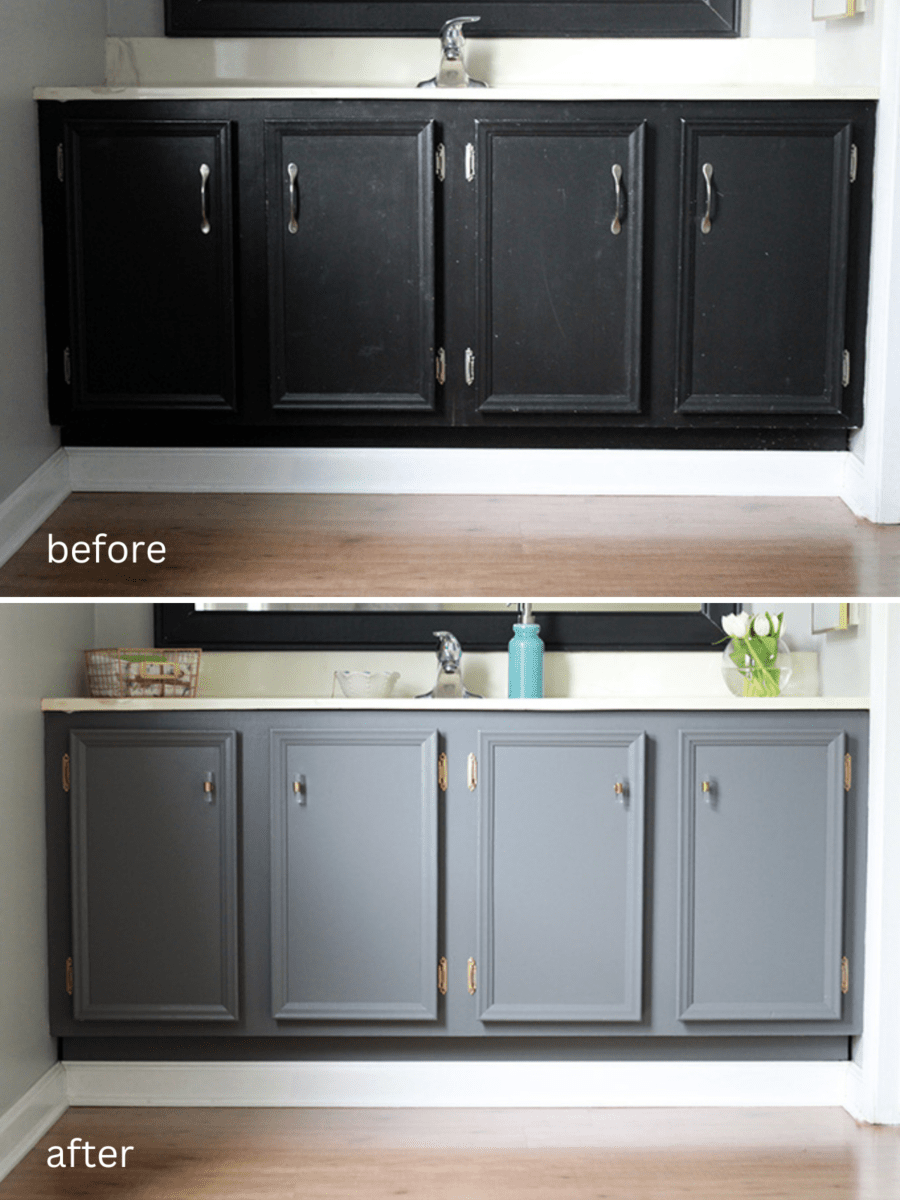
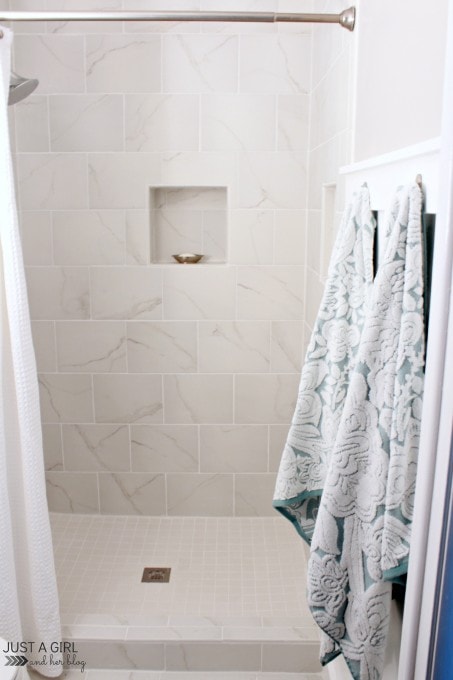
I’d say it’s a little better! 🙂 I think the vanity area now fits in nicely with the rest of our primary bathroom, which we totally demolished down to the studs and built back up last year…
Bathroom upgrades can be tough, but they don’t always have to be expensive– paint and new hardware can do wonders to transform a builder-grade vanity!
Builder-Grade Vanity Transformation: Frequently Asked Questions
Want to save this post to revisit later? Be sure to pin the image below so you can find it easily!
Have you done any fun bathroom upgrades lately?
Thanks so much for following along! Have a wonderful day!

This post contains affiliate links. For more information, see my disclosures here.
LOVE LOVE LOVE THIS! I’m also a huge fan of the grey/gold colour scheme! And the knobs… so pretty! Makes the whole space feel brighter! Well done!
Abby,
Lovely bathroom update! I am really digging grey right now. We just got a new shower curtain and rug in a grey and white pattern that looks amazing. I want a grey dresser in our bedroom too. Really digging your grey with the gold hardware. I like it so much better than the black cabinets. The contrast with the mirror is ok, but it might look good getting an update too. If you do paint it grey, perhaps you can add a touch of gold into it as well?
Happy Monday!
~ Bethany @ MakingMyStead.com
(formerly Bethany the ngnrdgrl)
ooh, I love how this quick and inexpenisve makeover completely transformed the look of your bathroom. I’m loving the gold and gray combo and those knobs are amazing. P.S. I fell in love with your blog because of all your amazing DIY projects. As much as I love your organizing posts, it’s nice to see a great post about DIY and home decor. I loved your recent tufted bench makeover too! Have a great week 🙂
I have been wanting to paint our master vanity for awhile and it is a cheap faux wood finish, too… I am excited to hear that painting faux wood works out fairly well and I have been wanting to do a gray color on them. I would totally paint that mirror gold, but the black contrast does work nicely. I am going to pin this for whenever I do get to painting my master vanity. lol
I love the transformation, Abbey!! Both the colors and new gold hardware are so gorgeous!
It looks great! Those pulls are amazing!
LOVE IT!!!! You did an amazing job!!!
What type of paint did you use? I painted my vanity many years ago over oak and then recently I used SW Pro Classic over the black after sanding it, but it leaves white marks where hands come in contact with, is peeling, and is sticky to the touch in areas.
I’ve had a thing for gray cabinets lately, and now I need to add gold hardware to my list of obsessions! Amazing transformation!
Abby! That looks AMAZING! Ah I wish you could come to Kansas and help me with three that I have on deck to paint. I’m so darn intimidated! I love the gray with gold hinges and pulls. Looks beautiful!
It looks wonderful! It is amazing what a little paint can do! Sometimes those little changes have such a big impact on a space. I too like the contrast of the dark mirror and I really like the pop of blue you have pulled in using the accessories. If you want to pull in more of that drama, you might want to think about doing something in the space above the mirror in that same pop of blue. Somethine sort of architectural. It totally doesn’t NEED it though…it looks great as is.
So pretty Abby! I am loving the gray and gold combo too. I have those same knobs but I’m still trying to find the perfect place for them. They look gorgeous in your bathroom!
What particular type of gray did you use? There always seem to be such a variety of colors, that I often get overwhelmed and just give up altogether 🙂 It is also helpful to hear that painting over faux wood can turn out so well. Thanks for the inspiration!
This looks great! Did you have to sand the cabinets down or do anything to them before you painted? Our bathroom really needs this kind of makeover.
I love seeing these kinds of home improvement projects. 🙂 I live in an apartment right now with my husband, and we are pretty limited in terms of what we can do to the place. Certain things are just begging to be upgraded, but I will have to save that for when we purchase our own home.
Hi, Abby ~ What a great project! And I love that you went with gray. I’m a paint-everything-black-girl, but I’m working on expanding my horizons. :0) I’ve been following all of the work you’ve been doing on your master bedroom, and I’m super excited to see the big reveal!
Ummmm that gray toes AMAZINGLY with the tile!! #homerun (!!)
We painted an oak builders grade vanity a few years ago. Our old hour is now a rental so I’m curious how it’s held up. I experimented with glaze and paint and it was super fun! https://www.createprettyblog.com/2012/02/master-bath-renovation-part-1.html?m=1
Hubs and I started talking about taking on our master vanity in our townhouse last week . It’s builders grade too and a darkish brown color. Our new house is a craftsman style with tons of cream moulding so we will probably go cream with it to lighten and brighten. Super excited!
TIES* not toes
Love the mix of gray and gold!
I love the way this turned out! It is so amazing how just a little paint, some thought, and a little time can turn an old piece of furniture into something brand new. Great job. I love reading your projects. You are one talented lady! Have a blessed day.