How to Paint Perfect Stripes
Use our simple step-by-step method to paint stripes on the wall that come out perfectly straight every time!

We are currently in the midst of decorating our boys’ shared bedroom and with a “Let’s Go Adventuring!” theme. 🙂 You can see our plans for the space here, and our favorite choices for kids’ beds in this post.
This week is all about stripes! Painted stripes, that is…
How to Paint Stripes on the Wall Step-by-Step
I knew I wanted to do something to make the walls look a little more fun for the boys, and I thought a little stripe would be the perfect detail.
I’m really loving how they turned out, so I thought I would share our process in case you have any stripe projects coming up in the near future!
This post contains affiliate links. For more information, see my disclosures here.
Materials you’ll need
our paint colors
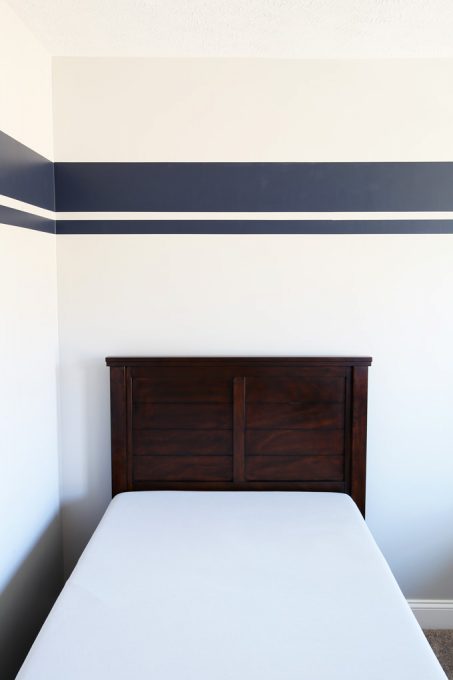
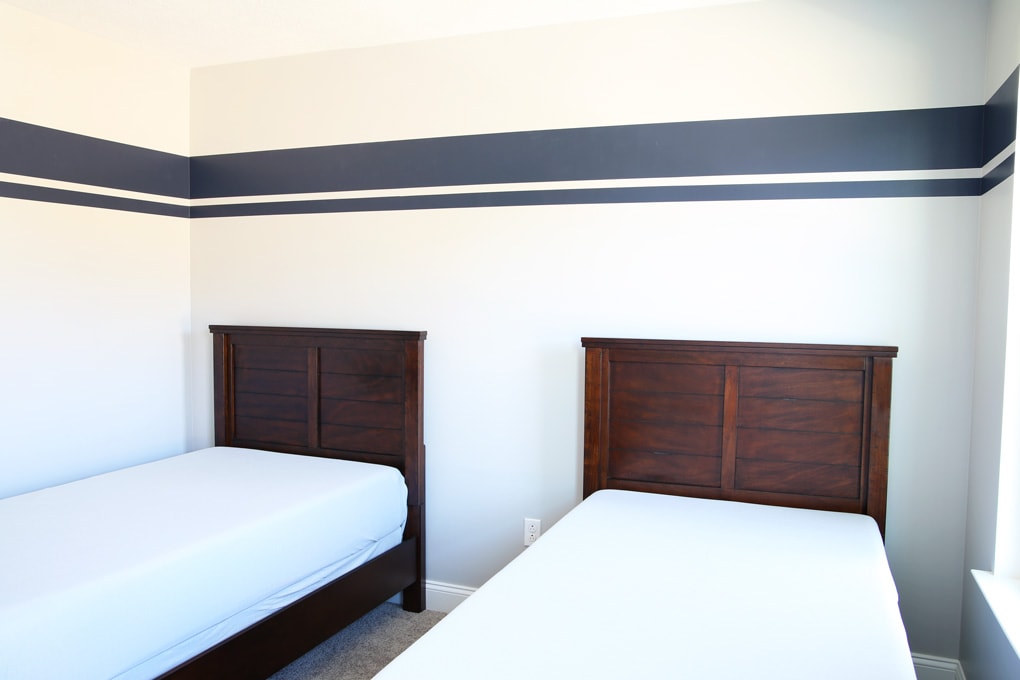
I used Behr Marquee Silver City for the wall color and Benjamin Moore Hale Navy, color matched in Behr Premium Plus Ultra paint for the stripes, both eggshell sheen.
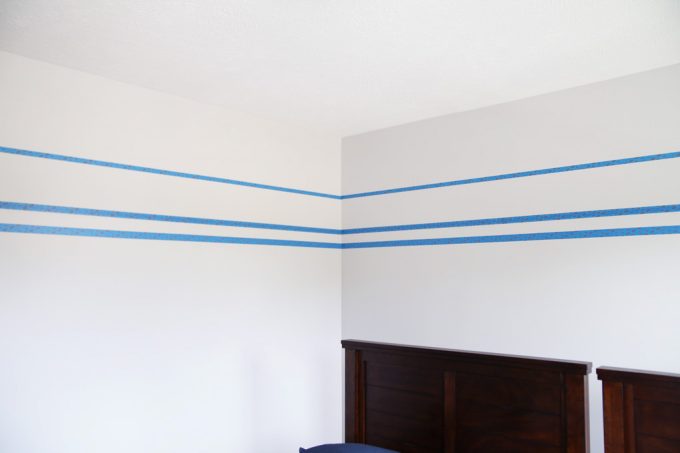
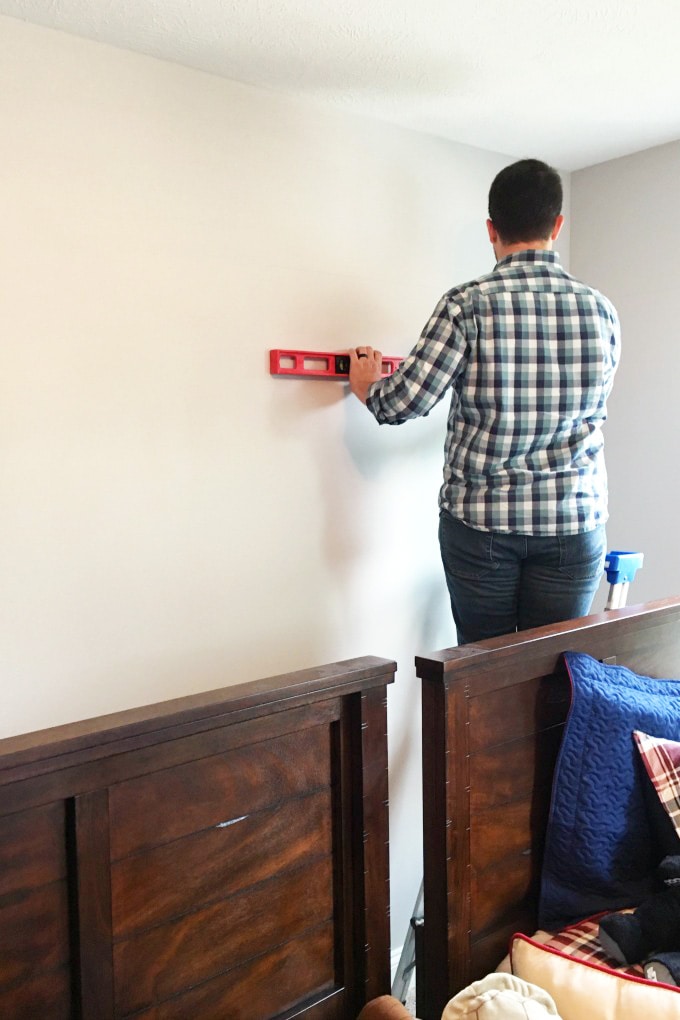
1. Measure and draw the lines for the stripes.
Donnie helped me with this part because he’s better with a level. 🙂 We decided on the height we wanted our lines to be and marked that spot on the wall. Then Donnie used a long level and a pencil to draw the line the whole way around the room. He repeated the process with the subsequent lines.
For reference, our top stripe is 8″ wide, the bottom stripe is 2 1/4″ wide, and there is a 1 1/4″ gap between the stripes.

When he was drawing the lines, he made sure that his ending point was on either side of the doorway. That way, if the lines didn’t match up exactly, it wouldn’t be as noticeable.
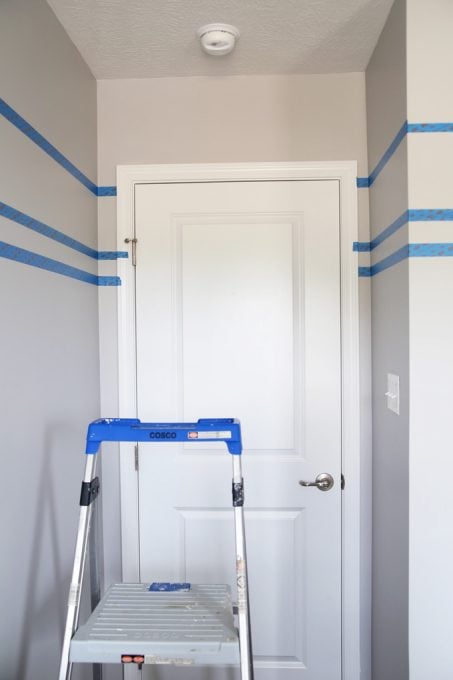
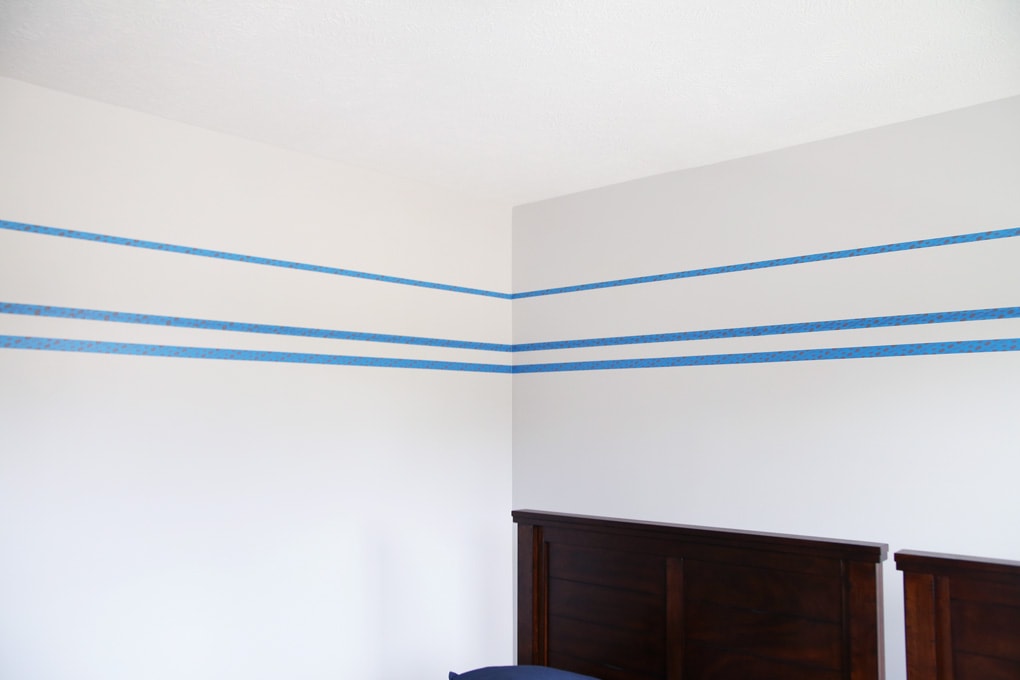
2. Tape tape off the lines.
Once Donnie had drawn all of the lines on the wall, I went around and very carefully put up painter’s tape just barely outside of his lines. This way, I made sure that I painted over the pencil marks so I wouldn’t have to try to go around and erase them later.
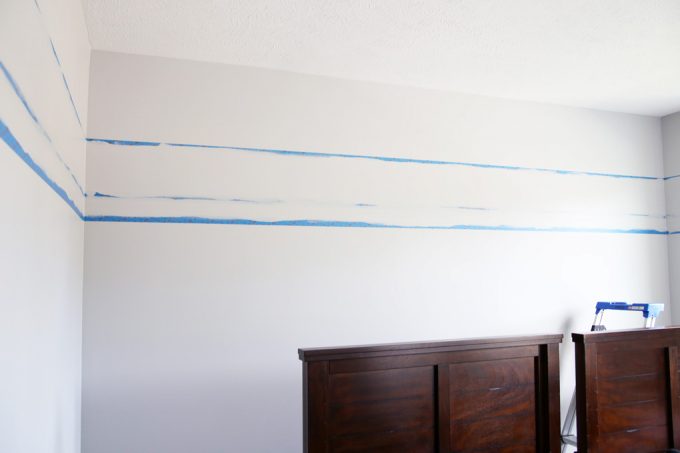
3. The Secret to Perfectly Crisp Paint Lines
This next step is the secret to getting perfect lines every time! Before I painted the stripes the color I wanted them to be, I painted over the edges of my painter’s tape with the wall color. This seals the edges of the tape and prevents the stripe color from seeping underneath it, giving me perfectly painted lines.
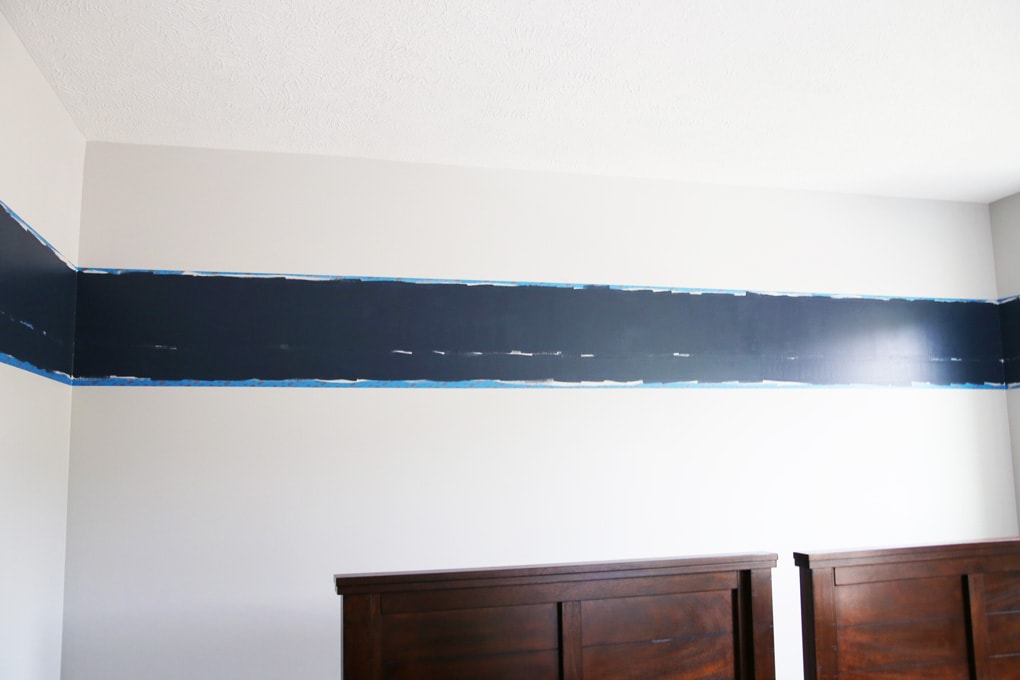
4. Paint the stripe color.
After I sealed the edges of the tape with the wall color, I painted on my stripe color. I did one coat, let it dry for about 10 minutes, then did a second coat.
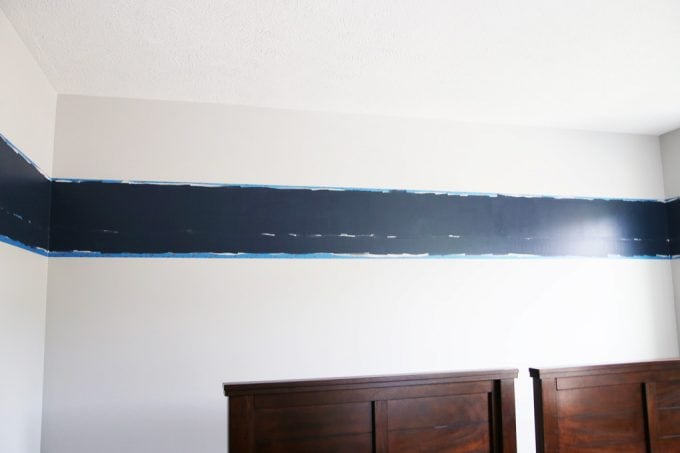
As soon as I finished the second coat of the stripe color, it was time to…
5. Peel off the tape.
I removed the tape, being very careful not to get the wet paint on anything else in the room, and I was left with my perfectly painted stripes!

It’s just a little detail, but I love the impact it makes in the room. And the Cs love it, so that is a win in my book!
Update: The boys’ room is finished! See their finished shared boy bedroom here.
Painting Crisp Stripes: Frequently Asked Questions
How to Paint Stripes on a Wall

Use our tips to learn how to paint stripes on the wall step-by-step that come out perfectly straight every time!
Materials
- Roller pan
- Pencil
- Paint- wall color + stripe color
- Painter’s tape
- Dropcloth
Tools
Instructions
- Prep the area with a dropcloth.
- Measure with your level, and mark the stripe lines with a pencil.
- Tape off the lines where the edge of the tape is barely outside of the pencil lines.
- Paint over the edges of the tape with the wall color to seal the edges so the stripe paint does not seep.

- Use the roller and/or brush to paint the stripes allowing time for it to dry before applying another coat.
- Remove the tape, being careful it doesn't get on anything else.
Notes
- I used Behr Marquee Silver City for the wall color and Benjamin Moore Hale Navy color matched in Behr Premium Plus Ultra paint, both eggshell sheen.
- For reference, our top stripe is 8″ wide, the bottom stripe is 2 1/4″ wide, and there is a 1 1/4″ gap between the stripes.
Thanks so much for following along! Have a wonderful week!

This post contains affiliate links. For more information, see my disclosures here.
Great tip about sealing the edge with the wall colour, Thanks Abby! The stripes look amazing, looking so forward to seeing the finished room!
The stripes look great Abby! I’m excited to see the final room!
The stripes look awesome, and I love their new beds!
I love this tip! I would have never thought of that but your lines look ULTRA crisp! I have always been kinda intimidated to paint stripes on walls because of that. Now I need to find a place for stripes in my home :).
Looking so good so far, I can’t wait to see when everything’s all finished.
>> Christene
Keys to Inspiration
Super classy – seriously, I love this idea. I need to re-do our boys room soon, and am keeping this in mind as part of the plan.
Thanks so much, Jenni! Have a fabulous weekend!
~Abby =)
I love watching the progress of your boy’s room, Abby! As a mom of 3 boys (now in high school), I’m confident you are creating a space that will grow with them. The walls and furniture will last them forever! It all looks classic but not boring or stuffy: My favorite style of decorating. Congrats on your beautiful new home!
Holy cow! That is such a great tip! About how long did you let the wall color dry before you painted over with the navy?
I am so glad you found such a great navy. I cannot tell you how many sample cans I have purchased trying to find “just the right” navy color and they have all been too light, too gray, and everything in between. I am writing this color down. Both my boys have navy accents in their rooms too.
You are right– navy paint colors can be hard!
We had a few days between when we did the wall color and when we painted the stripes, just because that’s when we had time available!
~Abby =)
I am definitely filing that painting tip away for future reference! Your stripes look super crisp and beautiful! It’s going to be an amazing boys’ room. Can’t wait to see the finished room with the beds all made and (hopefully) the super cute red bear pillow your oldest liked! 🙂
You’re too sweet! Thanks, Mary! Have a great weekend!
~Abby =)
Genius idea!! I will definitely remember that tip next time I’m painting stripes! Can’t wait to see how it all turns out!
Thanks so much, Jen! So glad it was helpful! Happy Friday!
~Abby =)
Looks great Abby. I remember when my son was little we did this to his room. We were trying to imitate the Toronto Maple Leafs stripes on their jersey’s. We are big hockey fans!! Always loved that room. I’m happy the strips are still in style for wall décor. Its one of my favourites.!
Thanks so much, Amy! We are hockey fans here, too! Go Pens! 🙂 Happy Friday!
~Abby =)
LOVE the look! So fun! Thanks for sharing tips – I am completely clueless when it comes to painting so I need lots of practical tips. 🙂
So glad it was helpful, Aimee! Happy Friday!
~Abby =)
The room is looking really good! Nothing beats a clean crisp strip – especially in blue. Looking forward to the reveal.
Thanks so much, Debi! I’m looking forward to it, too! Have a fabulous Monday!
~Abby =)
What a great tip! The stripes look great. How long did you wait to paint the stripes after you painted the walls? Looking forward to seeing the finished room.
Hi, Naomi! We had a few days in between, just because of when we were available to do the painting!
~Abby =)
The stripes are awesome – so simple but such a big impact. Can’t wait to see the rest of the room come together!
Thanks so much, Lizzie! Looking forward to it! Have a wonderful week!
~Abby =)
The stripes look awesome and I love the tip. I’ve used Frog tape before and thought it worked well, but this is a great option and doesn’t require a separate tape. Question: Do you ever have the paint on the edges want to pull away as you pull the tape up? When I paint normally, I’ve had that problem so I avoid painters tape at all costs. I find it’s best to remove the tape when it’s still a little wet in order to avoid it peeling off with the tape. Just wondering if you ever had that happen or how you prevent that. The room is coming along so nicely!!
I do try to remove the tape as soon as I can to avoid pulling up the paint. I will sometimes have to go through and touch up a few spots, but for the most part, this method has worked really well for me!
~Abby =)
Great tutorial! My son’s been asking for orange stripes for ages, but I’ve been intimidated by the process. You made it seem pretty simple, so I guess I should get on it. 🙂
Oh, how fun! Orange will be great. I’m sure he will love them! Happy painting!
~Abby =)
Wow this paint job looks real professional great post
Thanks so much, Brittany!
~Abby =)
mic drop!!! thats all i have to say!! 😉
I am planning a dimond pattern on my little man’s room and was researching painting techniques when I came upon your blog. Your tip of sealing the edges of the tape will no doubt save me hours of touching up! Thanks for sharing!
So glad it was helpful for you, Tatiana! Have a wonderful weekend!
~Abby =)