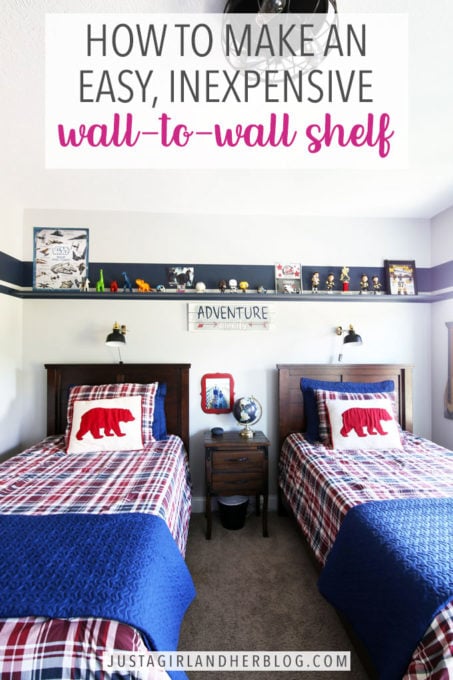
DIY Shelf Tutorial: How to Make an Easy, Inexpensive Wall-to-Wall Shelf
We recently created a simple DIY shelf for our boys’ room to add some extra storage, and they are loving it! Follow this simple step by step tutorial to create an easy, inexpensive wall-to-wall shelf in your own home!
I don’t know about your kids, but my kids are champions at collecting things. Random small statues. Weird posters. Little awards. “Important” pieces of paper with pictures that are hard to make out. You know. Kid stuff.
And not only do they like to collect things, but they also like to keep said things in their bedroom, as close to them as possible while they sleep.
Now as someone who really likes order and decluttered spaces, their little knick knack hoarding habit was driving me nuts, but it is their bedroom, and I wanted them to be able to display the things that were important to them in their space.
But when I walked in one day and saw this…
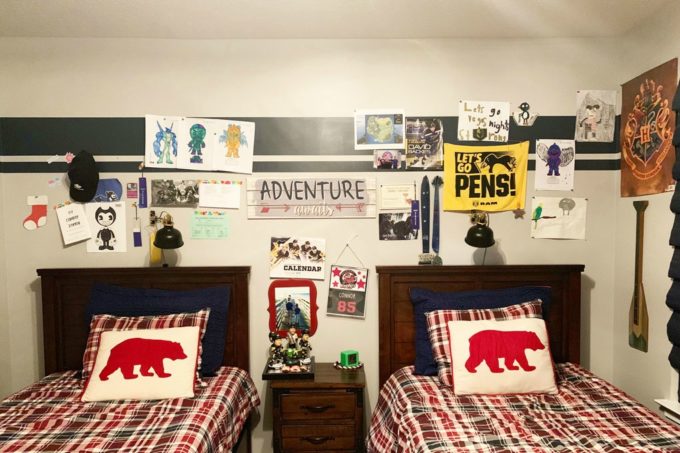
…I knew I had to do at least a mini intervention and find some sort of setup that would give them freedom to keep their things but also not make me cringe every time I walked into their room. 😉
I had the idea to make a wall-to-wall shelf above their beds so we could help to clear off their nightstand a bit and create some boundaries for the papers and posters they wanted to hang.
When I ran the idea past the boys, they were all for it, so Donnie and I got to work figuring out the best way to create a DIY wall shelf.
DIY Shelf: Step-By-Step Tutorial
This post contains affiliate links. For more information, see my disclosures here.
Step 1- Gather Materials
These are the materials we used to complete this project:
- Board for Shelf. We used a pre-primed piece of MDF that was 11′ long (the width of our room) x 7 1/4″ deep x 3/4″ thick.
- L Brackets. We used 8 brackets for our length of shelf.
- Screws + 50 lb Zinc Drywall Anchors
- Ryobi Cordless Drill
- Wood Chisel to Make Notches for L brackets
- Paint or Stain of Choice. We used Benjamin Moore Hale Navy.
Step 2- Notch the Board and Attach the L Brackets
We wanted our shelf to have a “floating” look, and the easiest way we came up with to do that was to hang it using L brackets.
So that the brackets would sit flush with our board and not extend below it, Donnie used a small wood chisel to create notches in the underside of the board where the bracket would sit.
Once we had created our notches, we could screw the L brackets into place on the bottom of the board.

We ended up using two brackets on each end of the board and four brackets spaced out along the length of the board, for a total of eight brackets.
Step 3- Paint or Stain the Board
Since we already had stripes painted on the boys’ wall, we decided to line up the shelf on the bottom stripe and wanted it to blend in. To get this look, we decided to paint our board the same color as the stripes, Benjamin Moore Hale Navy. It ended up taking us 3 coats of paint.
We painted our L brackets and screws as well so that they would blend in nicely with the shelf and be more inconspicuous.
You could, of course, paint your board any color that coordinates with your room! If you prefer a wood tone, be sure to choose a wood grain board, rather than the pre-primed option that we used.
Step 4- Hang the Shelf
Once our paint had dried, we were ready to hang the shelf! We used 50 pound zinc drywall anchors to ensure that the shelf would be sturdy and wouldn’t fall down.
Where available, we also tapped into the wall studs. But even without finding the studs, the type and number of drywall anchors we used is more than enough.
We were sure to measure the distance between them so that the L brackets on the shelf would line up with the drywall anchors exactly.

Once the drywall anchors were in place, I helped to hold the shelf steady while Donnie screwed the L brackets into the drywall anchors with his Ryobi cordless drill.

Step 5- Paint the Screws (Optional)
The screws we used to attach the shelf to the wall still had silver heads, which stuck out like a sore thumb since everything else was blue, so Donnie quickly touched them up with the Hale Navy paint, and they blended right in!

Step 6- Decorate!
Once the touch-up paint was dry, it was time for the fun part– decorating the shelf with the boys’ beloved items!

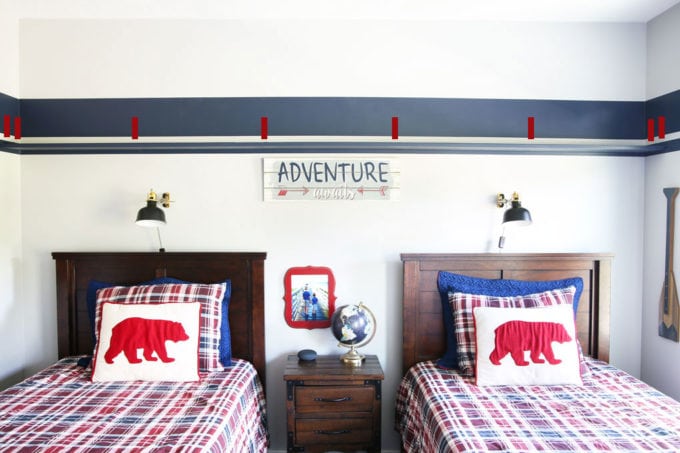
The boys love that they now have a place to store and hang all of their special items, and I love that we’ve created boundaries– everything has to be on or above the shelf– so that there’s a little more order to the space. It’s a win-win for everyone!
I haven’t decided if I will leave the “Adventure Awaits” sign or not. (Or maybe move it down a little?) I think I’ll live with it as is for a while and see how I feel in a month or two. Things are always changing around here! 🙂
Let’s take a look at the before and after:

So much tidier!
If you’re thinking about installing a wall-to-wall DIY shelf in your own home, be sure to pin the image below so that you can come back and reference this post!

And if you’re looking for more simple DIY projects to spruce up the walls of your home, these posts can help:
Install Craftsman Style Window Trim
Thank you so much for following along! Have a wonderful day!

This post contains affiliate links. For more information, see my disclosures here.
Looks great! Thinking this would be perfect for my son’s many LEGO creations! One question though… what did you end up doing with all the papers/artwork/calendar/sports medals etc?
Hi, Christy! They were done with many of the items that were previously hanging. A few of the things were put in their mementos boxes. (https://justagirlandherblog.com/the-konmari-method-organizing-sentimental-items/) We wanted to leave some extra space because we all knew that new items would want to make their way up on the wall soon! 🙂
~Abby =)
Yes! Kids collect the funniest/cutest stuff. This is such a great solution because it shows them that you also value what they find important. I love it.
My 4 year old Don also likes to collect a lot of treasures. I actually put a small trunk at the end of his bed for him to put his secret stuff and also declutter his room. It’s working great 🙂
Love that solution! They really do LOVE all their little treasures, don’t they? 🙂
~Abby =)
Great shelf <3 Did you add a bulletin board somewhere else in the room to hang up their art/papers?
We have a display area in their playroom (which is next door to their bedroom) to show off papers! You can see it in this post: https://justagirlandherblog.com/declutter-kids-toys-organized-playroom-tour/
~Abby =)
I love this! It’s so helpful to be able to see things visually a little more organized. I’m going to remember this when my 3 year old gets a little older. Glad the boys like it too!
Thanks so much, Catherine! Hope you’re having a great week! <3
~Abby =)
Love this look, y’all did a great job! We just installed 3 levels of Ikea picture shelves in our pipsqueaks’ rooms and they’ve cleared so much of the clutter; from stuffed animals to dolls to books and video game boxes, everything has to fit on the shelves, in the nightstand, or in their cube organizers, or it’s got to go. The kids love having everything in view and I love that their toys don’t end up forgotten at the bottom of a toy bin. It also works as room decor that changes as toys rotate in and out. So many problems solved in one go!
By the way, I vote to keep the “Adventure Awaits” sign- I think it looks great where it is!
That sounds beautiful, Patricia! I’m sure your kiddos are loving it! And thanks so much for weighing in on the sign! 🙂 Have a great week!