How to Install Craftsman Style Interior Window Trim
Learn how to install craftsman style interior window trim to give your windows a beautiful custom, finished look!

Lately we’ve been doing a lot of work in our main living space, which includes our kitchen, sun room, and living room. We spend a ton of time in this space, so we knew it would be one of the first areas that we would tackle in the new house.
After we finished and trimmed out our entertainment unit, there was one area in particular that was looking a little bare…
The windows! All of the windows in our house just came with a simple sill– no surrounding trim at all. We knew that adding trim could make a big impact in the space, so I sent Donnie on a mission to find the perfect pieces to add craftsman style interior window trim work to “beef up” the space a bit.
And oh boy did he succeed! Since he was the mastermind behind this whole project, I’ll let him take it from here…
Step by Step Craftsman Style Interior Window Trim Installation
A huge thanks to WindsorONE for providing product for this post! Our favorable opinion of beautiful, high quality trim pieces is 100% our own. For more information, see our disclosures here.

When we moved into our new home, I knew that I wanted to upgrade our interior window and door trim. We paid a little extra to upgrade the baseboards, but the rest of the interior trim is very basic and doesn’t match craftsman style exterior.
A few years ago my parents built a house, and my dad did all of the interior trim work himself. He chose very substantial craftsman style moldings, and they make such a big difference in the house.
The trim work is one of the first things guests notice when they walk into their house. You just don’t see that type of trim anymore. I’m sure it also adds substantial value to their home.
I took a lot of pictures of my parents’ trim work and also searched on Google and Pinterest for a few days until I found the WindsorONE Classical Craftsman line of moldings. This was the exact look I was going for!
1. Choose the Right Moldings for Your Craftsman Style Window Trim
WindsorONE is a molding manufacturer, and you can find their trim work at lumber yards all over the country. What really stood out to me on their website was their style guides (classical colonial, Greek revival, colonial revival, and classical craftsman).
WindsorONE created these various lines of interior moldings to work together as one cohesive style. To me, their craftsman style moldings have a much better look and style than anything else I’ve found.
I used their dealer locator tool and found several nearby places that stock WindsorONE moldings. I ended up getting all my trim from Allegheny Millwork & Lumber here in Pittsburgh.
The number of trim profiles a place like Allegheny Millwork has compared to a big box store is just amazing.
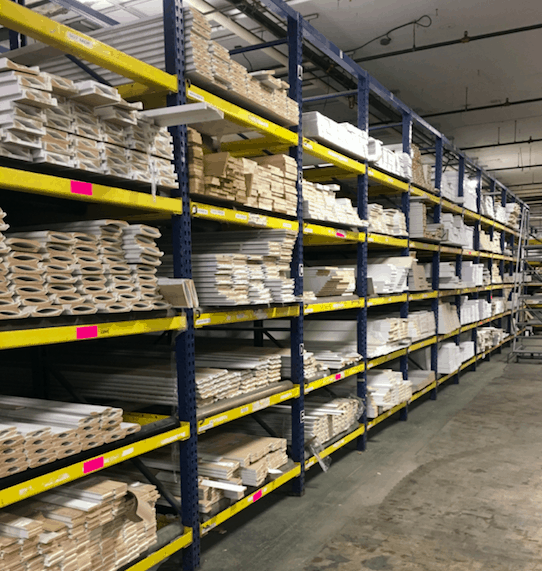
They were kind enough to cut all the trim pieces down to my preferred size and even helped load up the truck.
The trim is all finger-jointed pine, so it’s much straighter than some other pine trim but doesn’t have the floppy feel of MDF trim with soft edges. All of the details on the trim are very sharp and everything comes primed. It’s very high quality stuff.

This is the craftsman style look I was going for…

2. Gather the Correct Molding Pieces to Use for Craftsman Style Window Trim
Specifically for the window trim, I used the following WindsorONE pieces…
- 1×5 flat stock (Because of the dimensions of my window, I wasn’t able to use their window stool piece.)
- Apron
- Cove
- Casing
- Stop mold
- Header cap

I found all the correct SKUs for the pieces I needed on this page. This made it easier when contacting the lumber yard.
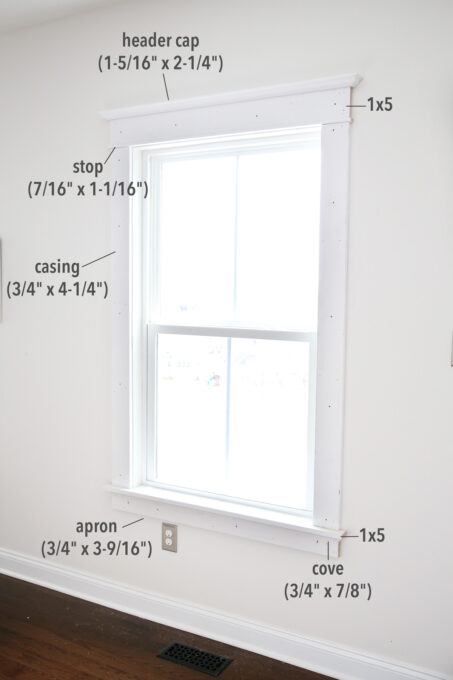
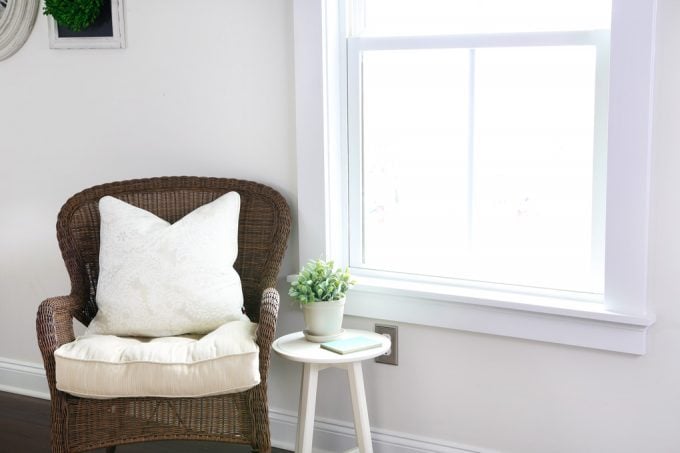
I used the 1×5 as the window stool. (I used to call it a sill.) Underneath the stool, I used their apron piece which has a slight bevel on one of the edges. Connecting the stool and apron is a little cove trim piece that just ads a bit of detail.
On the sides of the window I used the WindsorONE casing piece. These are nice because two of the edges have a slight bevel and the dimensions are a little smaller than a standard 1×5. Along the top I used the stop mold piece, a 1×5 as the main header piece, and then the header cap.
3. Prep the Window for New Interior Trim
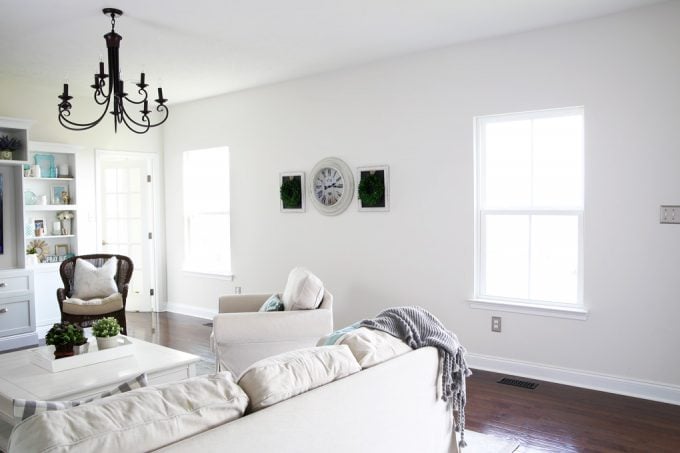
Before I started this project, our existing windows had no side casing or header, just a simple stool and apron.

I scored the caulk line with a utility knife and then used a rubber mallet and crow bar to knock out the existing trim so I clean slate to work with.

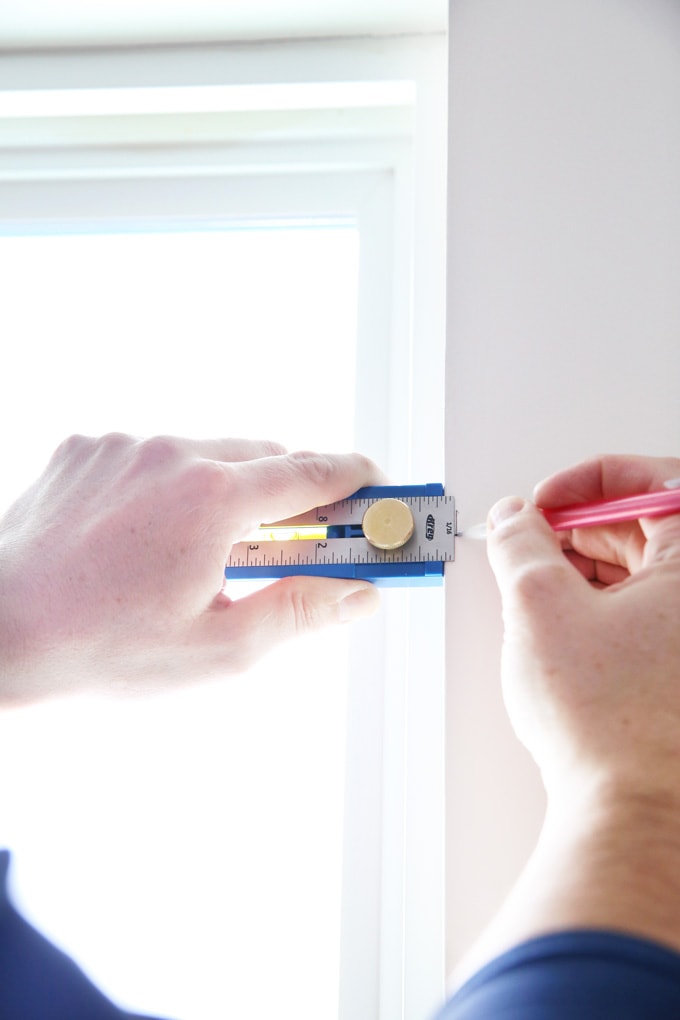
Then I made a “reveal” mark all the way around the window. Instead of butting up the new trim pieces right to the edge of the drywall, I decided to use a 3/16″ reveal. The reveal adds a bit of detail and just looks better.
To make the reveal I set my Kreg Multi Mark to 3/16″ and then made little hash marks all the way around the window opening. This little tool comes in handy for so many woodworking projects! It’s way easier and more accurate than using a tape measure or ruler.
4. Create a 60″ Opening
I wanted to preserve a 60″ opening on the inside of my windows because it seems like a lot of window treatments like shades and wood shutters use 60″ as a standard.
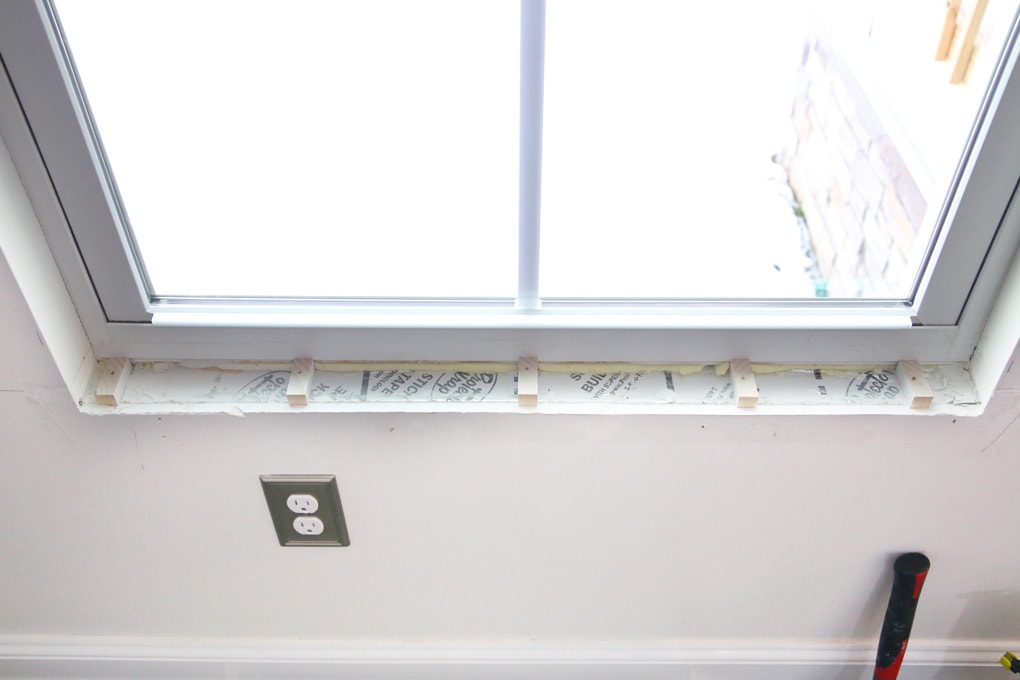
If I placed my 1×5 window stool directly on the window framing you can see in the picture, I would have ended up with a larger than 60″ vertical window opening. To overcome this problem, I created some custom measured shim pieces and screwed and glued them to the window framing.
This would raise the stool to the correct height. Because of the shim support and the eventual window apron support underneath, everything would be rock solid.
5. Install the New Window Stool
Next I cut the window stool to roughly the correct length with my miter saw. I then held it and marked it in place. It’s always easier for me to mark the actual board rather than measuring with a tape and then transferring that measurement to the trim piece.
When marking the stool, I had to take into account the width of the side casing (I marked that on the wall) as well as the 3/4″ overhang past the casing on both far ends. I also marked the cutout line so the piece would slid nicely back into the window opening with “wings” extending on both ends.
In order to have a better fit, instead of just drawing a straight line on the board, I used the protractor below to scribe a line that matched the wall contour. All I had to do was follow the wall line with the point of the protractor and that would transfer that same line contour onto the board.
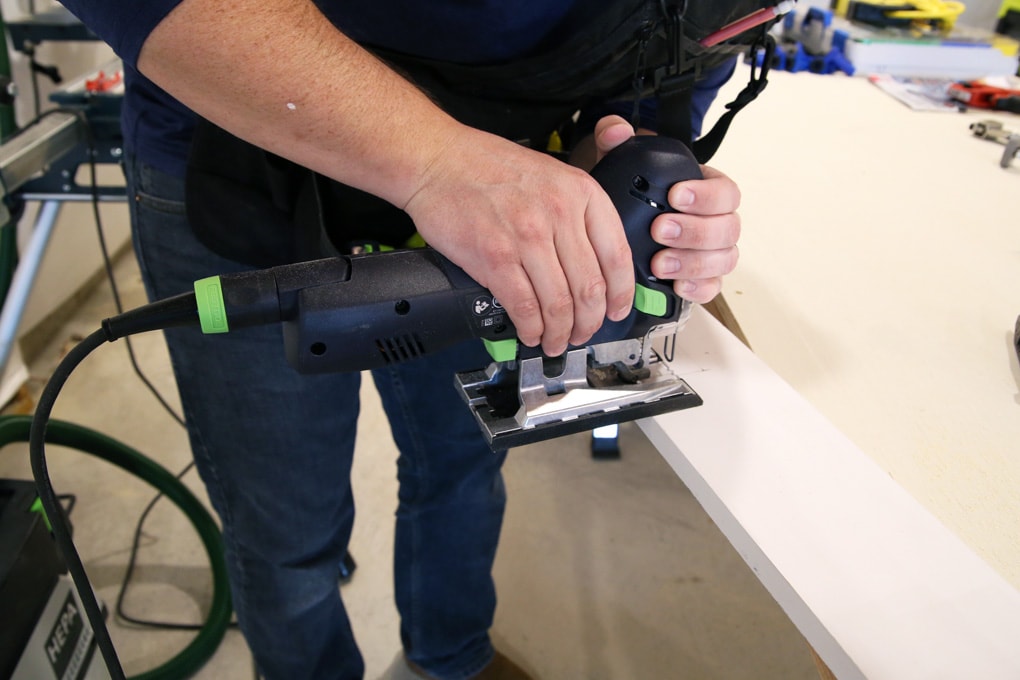
Once my window stool was marked with all of the cuts, I used a jigsaw to cut everything out. I recommend testing your jigsaw on a scrap piece of trim first to make sure you don’t get too much splintering. Some are better than others.
Once the stool was cut, I installed it with my nailer as well as some long GRK trim head screws. These screws are fantastic. I pre-drill all the holes, but I don’t countersink anything. The small trim heads countersink on their own and it’s a very small hole that I have to fill later.
Here’s how it looked after the stool installation. You can see that I still need vertical casing pieces to sit directly on the stool as well as an apron and cove piece underneath the stool.

6. Install the Window Apron and Side Casing
Installing the window apron and side casing was pretty straightforward. I held each piece in place, marked, cut, nailed, and then screwed. I would also glue any place wood met wood.
My reveal lines were already marked on the wall, so I knew exactly where each board should be placed.
Fortunately, I had taken a video of our entire house pre-drywall so I knew exactly where my studs were. If there was any doubt, I marked studs with my magnetic stud finder.
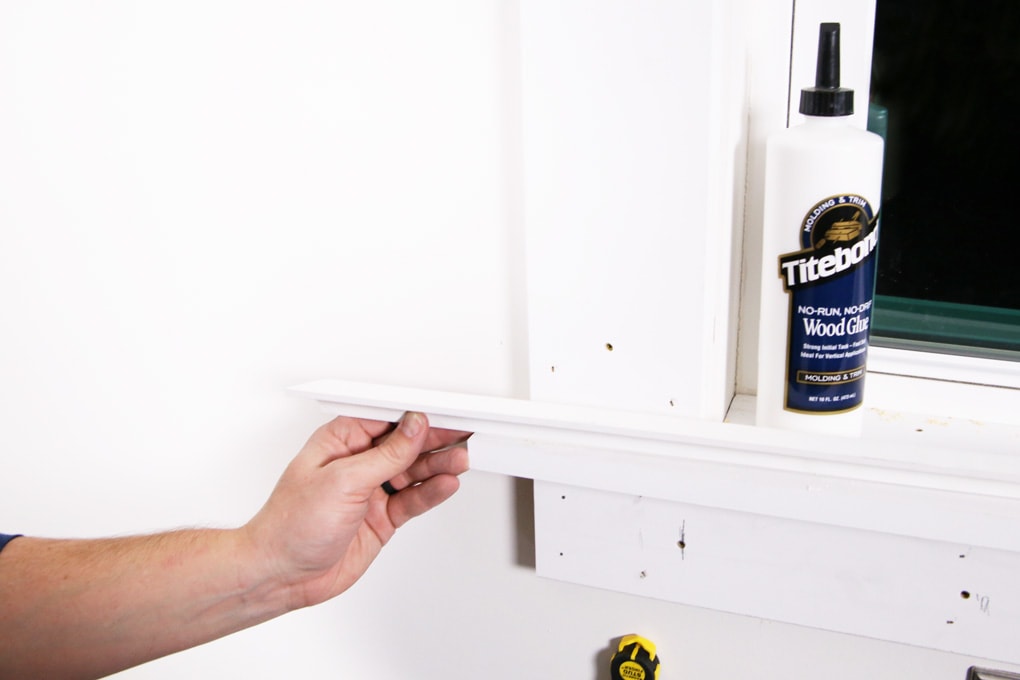
Next I installed the little cove piece that sits under the stool. Glue is really important for small trim pieces like this. This was the first project where I used TiteBond’s trim glue, and I really liked it. It’s designed to be less runny so there’s less wiping up glue from all over your trim work.
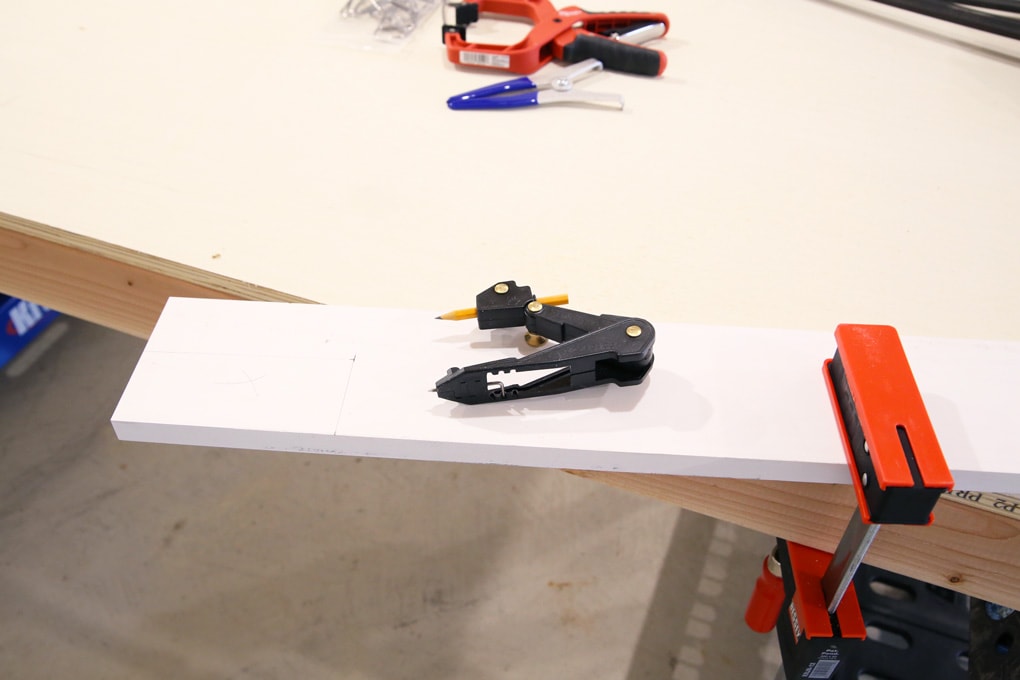
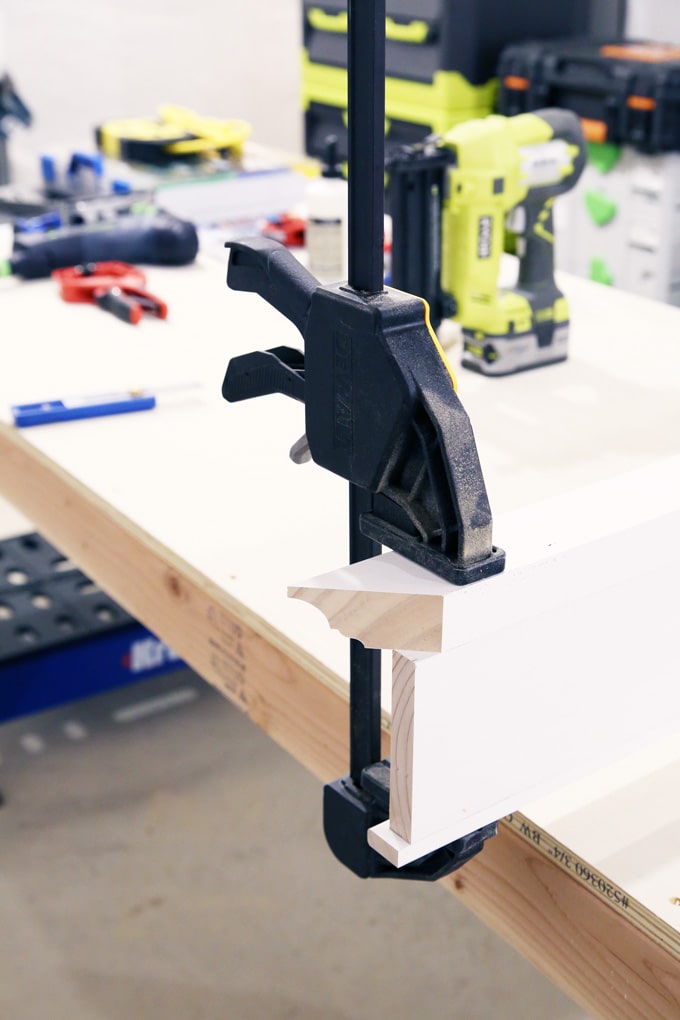
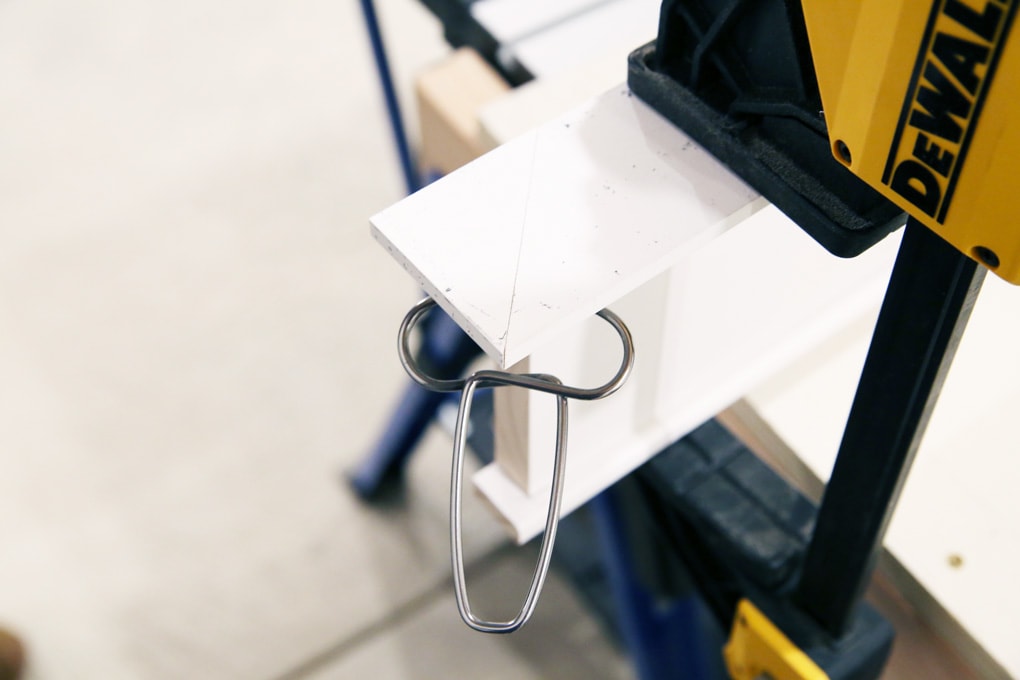
I also cut little “return” pieces to wrap around the apron. This was easy with my miter saw. After I carefully glued and nailed these pieces, I also used these awesome little miter clamps to hold everything in place.
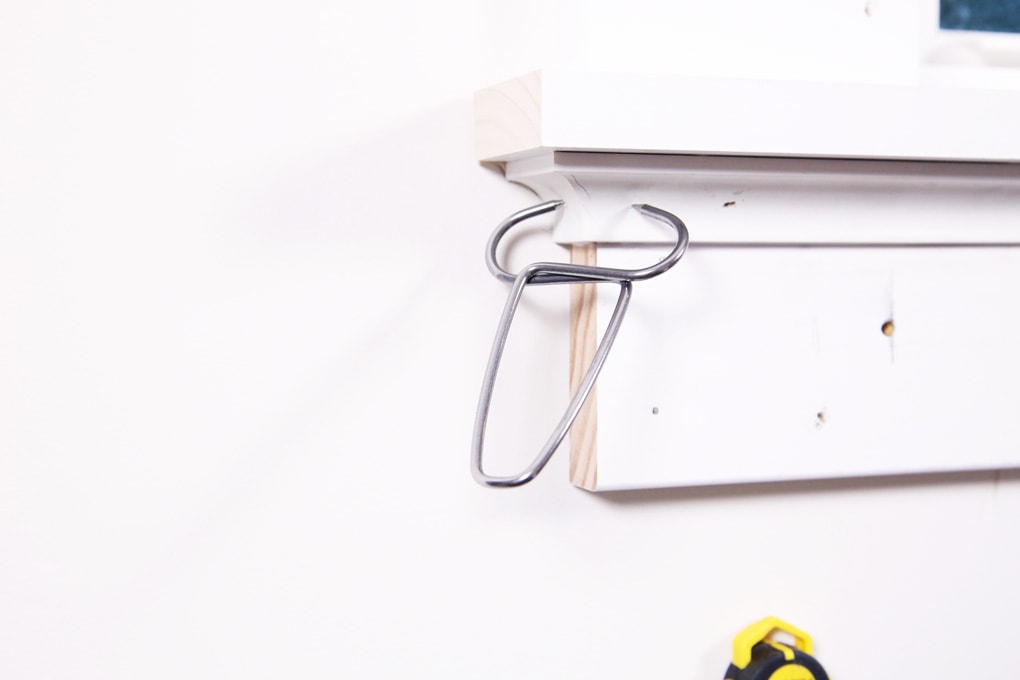
The miter clamps even have these cool little pliers to spread them out.

7. Assemble and Install the Window Header
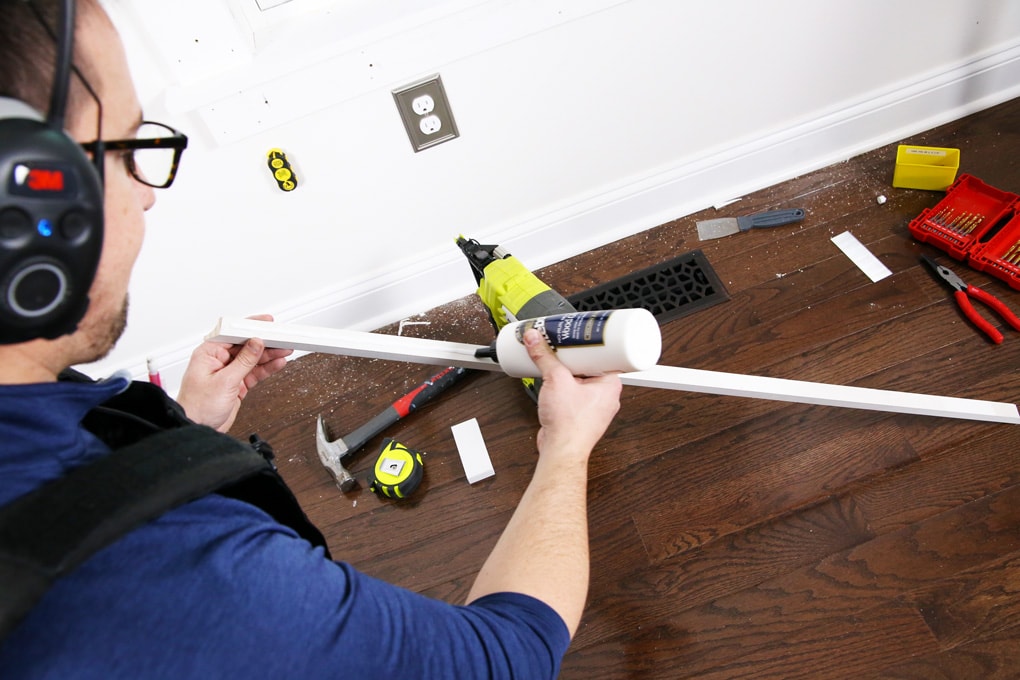
I then assembled the header as a completely separate unit. It consisted of three trim pieces: a stop mold, 1×5 flat stock, and then a header cap. All the pieces can be found here on the WindsorONE site.
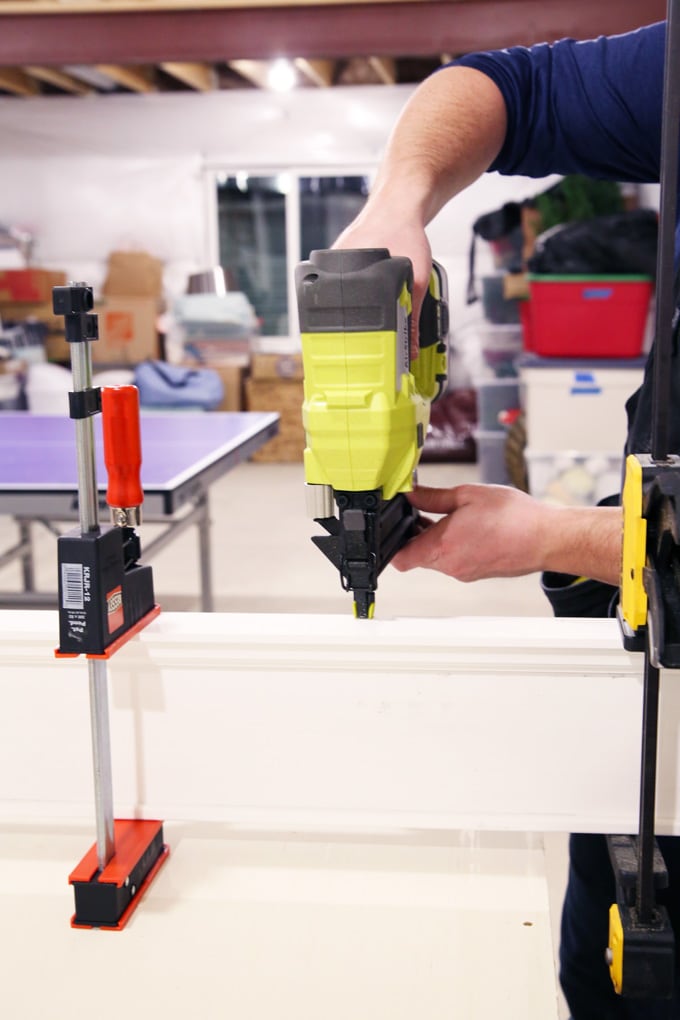
It was so much easier to cut and assemble the header on a table in the basement rather than up on a ladder. It was just a matter of measuring, glueing, nailing, and then clamping overnight.
Like the picture below, you have to account for the header return piece so it looks like it flows back into the wall. You can see the gap where I would install a small mitered header cap piece making sure the overhang was identical on the front and side of the 1×5.
Again, my miter clamps came in handy for keeping this small “return” piece in place.
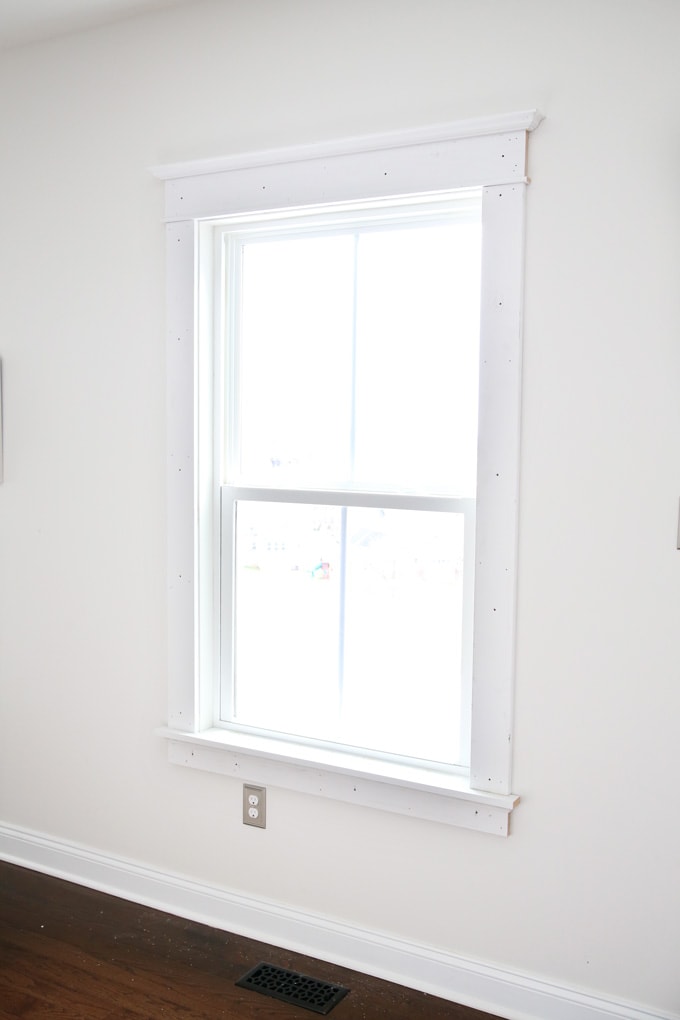
The next day, I unclamped my header assembly and set it on top of the side casing. I then glued and nailed the piece to the wall. Here’s how everything looked after the installation, nail holes and all. What a big difference!
8. Prep and Paint the Craftsman Style Interior Window Trim
Prepping for the final coat of paint was somewhat miserable compared to the fun of installing all the trim pieces. Here’s what I used…
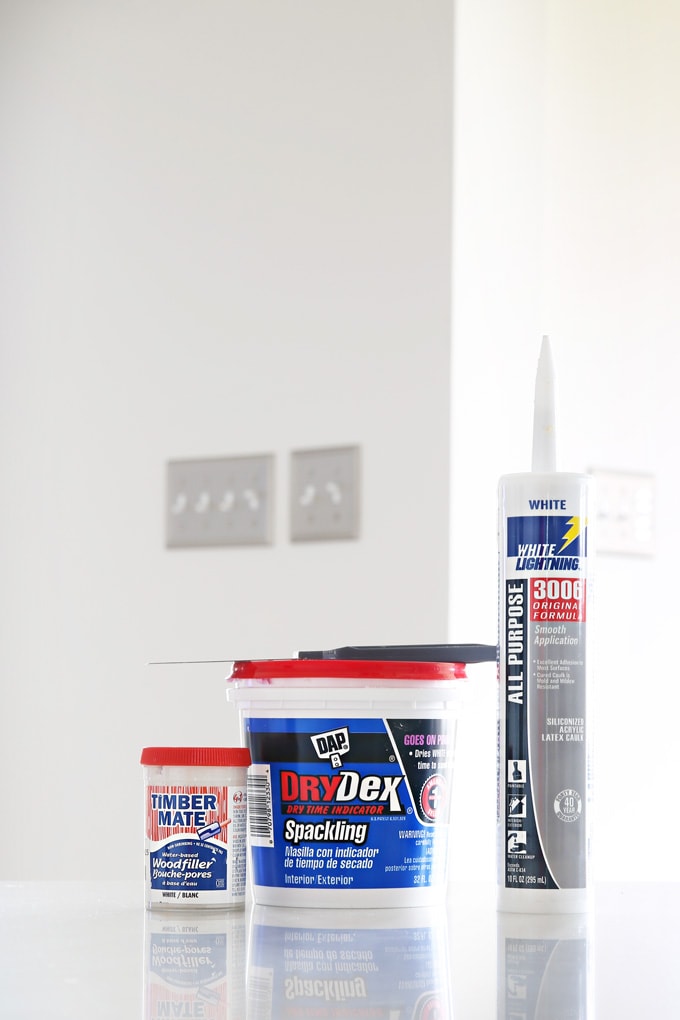
- DAP spackling for the really wide gaps. Fortunately I didn’t have to use much of this; it’s a multi-step process with spackling because it shrinks significantly once dry.
- Timber Mate white wood filler. I use this to fill nail and screw holes. It doesn’t shrink once drying, which is good, or else I would end up with little recessed nail hole areas.
- White Lightning caulking. I really like this stuff. It’s easy to clean up with water, is paintable, and doesn’t seem to attract dirt once it’s dry.
After using the spackling to fill large gaps and the wood filler for the nail holes, I lightly sanded everything. Then I primed everything. (I know the trim pieces come pre-primed, but there were enough nail holes and exposed wood edges where I had made cuts that I thought I should prime everything.)
After priming, I used caulking to fill all the remaining hairline gaps and every place the trim met the wall. This made a big visual difference on the trim.
For the final coat of paint, I used the water-based version of Benjamin Moore Satin Impervo. I was really impressed with this paint. It was easy to brush on and had great coverage.
The satin sheen is also perfect. There is enough gloss to be able to wipe the trim clean, but not so much that it causes a glare and shows every tiny imperfection.
Installing More Craftsman Style Trim Moving Forward
After completing a few windows, I was really surprised at how doable this project was. The trim installation went way faster than expected. I honestly spent a lot more time prepping the windows for painting and doing the actual painting than I did installing the trim.
Now that I’ve found a source of high-quality and authentic craftsman style trim where everything in the collection matches, I’m super excited to add more window trim, door trim, crown molding, and other craftsman style trim elements to our house. The WindsorONE moldings have been perfect for us.
If you want to add a lot of detail to your home with trim work and moldings you can use the dealer locator and find a lumber yard that carries WindsorONE. You can also call the incredibly helpful WindsorONE team at 888-229-7900 and they’ll assist you in finding the trim pieces you need for your project.
Ready to see how it turned out? (Spoiler alert: I am in LOVE!!)
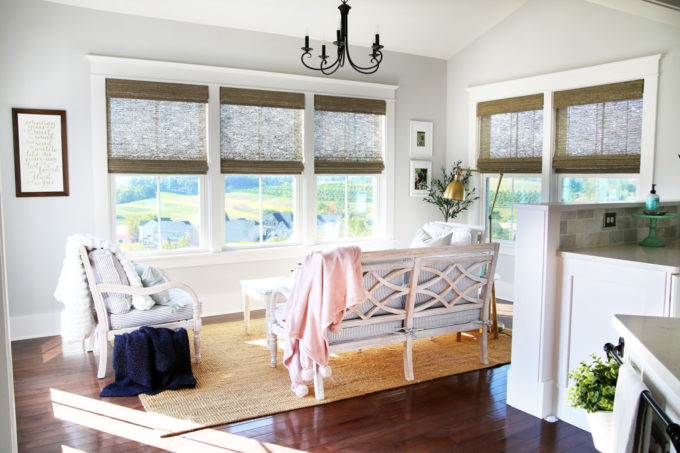
Here is what the window trim looked like right after we installed it…
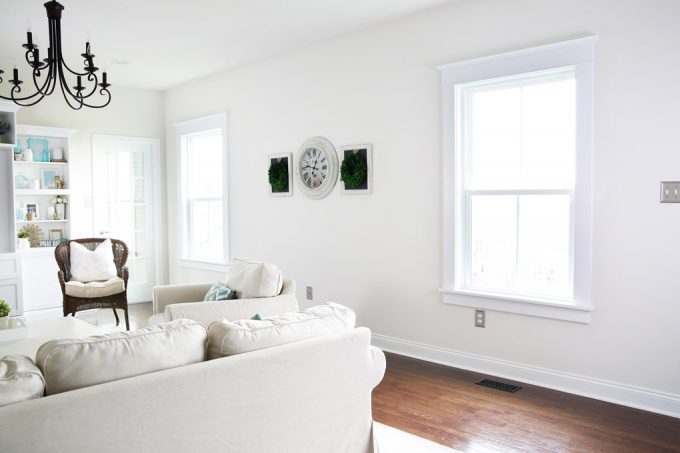
It definitely makes the space feel so much more finished and complete! It also adds a lot of character, which I will always take more of! 😉
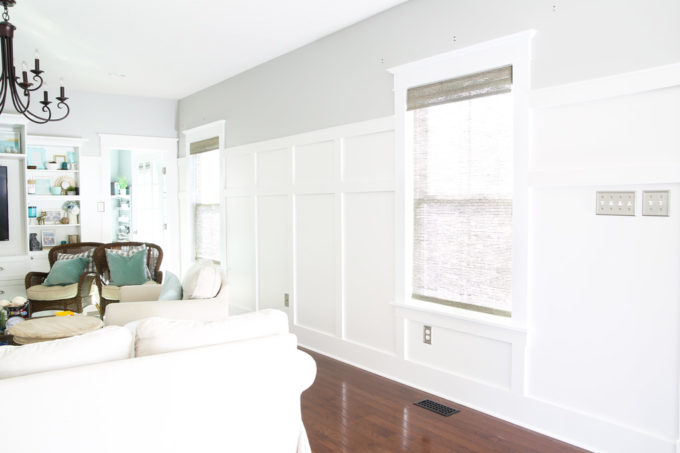
We then ended up adding a board and batten treatment to the living room as well, giving the space an even more custom look.
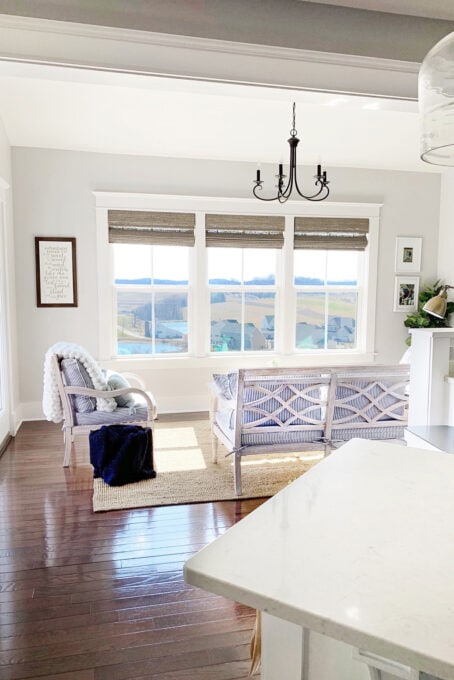
We added craftsman style interior window trim in our sunroom too…
Want to see a before and after?

Heart eyes!! I am so thrilled with how this project turned out, and I can’t wait to continue to add beautiful trim and moldings in the rest of our home as well!
Have you done any woodworking projects in your house recently? I’d love to hear about them in the comments!
Have a wonderful day!

A huge thanks to WindsorONE for providing product for this post! Our favorable opinion of beautiful, high quality trim pieces is 100% our own. For more information, see our disclosures here.


These turned out beautifully! We’ve been talking about beefing up our windows, so this is great to read!! We haven’t done it yet because I feel like I’d be a bit over the top and want them ALL done at one time to be consistent. 😉
PS. I love how your basement looks just like ours, lol
Thank you, Brittany! I’m loving the end result, but you’re right– it would be a big time commitment to do the whole house at once! Our plan is to knock it all out eventually… we’ll see how long it takes, lol! And yes, somehow Donnie is taking over more and more of the basement for his workspace. I guess if he keeps doing projects, it will be well worth it! 🙂 Hope you’re having a wonderful week!
~Abby =)
Definitely gives the room a nice clean feel and enhances your window…We are also trimming our windows along with other projects and i do like the craftsman style..I agree the painting is not fun but when its done another accomplishment in the books..Very Nice
Thank you so much, Carrie! We are big craftsman fans too! Best of luck with your projects!!
~Abby =)
Love this. Donnie did a great job in explaining how he did the trim etc. I for one would have a hard time covering up the windows. Thank you so much for sharing this.
Is there some place that you share on how to start a blog etc.?
Thank you, Sandy! We actually have a free email course that teaches you how to start a blog here: https://justagirlandherblog.com/quickstart . I hope this helps! Have a wonderful day!
~Abby =)
These turned out beautiful! New homes are great, but sometimes they lack that “older home” character and this was a perfect way to add that more of that custom and craftsman feel… plus I like “beefier” windows myself. LOL!
I agree! We will be trying our best to add the character piece to this house! 🙂 Hope you’re having a wonderful week, Yami!
~Abby =)
It turned out beautifully! Thanks for sharing this. Craftsman style has always been my most favorite.
Thanks so much, Sarena! Mine too! 🙂 Hope you’er having a great week!
~Abby =)
Absolutely gorgeous! Love it! What a blessing our men can be to us with their handyman skills! I’m showing my man this project 😉 Enjoy those beautiful windows!!
SO true! I don’t know what I would do without him! 🙂 Hope you’re having a wonderful week, Gail!
~Abby =)
Beautiful job – a salute to Donny for his detailed approach and skilled execution! All moldings make such huge difference in the home. I am looking forward to the all future posts like this !! When we remodeled about 12 years ago, we added molding everywhere. It’s the first thing people notice when they enter our home, and we always get compliments. Prepare for compliments !!!
It really does make SUCH a difference! Thanks so much, Kristine! Have a wonderful weekend! <3
~Abby =)
They look wonderful! It’s amazing how such a small detail can add so much beauty and make a space even more uplifting. Thanks, Donnie, for writing a post with enough detail to be replicable. How great to learn about those handy mitered-corner clamps and pliers! It was a pain to use my long bar-clamps when I trimmed out the last basement window.
Abby, I was relieved to read your surgery-was-successful post when you posted it, but didn’t comment on it that day bc I didn’t want you to feel you had to reply. How silly; I now realize it’s important to let people know you’re thinking about them. I hope you’re healing quickly and getting the rest you need. You are an amazing woman as well as a wonderful blogger, and on top of all that, you have made a beautiful home and secure family while remaining well-grounded. Truly admirable. Thanks for your blog and continuing inspiration.
I truly appreciate your sweet words, Ingrid! I still get worn out sometimes, but am feeling SO much better! Thank you so much for thinking of me. Have a wonderful week! <3
~Abby =)
Hi, Abby. Wonderful job! It turned out really well. I love how simple it looks, it’s not overwhelming. The trim certainly added charm on your windows.
Thanks so much, Erin! I think so, too! Hope you’re having a wonderful week! <3
~Abby =)
I love the craftsman windows with the colonial style baseboards. How tall are your baseboards? Did you purchase your baseboards with a built in ogee edge or did you use a 1×6 board with a base cap? They are in proportion to your window trim. Also, how tall are your ceilings? Do you have plans to change the door casings to craftsman style too or leave them as they are? I love what you have done to your home. Very nice!
This looks great! Do you happen to know the wall and trim colours? Thanks!!
Hi, Jeremy! The walls are Sherwin Williams Heron Plume, and the trim is Behr Marquee Cameo White. Hope you’re having a great week!
~Abby =)
This was so helpful — thank you! I’m wondering if you ended up doing the same trim around your door? We just finished our window (turned out great!) in the classical craftsman style from Windsor One and as we started in on the door, I questioned if it would be too much to have all that trim around all the openings in the room I’m curious if you did the same trim on all doors and windows or stopped at windows. Thanks!
We do have the same on the door! You can see it framed out near the bottom of this post: https://justagirlandherblog.com/light-swap/ . Right now we’ve only done the windows and doors in the living room and in Donnie’s office, but we’ll do the whole house eventually! Best of luck with your project!
~Abby =)
They look great! I was wondering…are the vertical insides of the window still just drywall…no wood there? I can’t tell since everything is white! Thanks!
Correct! The vertical insides are just drywall. 🙂 Have a great week, Andrea!
~Abby =)
Can you tell me more about using the protractor to scribe the stool? Im doing this exact project, with similar builder grade vinyl windows that only havd the same stool piece. Nothing is plumb or straight here! I undetstand the concept of the protractor for say crown molding. But never used to scribe along a wall. Any info on how to or specific tool?
I have a lovely 3 window bay area that will have some tricky nase boards and skirting- Im sure I will need to use it for that too.
Hi! It looks beautiful! How wide are your side pieces? I like the proportion between the side and head pieces. 🙂
Hi, Jessica! The side pieces are 4.25″ wide. Have a great day!