DIY IKEA LEGO Table with Storage
Create this easy DIY IKEA LEGO table with storage for your kids to enjoy building with bricks and keep them organized at the same time!

I recently shared our boys’ newly organized and decorated tween hangout room on the blog! I was so excited about the space that I published the “reveal” first. But I wanted to make sure I went back and shared some of the simple projects that helped bring the room together, starting with the easy DIY LEGO table!
DIY LEGO Storage Table
Our boys (10 year old Caleb, especially) love to spend time building with LEGOs, so I knew their hangout space had to have a dedicated area for that.
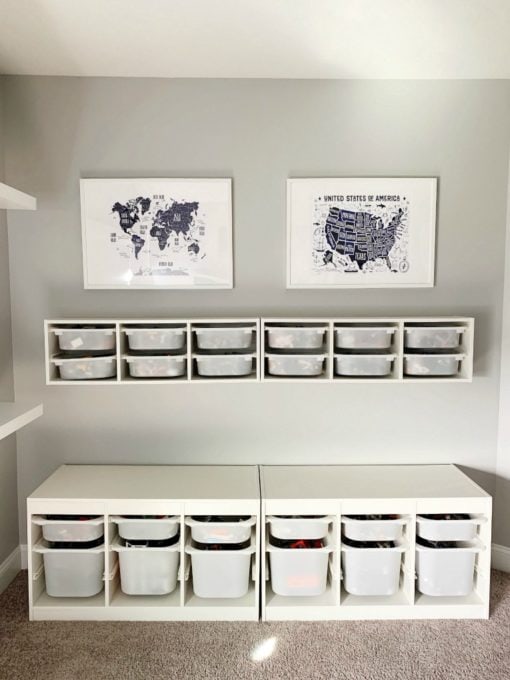
I have always liked IKEA’s TROFAST units for storing LEGO pieces. I thought it would be kind of fun to use them to create a LEGO table with them. That way, they could have a building surface right on top of the units.
These DIY IKEA LEGO tables were actually easier than I expected to create. And they only take a few supplies!
Supplies for Building a DIY IKEA LEGO Table
This post contains affiliate links. For more information, see my disclosures here.
Here’s what I used to create our DIY LEGO table:
2 15″ x 15″ LEGO Baseplates (per TROFAST unit)
3 5″ x 5″ LEGO Baseplates (per TROFAST unit)
Measuring Tape
A Few LEGO Bricks
A Wet Rag
Weights or Other Heavy Objects
DIY LEGO Table Using IKEA TROFAST Storage Units: The Process
The only part of creating the LEGO table that was a little bit tricky was figuring out which LEGO baseplates to use.
I would have liked to do solid baseplates across the two TROFAST units I was using in the room. But there is a small ridge at the end of each one that would keep the baseplates from sitting flush. So I decided to tackle each unit on its own.

Time needed: 2 hours
Create a simple DIY LEGO table using storage units from the IKEA TROFAST system and LEGO baseplates.
- Choose LEGO baseplates for the IKEA LEGO table.
The top of each TROFAST unit (minus the raised edge) measures a little over 37″ wide and 17″ deep. I decided to use two 15″ x 15″ baseplates and three 5″ x 5″ baseplates per TROFAST unit. This would leave me with about an inch of space around the outer edge of the baseplates.
I searched far and wide for baseplates that were not only the right width and length to fit on our TROFAST units, but also the right thickness. The first set of 5″ x 5″ plates I ordered were thicker than my 15″ x 15″ plates. This wouldn’t have worked well if the boys wanted to build something that spanned both plates.
The 5″ x 5″ baseplates that ended up working came in a set with some blue and green plates as well. I figured that the boys could just use the extras to create grass and water while they were building!
Note: The gray of the 5″ x 5″ baseplates differs very, very, VERY slightly from the gray of the 15″ x 15″ plates. The difference is so minor that sometimes when I’m looking at them I wonder if it’s just the lighting that makes them look that way or if they’re actually a little different. This very small difference wasn’t a big deal to me. But I wanted to give a little word of warning that they aren’t an exact 100% color match.
- Use LEGO pieces to line up the baseplates.
Before I even began trying to attach anything to the TROFAST units, I used LEGO bricks to attach my two large and three small baseplates together. This would ensure that they’re lined up correctly once they’re glued down so that the boys can build seamlessly.
Don’t skip this step! Even if the baseplates are just slightly off, it could throw off the ability to build between them.
- Tape off the position of the baseplates.
You could just try to eyeball it, but I wanted to make sure that my baseplates were in the very middle of the LEGO table. I used a measuring tape and painter’s tape to tape a border around where my baseplates would eventually be glued down.

- Wet the back of the baseplates and apply Gorilla Glue.
I didn’t realize it until I read the back of the bottle, but apparently Gorilla Glue bonds with moisture. With the LEGO pieces still holding the baseplates together, I flipped them over and used a wet rag to get the back of my baseplates a little damp. This prepped them for the glue.
We used the White Gorilla Glue to adhere my baseplates. If any of it ended up seeping up into the cracks, it wouldn’t be noticeable.
I simply squeezed a thin layer of Gorilla Glue onto the back of the entirety of the baseplates. I made sure to get close to the edges as well.
- Flip the baseplates over on the LEGO table and weigh them down.
As soon as I had applied the glue to the back of the baseplates, I flipped them over and lined them up with the tape outline I had created. Once the baseplates were sitting exactly where I wanted them, I set weights on top of them. This provided some added pressure to secure them to the TROFAST storage unit.
I removed the painter’s tape and left the weights on for about 24 hours. I moved them around a little bit from time to time so that they weighed down all parts of the baseplates.
- Enjoy your new DIY IKEA LEGO storage table!
After 24 hours, I removed the weights. The LEGO table was ready for my boys to use!

This is such an easy DIY, but it is a fun little addition for the kids to be able to play with. Connor and Caleb are already planning out scenes they want to create!

DIY IKEA LEGO Storage Table: Frequently Asked Questions
If you could use some more ideas for organizing LEGOs, you can learn more about my LEGO organization philosophy in these posts…
Our Favorite
LEGO Organization Ideas
More Tween Hangout Room Ideas
[Psssttt… Organize every room of your house with our 100 best home organization tips!]
What are your favorite strategies for organizing LEGOs? I’d love to hear about them in the comments below!
Thank you so much for following along! Have a great day!

This post contains affiliate links. For more information, see my disclosures here.


Hi Abby!
Can ask what the wall color is in these photos? It’s gorgeous!!!
Hi, Courtney! It is Behr Silvery City! It’s linked in this post at the very bottom: https://justagirlandherblog.com/organized-tween-hangout-room/
Thanks!
Hi! I’m thinking of doing this, but wanted to know how the glue is holding up to play, now that it’s been a few months? It looks lovely!
Hi, Leah! The boys play with the LEGO table often and the glue is still going strong. We haven’t had any issues with it at all! Hope you’re having a great week!
Love this idea my autistic son will love it. How much did it cost?
Thanks so much, Kennidi! It was about $100 per TROFAST unit. (I used 2 units, so about $200 for my project.) I hope this helps! Have a great day!