The Best Way to Organize a Desk
Organize a desk in a way that is both functional and beautiful at the same time by following this quick, easy, tried and true method of organizing!
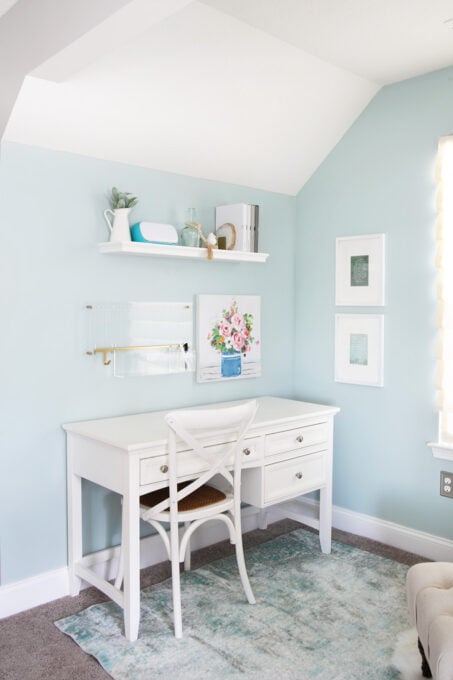
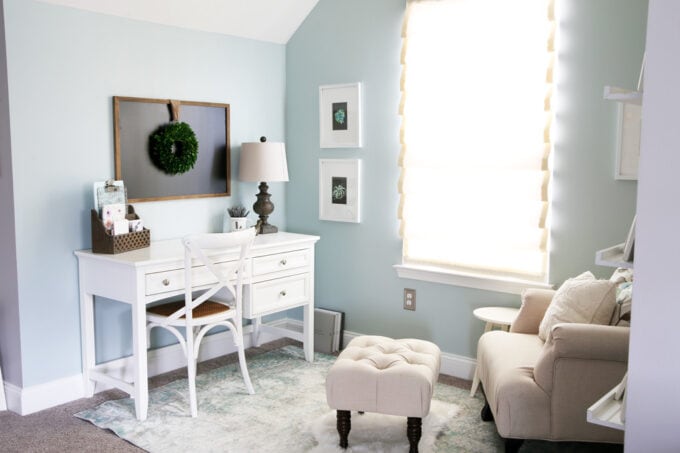
One of the very first areas I completely organized and decorated after we moved into our house 4+ years ago was this little nook in my office.

It is one of my favorite spots in our home, and I have loved spending time here, both working and relaxing! In four years, I’ve hardly changed much at all.
But over time, my style has changed a little bit, and my organization systems are in definite need of tweaking. So recently I decided to revisit my desk area to streamline it some and make it work even better for me.
(This exact desk is no longer available, but I rounded up several similar white writing desks here!)
When I was thinking about how I should organize my desk, I knew the exact process I should use.
No matter what size desk we’re working with, the same steps are used to organize it: identify problem areas, sort items by category, declutter unnecessary items, contain remaining items (and label if desired), then maintain the neat and organized desk space!
In the rest of this post, I will give a more detailed walk through of the quick and easy steps I used to create a perfectly organized desk!
How to Organize a Desk: A Video!
A huge thanks to Cricut for sponsoring this post! My favorable opinion of cute and practical tools that make my life easier is 100% my own. This post contains affiliate links. For more information, see my disclosures here.
If you prefer to see the desk organization process via video, you can catch that below!
Or if you prefer to read and look at pictures, read on…
Organizing the Desk Area of a Home Office
Before I could create an organized desk that worked well for me, I first needed to figure out what wasn’t working with my current setup.
Step 1- Identify desk organization problem areas.
My desk drawers weren’t terrible or anything. But they held several items I no longer used and wanted to declutter.

The items in the top drawer slid around a lot too, which I didn’t like at all. So I wanted to find a solution to separate my writing utensils a little more and keep them from moving all over the place.

And my bottom drawer? Well, it had become the designated “catch all” drawer, so I definitely wanted to declutter it and make it neat and tidy!

Step 2- Sort desk items by category.
The first thing I did was take everything out of the drawers. I separated all of the items into categories so I could see what I was working with.

As I was sorting, I was also working on step 3…
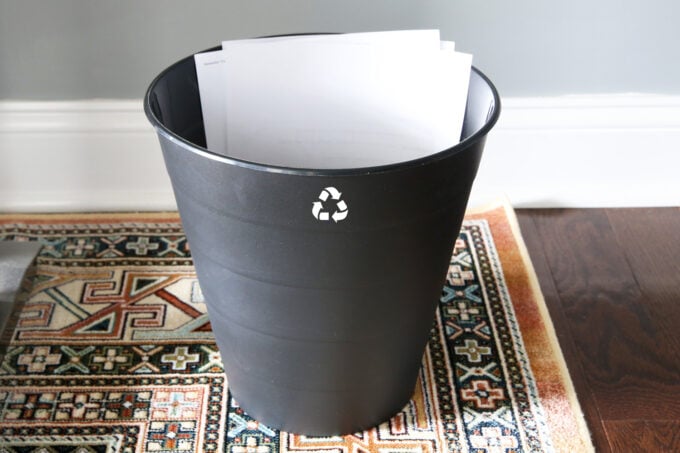
Step 3- Declutter anything that is no longer needed or used often.
When going through the decluttering step, there are several types of items to look for. I find it’s easiest to start by eliminating the trash. Anything that is broken, writing utensils that no longer work, old paperwork, or items that are no longer usable can either be thrown away or recycled.
During decluttering, I also look for items that can be relocated. Items that I don’t use when I’m sitting at my desk or working nearby can be moved to another spot where they’ll be more useful. This gives me more space in the desk for items I’ll actually use in that location.
Finally, anything that is still in good shape but that I no longer love or use can be donated or sold. I typically donate almost everything in this category because it is quicker and easier. But if I have a higher ticket item, I will spend the time to list it for sale.
Step 4- Contain categorized items so everything has a designated home.
Once I knew what I needed to store and had measurements of my desk drawers, I set out looking for organizers that would work well to hold my items.

I ended up using clear bins in multiple sizes so I could mix and match to get the exact combination I needed.
Step 5- Add labels!
Anytime I can add a cute label to my project, I will add a cute label to my project! And I just happened to have a new little tool that I was excited to use to do it. Enter, the Cricut Joy:

I have done tons of projects on the blog with my Cricut Explore cutting machine. And the Joy is like Explore’s cute little cousin. Joy is perfect for small projects like labels, which is exactly what I needed.

Cricut Explore and Cricut Joy side by side
As I would with my Cricut Explore, I used Cricut Design Space to create my label designs. (If you are a Cricut user and would like to use these same labels, you can get them in Design Space here.)

Cut the Labels with the Cricut Joy
Once my design was situated, I could send it to the Joy to do the cutting. Fun fact: there is no cord to connect the Joy to my laptop. It all happens wirelessly via bluetooth. I loved not having to mess with an extra cord!
Another perk of using the Cricut Joy is that I could utilize Smart Vinyl to create my labels. Smart Vinyl is adhesive vinyl that has a thicker backing, so it can be fed into the machine without a cutting mat. This allows me to cut longer projects continuously, without having to break them up into separate mats.

After the Joy had finished cutting all of my labels, I weeded them. (i.e. I removed the excess vinyl that I didn’t need.) Then I was able to use transfer tape to adhere my labels to their designated bins.
Label Bins with Transfer Tape

Transfer tape is handy because it allows me to move an entire design at once without worrying about the parts separating or getting wrinkled.
I simply put a piece of transfer tape over my design, flip it over, and use my scraper tool to make sure the vinyl comes off of its backing and adheres to the transfer tape.

Then I apply the design where I want it, use the scraper again to secure it in place, and peel off the transfer tape.

I repeated that process for each of my labels and ended up with the cute labeled bins that I was hoping for! I usually use worded labels, but I opted for pictures this time, and I’m so glad I did– I love them!

Step 6- Put organized bins into the desk drawers.
Once my bins were ready to go, it was time to put everything in place. First I used some marble-like contact paper to line each of the drawers. I love that it gives a pretty, subtle pop of pattern, and it protects the drawers as well.

Then I could add my labeled bins. Look how beautiful they are! (Now no one in my family will have an excuse for not putting things back in the right place! 😉 )

With my bins in place, it was time to fill them up. Everything has its own designated spot and sits neatly in the drawer.

Secure Bins with Museum Gel
Once I was sure everything was where I wanted it, I wanted to make sure my bins weren’t going to slide around and become messy. To do this, I used small dots of clear Museum Gel on the bottom of my bins to hold them in place.

Step 7- Maintain your beautifully organized desk drawers!
My bottom drawer is no longer a messy catch-all, but instead holds my emergency protein bar stash and additional office supplies. I keep clipboards close by too for when I’m walking around the house doing projects and need a hard surface to write on.

And the top drawer ended up being the perfect size for all of my Cricut cutting mats. It was meant to be!

I love that my drawers are now more streamlined and organized! They hold everything I need and nothing I don’t. Yippee!
Now that my desk drawers are tidy, I’ll need to make a concerted effort to put everything back where it goes so it stays that way! But when everything has a designated home and pretty labels to remind us where things go, it’s so much easier to maintain the system.
Bonus: Organizing the Desk’s Surface
Once my drawers were taken care of, I really wanted to make some tweaks to the top of the desk and wall area. The top of my desk was fine, but it was really set up more to look nice than to be super functional. I wanted to change that to get more function out of my space while still looking beautiful.

Ideally, I wanted to be able to have a completely clear desktop so I could have maximum space to work. This meant that I would need to use the wall space to hold anything I wanted to have right at arm’s length.
Also, my style has changed a little bit since I first chose the accessories for this space. So I wanted to make sure the new elements were a little less rustic and a little more “light and bright.”
After clearing everything off of my desk, the first thing I brought in was an acrylic weekly wall calendar. I loved the idea of being able to have my plan for the week right in front of me so I could be reminded of my priorities and not get distracted.

The calendar also had some organizers that I could add onto it– a pen/utensil holder, an inbox bin, and a small hook for hanging keys or other small items.

Per usual, I wanted to add a few simple labels to the bins for some additional interest and functionality.
Creating Written Labels with Cricut Smart Label
I almost always use adhesive vinyl labels, but I was worried that they wouldn’t stand out very well in this case because the bins were clear without a background behind them like I had in the drawer.
I was delighted to find Cricut’s Smart Label product, which is an adhesive vinyl that can be written on with Cricut’s multi-colored pens and then cut out to create the perfect “handwritten” label.

As I did previously, I created my design in Cricut Design Space. (You can snag it here.) But I then replaced the blade with the pen in the color of my choice. When I sent the project to the Joy, it used the pen to write out the words and pertinent parts of my design.

When it was finished writing, Design Space prompted me to remove the pen and put the blade back in place.

The blade then cut out around the design, leaving me with the exact label I wanted!

I could easily apply the labels to my bins, and they were ready to go.

Making Wall Space Functional + Beautiful
To finish out the wall above my desk, I added a pretty piece of art. Donnie also helped me install a floating shelf to hold my planner, journal, and notebooks. The shelf also ended up being the perfect spot to store my Cricut Joy so I can quickly grab it for projects!

I am so thrilled that my desk is cleared off, maximizing my work space. And by using the vertical space on the wall, I can still have everything I need close by. It really is a win-win!
Organized Desk Supplies
If you’re looking for any of the items I used for my desk organization project, you can find all of the links in the list below:
- Cutting Machine- Cricut Joy
- Cricut Joy Smart Vinyl- Beachside Sampler
- Smart Label Writable Vinyl for Cricut Joy
- Cricut Joy Pens
- Cricut Transfer Tape
- Scraper
- Cricut Explore Air 2
- Cricut Cutting Mats
- Large Clear Bins
- Medium Clear Bins
- Small Clear Bins
- Museum Gel
- Marble Drawer Liner
- Acrylic Wall Calendar
- Hook
- Acrylic Inbox
- Acrylic Pen Holder
- Art- Purchased at a Local Shop
- Hand-Lettered Art Prints
- Floating Shelf
Thank you so much for following along! Have a wonderful day!

A huge thanks to Cricut for sponsoring this post! My favorable opinion of cute and practical tools that make my life easier is 100% my own. This post contains affiliate links. For more information, see my disclosures here.


Where is your desk from? It looks like a great size with good storage! Thanks.
Hi, Alissa! I got the desk from Joss and Main years ago, so it is not available anymore, unfortunately. I recently did a roundup of similar white writing desks though, if that would be helpful! It is here: https://justagirlandherblog.com/beautiful-affordable-white-writing-desks/ . Have a great week!
I really love everything about your blog. The design, the colour and the content. This blog about the organized desk is really very helpful. Thanks for sharing it.
So glad it was helpful for you Sona! Have a great week!
~Abby =)
I couldn’t find the special code anywhere. I already have the cuicut and was going to order the extra for the special price to go with it.Is it still available at that price? To all who are thinking of getting the mini it’s well worth it for a lot of things
Hi, Meryl! You don’t need a special code. The Cricut Joy is still on sale on their site. You can see it here: https://cricut.com/en_us/machines/cricut-joy.html . Have a great week!