25+ Brilliant Storage Solutions for a Beautiful and Organized Pantry
Create a beautiful and organized pantry with these 25+ brilliant storage solutions for spaces of all shapes and sizes!
Of all the organizing projects we do in our homes, one of the most impactful has to be organizing closets. When the closets are organized, it makes it a lot easier to keep the rest of the room organized as well, so I always make them a priority!
It’s no surprise, then, that one of the first projects I did when we moved into our current house was to organize the “kitchen closet,” aka the pantry!

I’ve organized pantries of all shapes and sizes over the years and have learned a lot in the process. I’m sharing my favorite pantry organization ideas for any shape or size of pantry below. I hope they will be helpful for you!
Pantry Organization Ideas to Maximize Your Space
This post contains affiliate links. For more information, see my disclosures here.
1. Declutter like crazy.
No matter what space I’m working on, the very first thing I always do is declutter. If I don’t get rid of the things I no longer love and/or use often, I’m not organizing– I’m just rearranging my clutter!
If possible, I like to take everything out of the space so I can put items into categories and see what I have. Then it’s easy to see what is trash, what is no longer usable, what we’ve outgrown, etc.
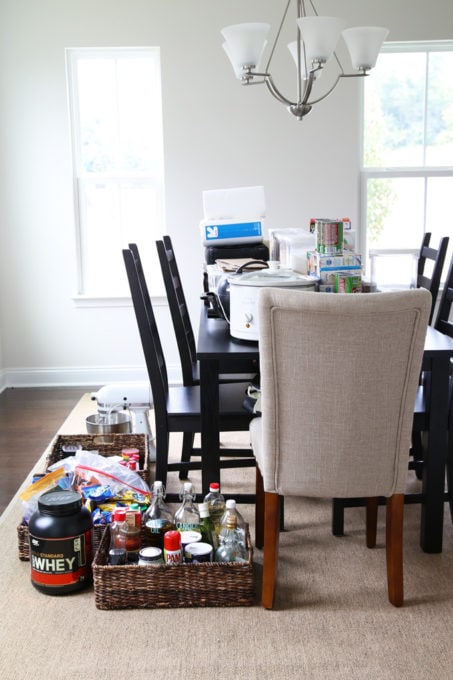
I try to be as ruthless as possible during the decluttering process. I know that when I only keep the items I absolutely need, my space will be easier to organize (and keep that way)!
2. Create a solid surface.
Believe it or not, I had never had wire shelving until I moved into my current house. The first day we moved in, I went to put one of my narrow pantry containers on the shelf, and it fell right over… ugh!
There are several ways to solve this problem and create a solid surface in the pantry. The most drastic is to replace the shelves, which is what we did. We used IKEA’s ALGOT system (now called BOAXEL) to put solid shelves in our space, and we love them!

But even if you’re not looking to replace your entire closet system, there are many ways to create a more stable surface for your pantry items.
- Corral pantry items in bins to keep things organized by type and create a solid surface at the same time.
- Have acrylic sheets cut to the size of your pantry shelves at the home improvement store and simply lay them on top to create a solid surface.
- Or build these simple shelf covers for a great surface and a beautiful wood look at the same time!

3. Think outside the box.
Just because the house “says” that a space is supposed to be the pantry, it doesn’t mean we have to use it that way!
In our townhouse, our pantry was teeny tiny! No matter how much I organized and rearranged, I couldn’t fit everything into the small space.

But the coat closet was close to the kitchen, so at first I put a set of cheap storage shelves in the closet and used it to hold additional pantry supplies…

Eventually, we decided to relocate our coats entirely and turn the whole coat closet into a pantry. The setup worked much better for our family and kept our kitchen space a lot tidier too!

So the moral of the story is: don’t be afraid to rearrange and try different configurations with your space! You might find a better setup than how the space was intended to be used!
4. Store like items together.
It’s always easier to find my items when I keep like items together– all canned goods together, all baking supplies together, all spices together, etc.

This creates little “zones” within the pantry so everything has a designated spot. And I can grab whatever I need quickly and easily
5. Place items according to use.
Along with keeping like items together, I try to arrange the pantry so that the items I use most often are right within arm’s reach.

Anything that I want my kids to be able to grab themselves– like school snacks and water bottles– goes down low. And items that we use less often, like the blender and paper towel back stock, goes up high.
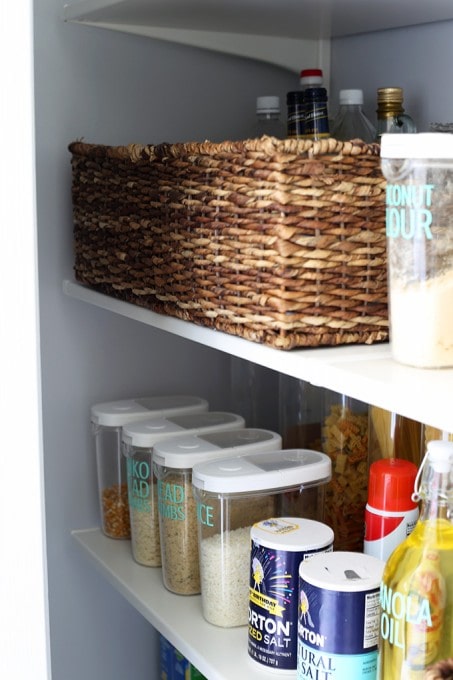
6. Add baskets to corral like items.
When we’re putting like items together, the easiest way to keep them that way is to corral them in baskets or bins!

I’ve used plastic bins and woven baskets and clear bins— the style is up to you! But a little bit of separation goes a long way in giving everything a set home to come back to, keeping our space neat and tidy.
7. Use risers for spices and/or cans.
Risers are great because they allow us to see what we have more easily! Rather than constantly rooting around because we can’t see what’s in the back rows, with risers we can grab what we need within seconds.

I’ve used risers for spices and canned goods, but they could also work well for small bottles and jars.
8. Choose matching containers for spices.
This tip won’t necessarily appeal to everyone, but I love the streamlined look of matching jars for spices.

After decanting the spices into their jars, I used my Cricut machine and adhesive vinyl to label each one.
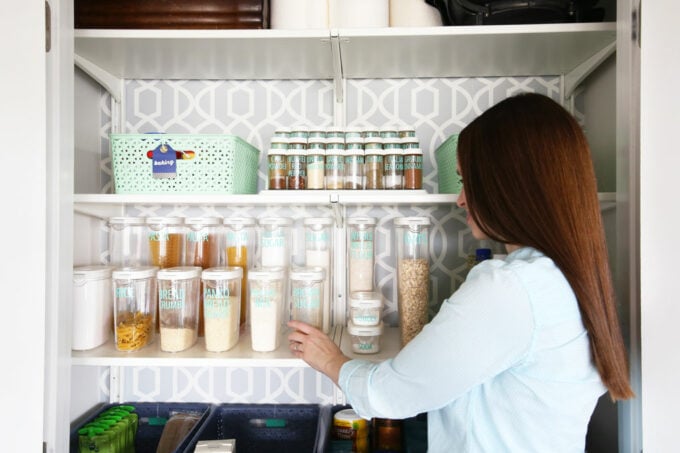
9. Decant to create a streamlined, organized pantry.
“Decanting” just means taking items out of their original packages and storing them in streamlined containers instead.
Decanting is another personal preference thing. I like to do it with my dry goods and pastas.

Decanting is visually pleasing because I can get rid of a lot of the original packaging. It allows me to see what I have at a glance. And it keeps my food fresher longer because my containers are airtight.
I go into much more detail on the decanting process I use here.
10. Utilize stacking containers.
I love these containers for decanting because they are designed to stack on top of one another. Not only does this give me a neat, streamlined look, but it also saves space!

11. Add a built-in measuring cup.
Another nifty feature of these particular pantry containers is the ability to attach a half cup measuring scoop to the underside of the lid.

I love having a dedicated scoop for each container, and it is always easily available when I need it.
12. Don’t forget the back stock bin.
One of the questions I get often when I talk about decanting is, “But what about the stuff that won’t fit in the container?!”
Well first, I try to avoid this problem as much as possible by choosing containers that hold an entire standard size package of something. So for example, flour typically comes in a five pound bag, so I made sure that my flour container could hold five pounds worth of flour.

But if I do end up a with a little bit extra for some reason, I keep a back stock bin on the floor of my pantry to hold it. I then try to use up the extra first so I don’t have to keep much in the bin.
13. Choose deep bins for chip bags and other awkward items.
I don’t typically decant snacks like chips and crackers because we go through them so quickly that it didn’t really make sense for our house. But chip bags are especially awkward sitting on a shelf, so I like to store them in a deep bin.

This makes them easy to grab, they sit neatly in the bin, and I don’t have to worry about them cluttering up my shelves.
14. Label your organized pantry!
I love labels! They make it easy to see what’s in each container, and they can be pretty too!

My favorite type of labels are the ones I make with my Cricut cutting machine + adhesive vinyl. But hand written, wet erase, and label maker labels can also work!
15. Use clip-on labels when appropriate.
Clip on labels are great because they are easy to move around and change out when you need to!

I used adhesive vinyl for my clip-on labels, but a wet erase marker could also work if you plan on changing the bin contents often.
16. Organize water bottles with wine bottle holders.
I was so sick of our water bottles falling over all the time until I started using the wine rack strategy! Now all of our water bottles stay neatly in place, and I’m not fighting to keep them tidy all the time.

17. Maximize vertical space in your organized pantry with stacking bins.
They’re called pantry bins for a reason! Stacking bins are great because they allow us to store more items while still having easy access to everything.

I would choose pantry bins over stacked lidded bins because it can be inconvenient to have to unstack and re-stack lidded bins to get to what I need.
18. Choose lazy Susans for pantry corners.
I don’t have a walk-in pantry with a corner spot, but if I did, you’d better bet I’d be putting a lazy Susan there!

The round shape of lazy Susans / turntables make them the perfect solution for those awkward corners, allowing us to reach everything easily with one quick spin.
19. Know your expiration dates.
When decanting pantry items, one thing that can be sort of tricky to navigate is figuring out how to keep the original instructions and expiration dates for each item.

With my current pantry setup, I use a clear adhesive business card holder on the back of each of my containers to hold the instructions. And I write the expiration date on the back of the instructions.

I have also used a system where I kept a clipboard hanging inside of my pantry with a wet erase marker. I then used a laminated page on the clipboard to track expiration dates and any other information I wanted to save.

20. Consider bringing in a rolling cart.
Rolling carts are especially helpful in smaller spaces, but they certainly work well in larger spaces too!

Rolling carts are a great way to bring in extra storage but then easily move items out of the way when needed.
21. Create a backup pantry for lesser used items.
I have a few items that I like to keep around because I use them a few times per year, but I don’t want them taking up permanent space in my kitchen. For these types of items, I create a “backup pantry” in my basement.

It is essentially a storage bin or two that holds the extra stuff so I can grab them when I need them without taking up valuable space in my kitchen.
22. Follow a “first in, first out” policy.
To try to minimize food waste as much as possible, I try to adhere to a “first in, first out” policy. This simply means that the first items to go into the pantry should also be the first items back out.

So when I’m restocking after a grocery shopping trip, for example, I will put any new food items behind the existing items in the pantry so that the existing items are used first.
When possible, I try to completely use up any product I’ve decanted into containers before refilling them for the same reason.
23. Use grocery shopping day to reset.
And speaking of grocery shopping day, it is a great time to reset the pantry! I check for any expired items, clear out anything that has become stale, and move items back into place that have gotten messy or were put back incorrectly.
Resetting the space every week or two when I go shopping ensures that it never gets super messy and keeps it tidy most of the time.
24. Always return items to their designated spot to maintain an organized pantry.
It can be hard to start a new habit (or to encourage our family members to start a new habit!), but this one is absolutely essential for keeping the pantry tidy long term.
If we’ve followed the tips and tricks above– corralling items into bins, labeling, giving everything a designated spot, and resetting– it will be much easier to return items where they go on a regular basis.

If it helps, put a sticky note on the pantry door reminding everyone to put things back until it becomes more of a natural habit.
25. Get into the “scan and fix” habit.
And speaking of habits, this is one of my favorites, and it is definitely helpful in the pantry! Scan and fix is exactly what it sounds like. Anytime I open the doors to the pantry, I scan, looking for anything that is out of place.
If I spot something, I simply take a few seconds to fix it right then, rather than waiting and letting the pantry get messier and messier.

It hardly takes any extra time at all to do, but all of those little scan and fixes add up, leaving us with a much tidier space for the long haul.
So those are my favorite ways to keep our pantry neat, tidy, and organized!
I know this isn’t an exhaustive list, so be sure to let me know your favorite pantry organization tips in the comments below!
Shop the Post
MY PANTRY FAVORITES

Thank you so much for following along! Have a wonderful day!

This post contains affiliate links. For more information, see my disclosures here.


Your pantry looks amazing – so many great tips and products! Would love to know what colour vinyl you used for your labels.
Thank you so much, Tracey! It is Oracal 651 Mint vinyl! (You can get it on Amazon or Michaels usually carries it too.) Hope you’re having a wonderful weekend!
Great post, I’m going to implement the business card holder on the back trick. Thank you
Thanks so much, Electra! Hope you’re having a wonderful weekend!