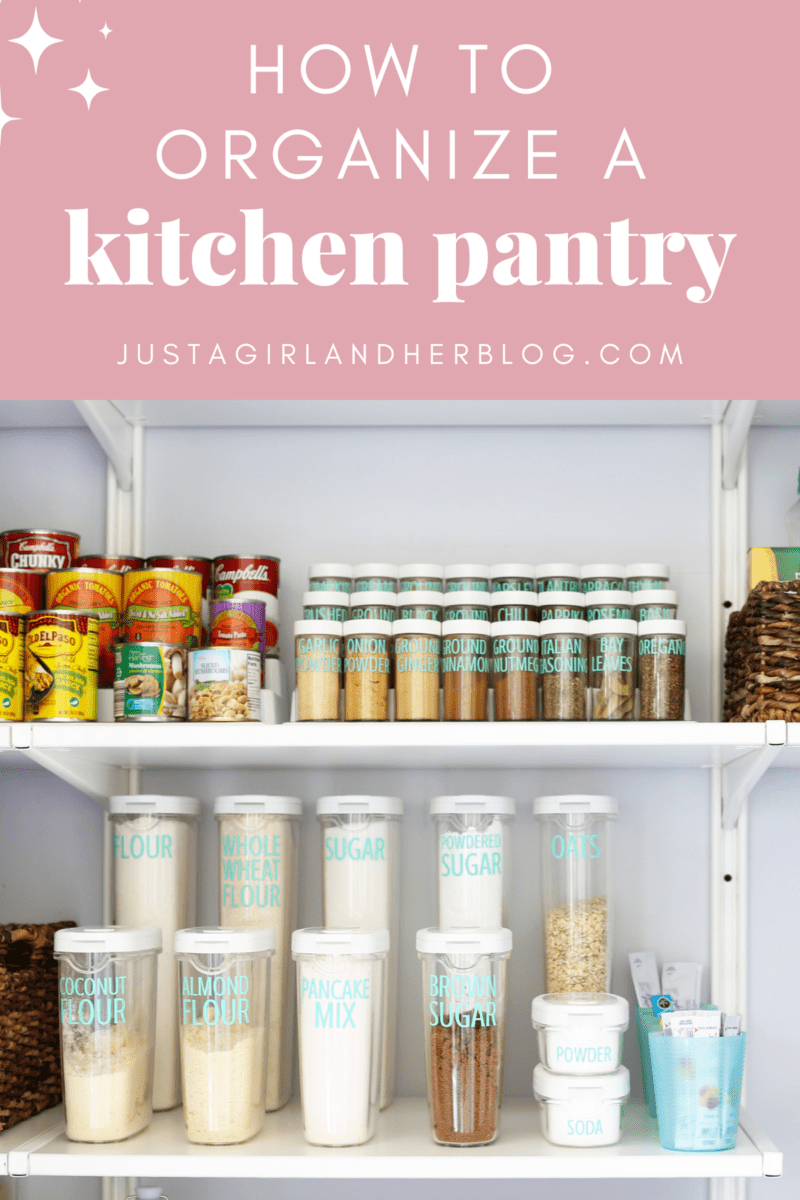
How to Organize a Kitchen Pantry
Learn how to organize your kitchen pantry using our tips and tricks, and find out which IKEA storage system will help keep the pantry neat and tidy!
Sooooo I’ve been just a teensy bit obsessed with our pantry this week. If you follow me on Instagram, you’ve probably seen little snippets of my excitement!
I love organizing any day of the week, but this project is extra special to me because I’ve been waiting for it for a LONG time.
Our Pantry Before Organizing
This post contains affiliate links. For more information, see my disclosures here.
This house was seriously lacking in pantry storage when we moved in…
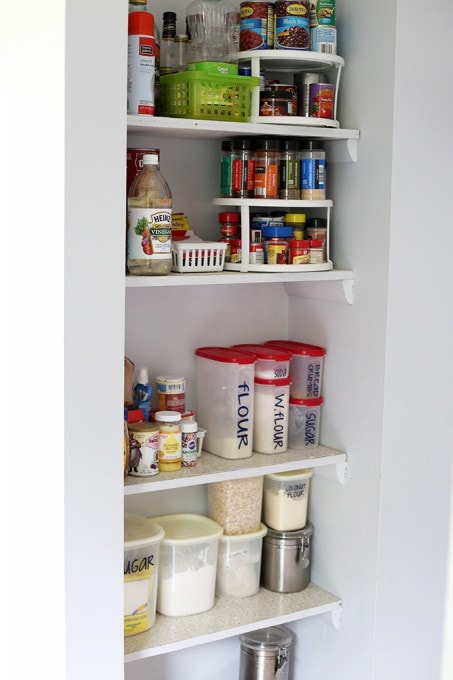
This is what I had to work with. Those shelves are only 9.5″ deep and hardly fit anything! Also, a few years after we moved in, the pantry door broke and because it was just easier to grab things without it, we didn’t replace it.
It forced me to keep the pantry relatively organized, which was great, but I also had a dirty little secret…
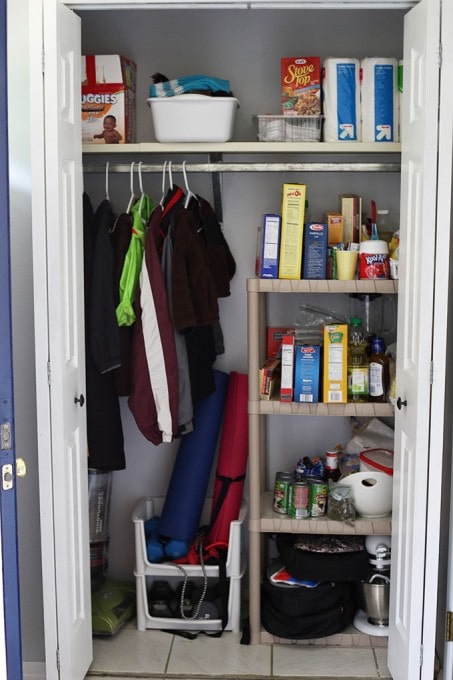
Ahem. 🙁 Since there was no possible way to fit everything I needed into the teeny tiny pantry, I created another little pantry area in our entry closet. It quickly became a catch-all for anything and everything I could throw in there.
Along with pantry items and coats, we also tossed in some workout equipment and the vacuum for good measure. It was a cluttered mess and was not serving any of its purposes very well.
When we started planning the kitchen reno, then, I was determined to *finally* get the pantry storage I had been dreaming of.
A Kitchen Pantry Fail
I worked a floor-to-ceiling pantry cabinet into the kitchen plan– it was going to be so beautiful and functional! I could hardly contain my excitement when Donnie was putting it together, thinking of alllllllll the things I was going to be able to store in it!
And then we put it up.
And it looked terrible.

We had opened up the space nicely by taking down a weird half-wall that had been there, and this monstrosity just closed everything right back up again, making the kitchen feel even smaller than it had before.
To be honest, I should have known that would be the case, but I had my heart set on that massive amount of pantry storage, so I put it into the plan anyway.
So poor Donnie had to take this ginormous cabinet that he had worked so hard to assemble back to IKEA with all of the many parts that had come with it, and I was again without pantry storage.
But I was not going down that easily. Not without a fight. 😉
I concocted a plan. What if we just took the entire coat closet and made it pantry storage? That would solve my problem, right? (I know some of you are thinking, “But what about your coats?!” I have a plan for that too, I promise. 😉 )
I started dropping little hints and ideas to Donnie, trying to ease my way into suggesting another big change in our kitchen plans and hoping that he would forget all that I had just put him through because of my pantry storage dreams.
Thankfully, he’s the best. And he WENT FOR IT!! Woooo! Husband of the year for that man! 🙂
Creating a New Pantry with IKEA Storage
We had recently revamped our primary bedroom closet with IKEA’s ALGOT system, and thought it might be a perfect solution for our entry closet-turned-pantry as well. So we headed off to IKEA. Again. (Not that I would ever dare to complain about visiting my favorite place ever… 🙂 )
We were armed with closet measurements and picked out the pieces we needed to create my plan B dream pantry.
[FYI… IKEA recently discontinued their ALGOT system and replaced it with BOAXEL, which is very similar.]
Since I have gotten a bunch of questions since we did our first ALGOT closet, I thought I should mention that though you go to the IKEA website and the ALGOT systems look like this:

…in true IKEA fashion, all of those little pieces you see are sold individually at the store; they’re not boxed together in neat little sets. So you have to go in knowing the measurements of your space and what types of storage needs you have so that you can choose the correct number of wall uprights, shelves, brackets, baskets, etc.
Need more details about how to measure for an IKEA ALGOT / BOAXEL closet system? See this post.
4 Things to Do Before Organizing the Pantry
As you can see in our before pantry pictures, we are not a stockpile family. So we did not have a ton of stuff to declutter. However, here are a few tips that we always use before we start an organizing project.
1. Take everything out and declutter.
Before choosing an organizing system, the first step is to take everything out of your pantry and declutter! Toss the items that are expired, stale, or those that are no longer used.
2. Sort.
Place like items together. Most pantries contain canned goods, pantry baking staples, snacks, and maybe a few small appliances and paper products. We put the items from each of these categories together so we can see exactly what we’re working with.
3. Make a plan.
Now that the full space is visible and we know exactly what needs to go back in, it’s time to visualize! Are there containers or baskets around the house to use or do these need to be purchased? If the area seems like it’s going to be too crowded, can the odd-ball items be kept in a different space?
4. Clean.
What a perfect time to make the pantry nice and sparkly! If a new system isn’t going to be installed, shelf liner can be added for a little pop of pretty.
Now it’s time to put the pantry back together and see the transformation!
Organizing a Pantry Step-by-Step Using IKEA Storage Systems
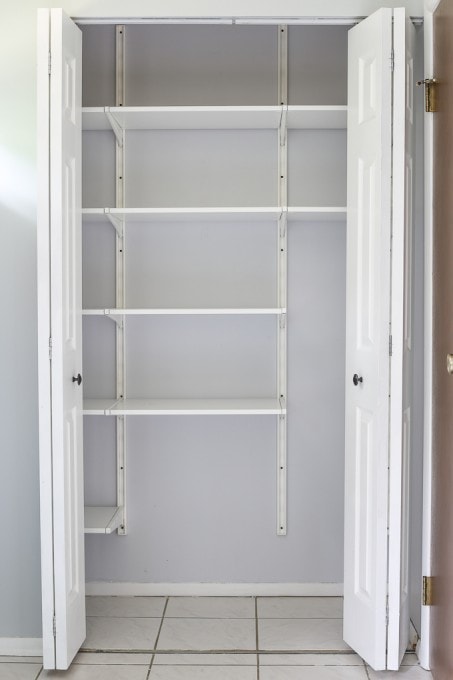
1. Install the organizational system.
We kept it super simple and just went with a bunch of shelving for the pantry, and since Donnie is an old pro at installing this closet system by now, he had it up in about a half an hour.
2. Choose containers.
Look at all of that space!! I know it is still tiny compared to some pantries, but to me it felt absolutely huge, and I could not WAIT to start organizing it!
I decided to honor the occasion by investing in all matching pantry containers… and when I say investing I mean that I went to IKEA and bought them so they really weren’t that terribly much at all. (Also, I promise that IKEA is in no way sponsoring this post. I just really, really, really love them. 🙂 )
Tips for organizing containers
- Clear pantry containers and spice jars are a great way to make the space look clean and keep up with inventory.
- Racks and risers can help to maximize vertical space and are perfect for deeper shelves.
- Lazy Susans come in handy for extra condiments and sauces.
- Baskets for the best for combing like items, such as snacks.
- Trays are excellent to use in deeper pantries. This way nothing has to be moved, and the tray acts almost like a drawer that can be pulled out.
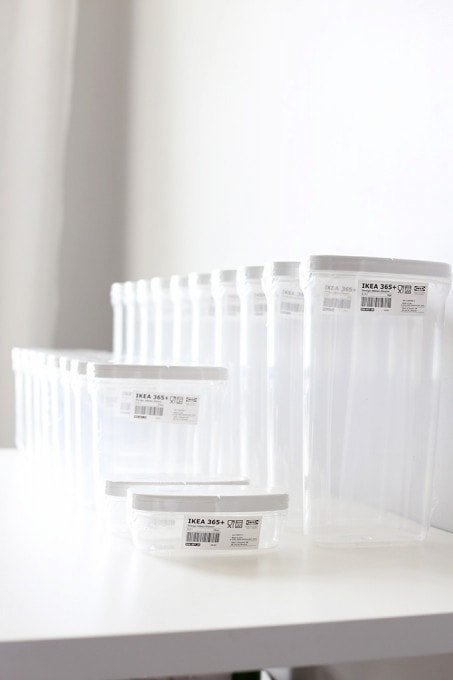
Because I am ridiculous, I insisted on lining them up on my desk and taking pictures before I got to the really fun part– filling and LABELING!! Yippee!
3. Label the pantry containers.
I used my trusty Silhouette Cameo to cut out adhesive vinyl labels for each of my containers and also for some matching spice jars that I found!
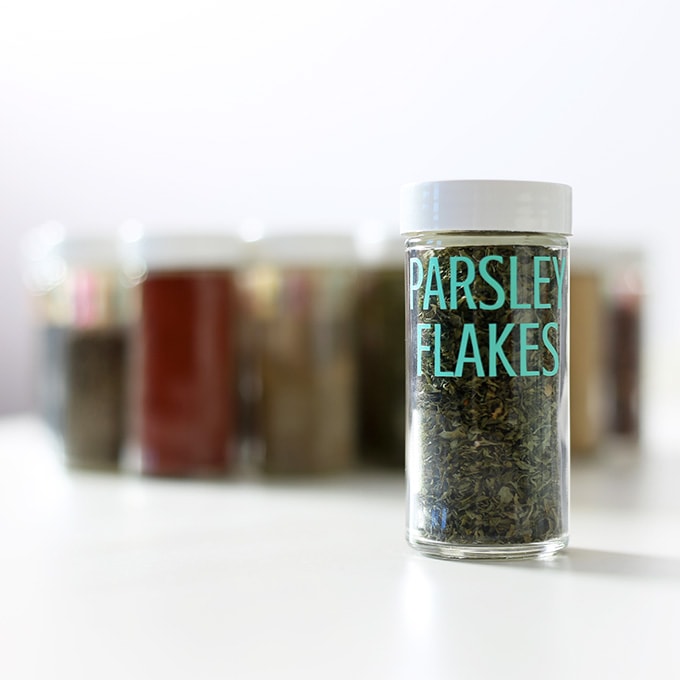
Yes, yes aqua vinyl. You didn’t actually think I could put together a space without incorporating that color, right?! 😉
4. Restock the pantry.
So, with everything filled and labeled, it was time to put it all together! And just for you guys, because I wanted you to be able to share in the excitement of this moment, I learned how to make a GIF (which, it turns out, is not that hard at all) so that you could see how it all went together! Are you so excited?! 😉
Here we go…
5. Add more bins and organizers as needed.
Yay pretty, organized pantry! It was like the stars were aligning when I was putting all of this stuff together because along with the inexpensive containers and spice jars, I also just so happened to be at Michaels looking for baskets on the day that they were 40% off, so I got 3 matching baskets that fit the space perfectly for an absolute steal! Shall we take a closer look?!
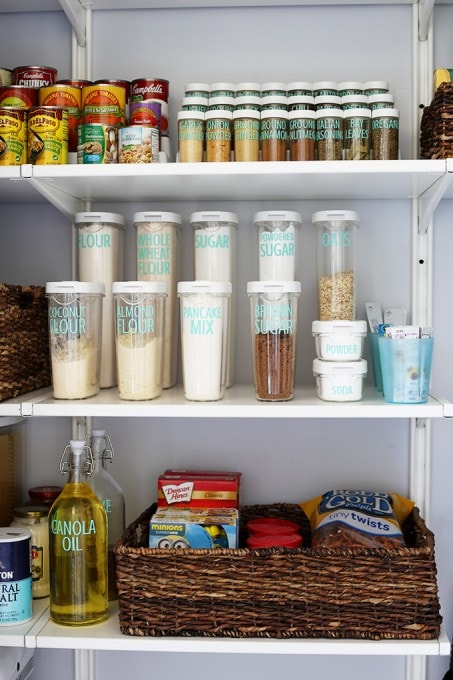
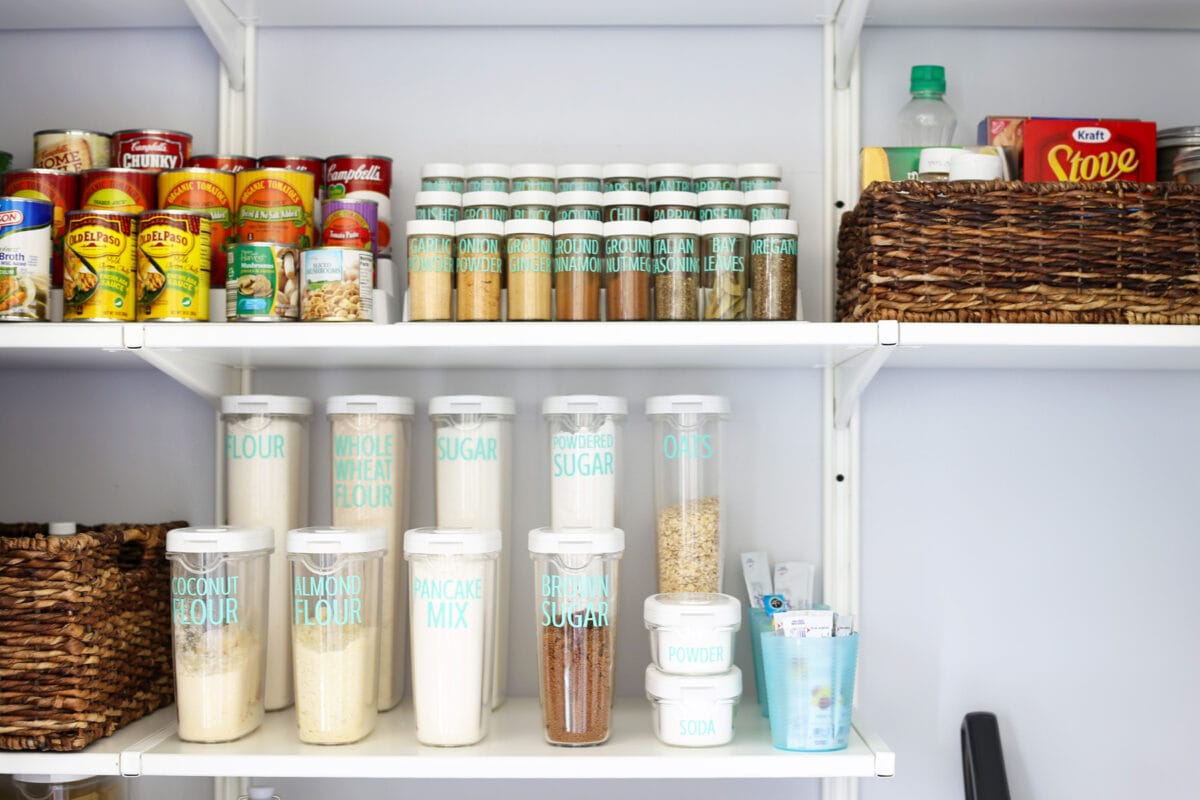
The snack basket is on one of the lower shelves so the boys can grab them on their own when they need to. Baking supplies, spices, and canned goods also made it front and center so that we can access them easily.
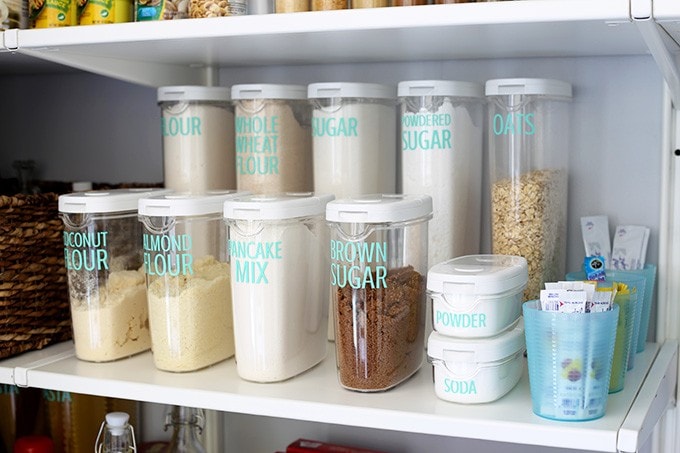
I just love how the containers look all lined up and labeled! Adhesive vinyl is great because it is strong enough to go through the dishwasher, but I can also remove it if I decide to change things up a little bit.
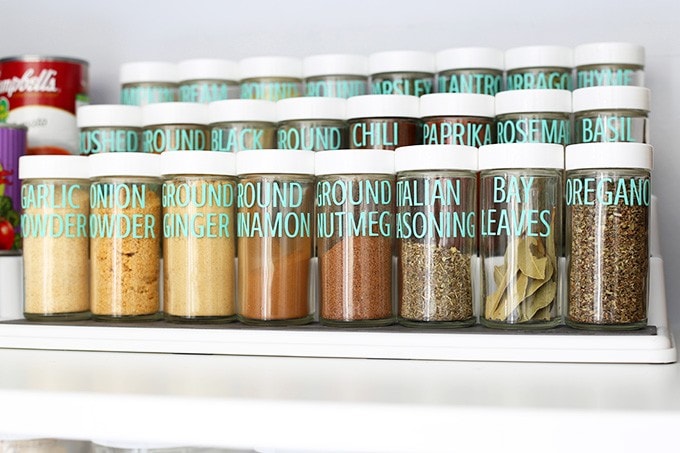
I searched far and wide for the best way to organize my spices and was kind of surprised at the limited options in the stores near me. I ended up finding these risers and they were perfect for the job.
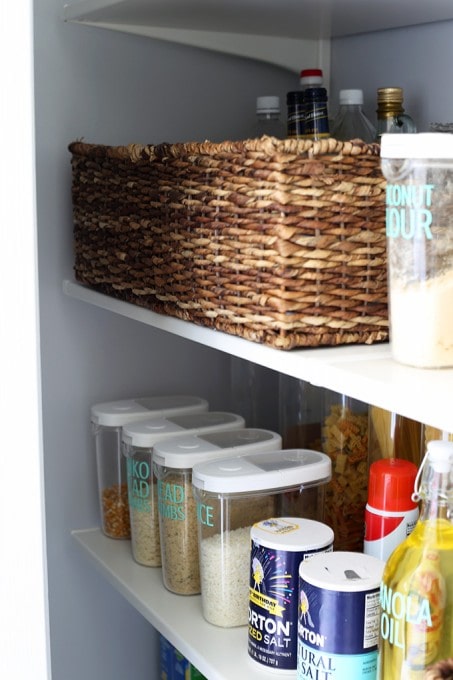
These shelves go decently far back, so I was able to sneak in our pastas, more baking items, and some small kitchen appliances like my KitchenAid and CrockPot. And everything fits so neatly too!

Yes, the vacuum got to stay– hopefully I’ll be inspired to use more often it since I can actually reach it now! I’d say that this closet ended up looking pretty different than it did before…

(If you’re looking for an organizing solution for a smaller space, I love the IKEA RASKOG cart for portable storage!)
Free Pantry Organizational Labels
You know I couldn’t just keep all of the pantry organization fun to myself, so I put together some pretty pantry labels for you too!
These were designed to fit the Avery 22818 round labels, so you can print them directly onto the labels or you could just print on card stock and attach them with tape. There are labels for baking/cooking items…
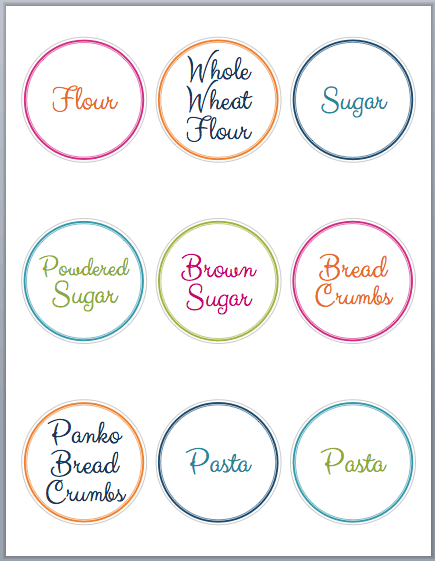
…and another packet of labels for organizing allllllll of your spices:
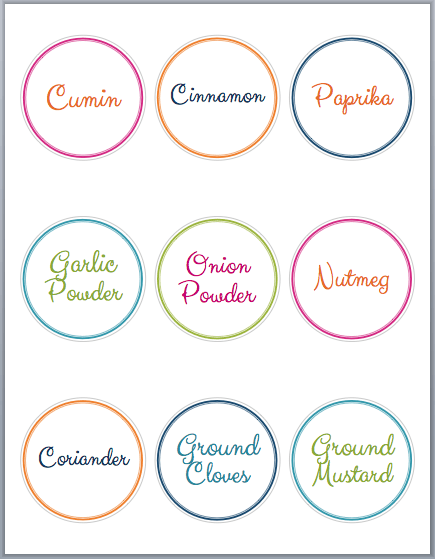
Each packet includes several pages of pre-printed labels + a blank page where you can write in your own items.
And if you prefer to create your own labels, you can use my tutorial for making labels in Microsoft Word to help you! (I used this template for the pantry labels above.)
Kitchen Pantry Organization: Frequently Asked Questions
Want to save this post to revisit later? Be sure to pin the image below so you can find it easily!
[Psssttt… We also have a post with our 100 best home organization tips and tricks here!]
Happy organizing, friends!
Have you attempted to organize a kitchen pantry lately? What are your best tips and tricks?

This post contains affiliate links. For more information, see my disclosures here.
I love your little GIF! Look at your go. 🙂 Great post! I really should do something about my spices! Ha. 😉
Wow, what a gorgeous space! Now I’m inspired to re-do mine!
That animated GIF is TOO cool, Abby! Wow, this is just amazing. I love it!
Carrie
curlycraftymom.com
This looks so great! I love the aqua labels! and that everything is in it’s own container–even the canola oil!! This is always something that I want to do, I even have purchased the containers, but for some reason I never get around to doing it! great post!
Abby I absolutely adore your “after” pantry! Sadly none of the places I’ve lived in since I moved out of my parents rooms long ago have ever had a pantry. “Someday” when we buy our own house that is a definite must have. For now, I’m going to have to steal your idea and use my ever handy Silhouette to label some containers. Thanks for inspiring me today!! I needed it
Do you have a floorpan somewhere? How close is the pantry to the kitchen? I assumed a coat closet is near the entry and the kitchen isn’t typically in the front of a house?
Great question! I should draw up a floorplan at some point, but our kitchen is in the front of our house and is one big space with the entry now that we removed a half wall that used to be there. You can kind of see how they are connected in this post: https://justagirlandherblog.com/our-kitchen-renovation-plan/ . The entry closet takes about three more steps to get to than our previous pantry. We are in a townhouse, so the layout is a little different than what a single family home would be. I hope this helps! Have a wonderful weekend!
~Abby =)
Makes perfect sense! Thanks!! We are also in a townhouse which is why I love reading your stuff 🙂 ours is like in the middle of our house. Our pantry backs up to our coat closet. I figured you wouldn’t make it half way across the house but I just was curious. Thanks!
I love your new pantry! My husband would absolutely drool over all the organization. I swear, his favorite place is The Container Store. I’ll have to pass this along his way. :o) Thanks for the cute printable!
You did a wonderful job with your new pantry! I like what you did with the shelving. The containers with the aqua labels look great!
Once again I love the organization and once again I find myself to be jealous of your finished project. This time it is the new pantry instead of the new laundry room. Only jealous in the nicest way! Both of these renos are in my “doable” range and I can’t wait to give them a try!
What a difference a little (or a lot) of organization makes! It looks fab and your labels are darling! Thanks for linking up to the Pretty Preppy Party with us! xx, b
Love how you organized your kitchen pantry! So neat and tidy 🙂
The matching containers, jars and text really stand out! Do you also jot down the expiry date? Sometimes we tend to keep the food/spices for too long…
I’m totally inspired!! I am constantly rethinking and reorganizing my pantry. I also have the same exact vacuum – lol!! Thanks for sharing the printables and info!
I seriously cannot get over how amazing your blog is! I just happened to run into a link on Pinterest that led me here and I am hooked! In the beginning of October I got married and moved in with my now husband into our new townhouse so there was a lot of organizing and decorating to be done. This pantry post is exactly what I’ve been looking for (my pantry is sadly quite ugly).
Congrats on all of your recent milestones, Natalie! So exciting! Best of luck with getting organized!!
~Abby =)
Amazing storing ideas! I try to improve the organization in my home and the storing system. I am glad to find those ways. Best regards
Your pantry looks lovely. Creating a pretty and organized space makes everything look so much better. It’s pretty remarkable how, with a little planning and thought, great storage containers can bought without busting a budget.
I love the look of this! Love the blue vinyl too! My pantry is a mess, I think it’s time for an upgrade. 🙂
Love the pantry. I am a new reader and am loving your blog. Bummed that we don’t have an IKEA where I live.
Random question here–what type of Hoover vacuum is that? Is it good for tile/wood floors as well as carpet?
Hi, Barbara! We have this vacuum: https://www.amazon.com/Hoover-WindTunnel-Bagless-Upright-UH70120/dp/B002HFDLCK/ref=sr_1_1?s=vacuums&ie=UTF8&qid=1456860733&sr=1-1&keywords=hoover+vacuum and it has been working well for us for almost 10 years now, both on our laminate wood flooring and on carpet!
~Abby =)
How are the shelves doing now with holding up your mixer and smaller appliances? My pantry is almost done being built and I am trying to decide on shelves, so I am wondering how the pressed board is doing and if it is bowing at all with the weight? BTW, this looks amazing and I can’t wait to use some of your ideas in mine!!!
They have been great! They’re really strong– not bowing at all. We’ve used the ALGOT system in 3 closets in our house now and absolutely love it!
~Abby =)
I was wondering if the larger containers are able to hold a full bag of flour or sugar, etc…? I have the smaller ones and I love them, but I was wondering about the capacity and usefulness of the larger ones.
Your pantry looks beautiful!!
Thank you, Carrie! I am trying to remember, but I think I had less than a full bag when I transferred the flour and sugar to the containers. I’m not a huge baker, so I don’t keep a ton of baking supplies on hand. I hope this helps!
~Abby =)
Can you tell me where you bought your stool & your oil bottles on the bottom shelf? I have been looking for weeks for spice organization. Thank you! This is the only organization I’ve found that I love. It’s exactly what I wanted! Which of the ALGOT shelves did you purchase for your pantry? There are so many different ones, I couldn’t really figure out which ones you used. Thanks in advance for everything! You have wonderful ideas!
Hi, Alissa! The stool is from Bed, Bath & Beyond years ago, so I’m not sure if they still carry the same one or not. The oil bottles are from IKEA. For the shelving, they show a grouping of the shelves online, but really at the store they are sold in individual pieces, so we just measured the closed and chose the uprights and shelves that would fit the space. Sorry I couldn’t be more exact! Hope you’re having a great day!
~Abby =)
Great organisation – well done! One tip for your spice rack – consider alphabetizing them to find the spice you want so much quicker! I know, I know, I’m OCD..! All the best, PJ
Love that idea!
~Abby =)
Fantastic web site you’ve here
WOW this is so beautiful! I need to do this ASAP!! Thanks for sharing 🙂
Aw, thanks so much, Driana! <3
~Abby =)
My New Years resolution this year is to get organized!! My pantry is my number one place to start. You have some great ideas. I just need to get rid of items that I have not used in the past year or more.
Hi Abby, I found your blog last light and fell in love! You’ve inspired me to finally organise our pantry. It’s always been wasted space but never knew what to do with it. Have you any advise for redesigning? The pantry is directly beneath the stairs so it has a slanted ceiling which I think could be a problem
Hi, Rebecca! That sounds like a neat space! You may have to get creative with the types of shelves and bins you use and where you choose to place items due to the slant, but the same basic organizing principles would apply. (You could even create your own shelves using basic brackets and boards from the home improvement store. This would give you more of the farmhouse look that is really in right now!) I hope this helps! Happy organizing!
~Abby =)
I love you labels! Can you share what font you used?
Thanks!
Aimee
Thank you, Aimee! The font is called Crushed. (http://www.1001freefonts.com/crushed.font) Have a great day!
~Abby =)
Hi Rebecca. I may have missed this in your description, but how deep are the shelves? Everything looks gorgeous BTW
Thank you, Lana! These are the shelves that are 15″ deep. They also have 7″ deep and 23″ deep options. 🙂 Have a great day!
~Abby =)
Hi Abby!
I LOVE your labels. I just bought OXO containers and reorganized my entire pantry but now I need to make the labels. I have a Cricut and have downloaded the font you used. Can you tell me what size you made your font? Just trying to get the look you made. Like for example how did you do your powdered sugar label? And I am guessing you changed your line spacing between the 2 words? Thanks so much!
Hi, Stacy! For the pantry labels, I chose the font size based on how long I wanted each word to be. (In my case, I wanted each word to be about 2.25″ long.) So for “Powdered Sugar,” I did each word separately. “Powdered” was about a 45 pt font size, and “Sugar” was about a 75 pt font size. I hope this helps!
Would you please list the IKEA part numbers for the 3 different sizes of storage containers or least the sizes.
I cannot seem to find all three on the Ikea website.
Thank you!
Hi, Mary! The largest container is 2 qt and the article number is 900.667.08. The medium sized container is 44 oz. and the article number is 800.667.23. I am not currently seeing the smallest size that I used on IKEA’s website. Sorry about that! Have a great weekend!