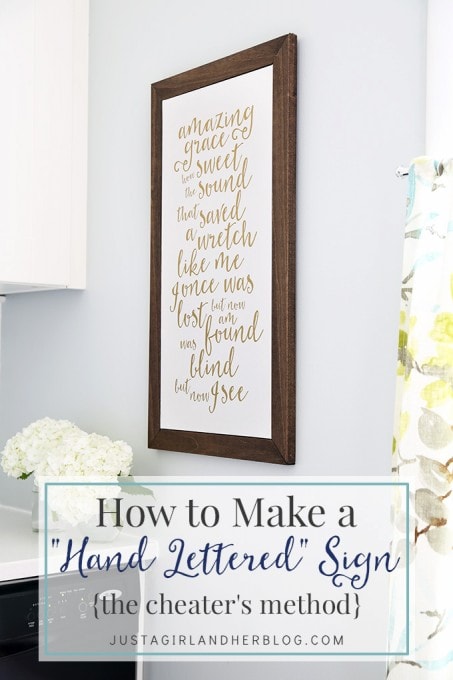
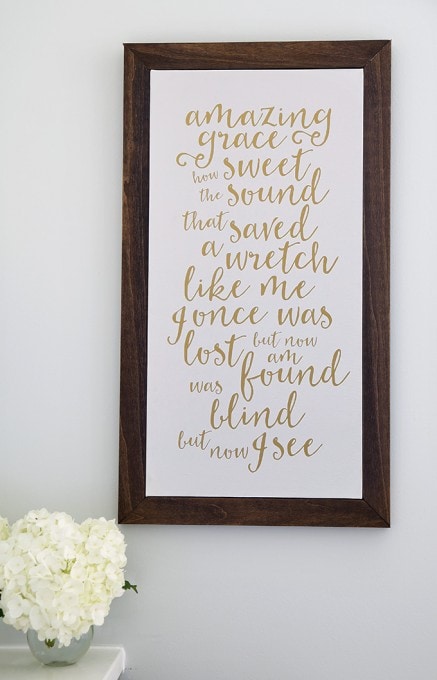
How to Make a “Hand Lettered” Sign {The Cheater’s Method}
For quite a while now I’ve been pinning and admiring and fawning over hand lettered signs. You know those ones by House of Belonging and Lindsay Letters that always look so incredible? Yes, those. Recently, my amazingly talented friends Rachel and April even made their own versions, and I was so in awe of their talents! The DIY-loving side of me wanted to try hand lettering for myself, but the realistic side of me said, “Abby, you know you are not patient or detailed enough for that.” It was like having a little angel on one shoulder and a devil on the other, with one telling me to go for it and the other warning me that it would just turn out miserably. 😉
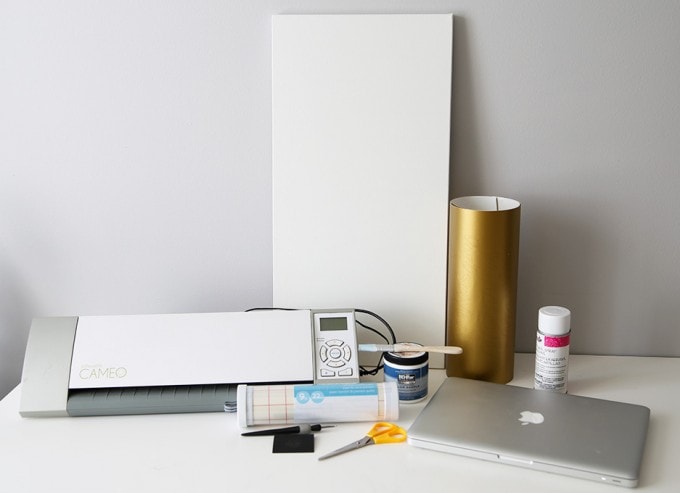
I really wanted a beautiful sign of my own, but realizing the whole hand lettering thing probably wasn’t going to happen for me, I did what any sensible blogger would do: I cheated. 🙂 And by cheated I mean that I pulled out my Silhouette machine and had it do my “hand lettering” for me. Here’s what I used to make this project:
This list contains affiliate links. For more information, see my disclosures here.
- Silhouette Cameo
- 12″ x 24″ Canvas
- Gold Adhesive Vinyl
- White Paint {I used Behr’s Arcade White.} + Paint Brush
- Transfer Paper
- Hook Tool
- Scraper Tool
- Scissors
- Spray Adhesive
- Computer with Silhouette Design Studio Software
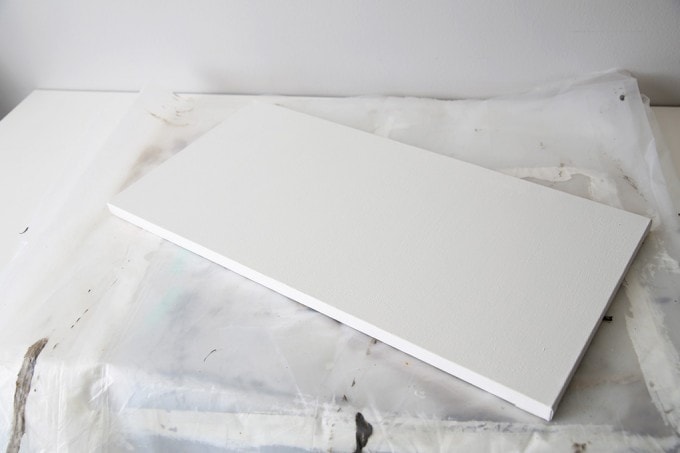
I began by giving my canvas a few coats of white paint. I think it ends up looking more polished when the canvas is painted white; some people would probably argue that it makes no difference. Feel free to choose your favorite method. 🙂
While the paint was drying, I created my design in the Silhouette Studio Software. I used a font called Sugarbush and just moved the words around until it looked right to me. If you would like to use my design for personal use, you can download the Studio file here.
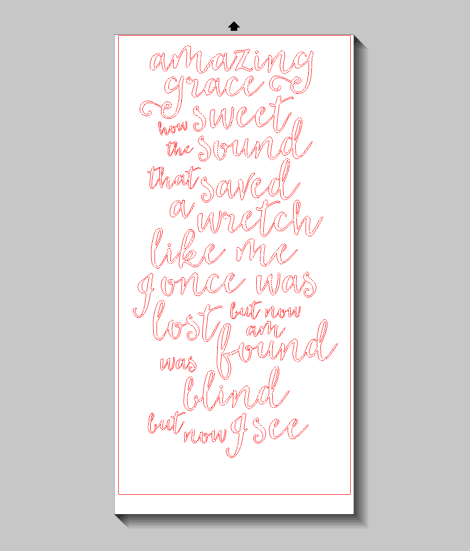
Tip: If you’re creating your own design in Silhouette Studio and using a cursive font, be sure to “weld” each word so that your machine cuts it as one word and not a bunch of individual letters. To do this, right click on the word and choose the “weld” option. Then I usually right click again and choose “group” so that I can still move my word around the page if I need to.
Next I had my machine cut my design for me, and I weeded away the excess vinyl. (I used the recommend Silhouette settings for vinyl of blade 1, speed 5, thickness 10. I also loaded my vinyl directly into the machine rather than using a cutting mat so that I could cut a longer length.)
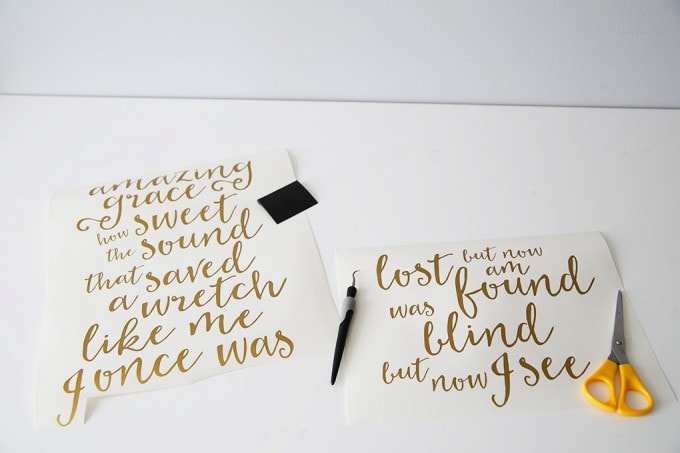
My original plan was to cut this all as one piece, but I had a slight snafu with the machine in the middle of cutting and ended up with two pieces, which still worked out just fine. Now that I had my words ready to go, it was time to transfer them to the canvas.
I once learned the hard way that adhesive vinyl doesn’t stick to canvas extremely well on its own, so I sprayed the canvas with a spray adhesive and let it dry for a few minutes before I started to add my wording.
Tip: Always be sure to have something underneath your canvas when you spray it. There will be overspray, and the spray adhesive sticks around and stays gummy for a *long* time. {Not that I know that from personal experience or anything… 😉 }
While the spray adhesive was getting nice and tacky for me, I cut a piece of transfer paper to fit my larger group of wording, aligned it carefully over the words, and used my scraper tool to press it down. If you’ve never used transfer paper before, it is sticky on the back, so when you press it down on your wording, the words stick to it, allowing you to move them to the canvas as a group, rather than you having to move one word or letter at a time and worry about placing them in a straight line.

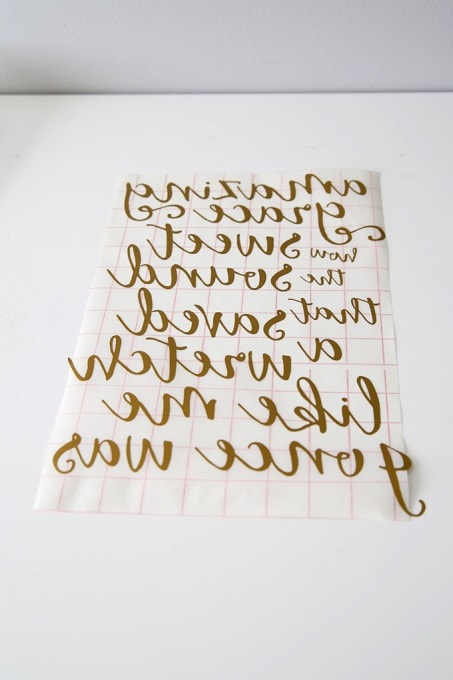
I peeled the backing off the adhesive vinyl so that my letters looked backward on the transfer paper…
…and then carefully placed my wording where I wanted it on the canvas and used my scraper tool to press everything down firmly. {I am terrible and always just eyeball the placement rather than doing an official measurement… there’s that lack of patience thing again. Oops!}
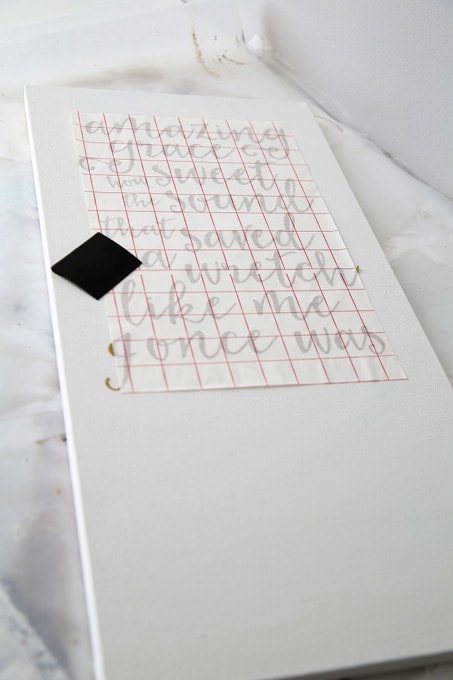
I then carefully peeled away the transfer paper {It sometimes wants to stick because of the spray adhesive. If you go slowly and press down the letters that want to stay stuck to the transfer paper, it will come up for you!} and then repeated the transfer process with my second group of wording.
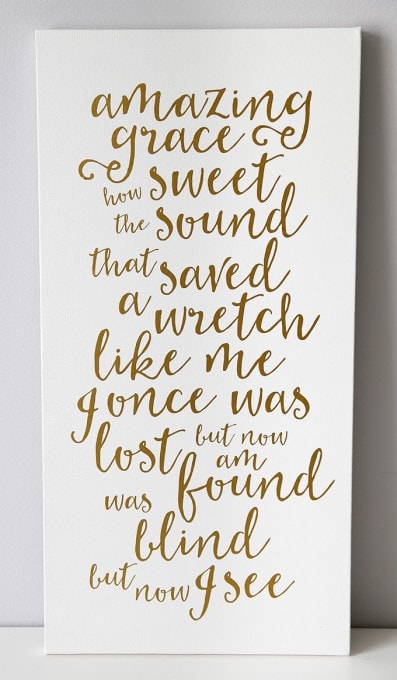
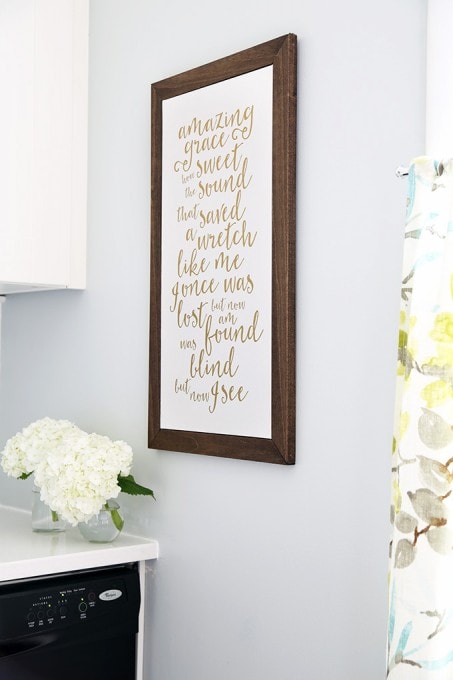
Yippee! I had Donnie make me a quick frame out of a 1×2, glued it to the canvas, and had my very own cheater’s version of “hand lettered” artwork! 🙂
It’s the first piece of art in our newly renovated kitchen!
I know many of you are way more patient and talented than I am, so if you’re looking to actually paint your canvas by hand, check out my friend Rachel’s awesome tutorial over at Maison de Pax, and feel free to use the PDF version of my design! {These would also work as prints!}
Have you ever done your own hand lettered art? I’d love to hear your tips in the comments! Have a wonderful day!

Great. Now I want to go out and buy a Cameo. Or maybe I will stalk people shopping in the Cameo aisle at JoAnn’s and befriend them. 😉
Looks awesome!
Your sign looks amazing! I need to get one of those machines!!! ASAP! 😉
That looks really hard, but you did such a nice job. It turned out so well.
It looks beautiful!! I have a few blank canvas at home and will definitely try this!!
One question though, does the stickiness from the spray adhesive go away? If it doesn’t, do you think a clear coat will help seal it? Thanks a bunch for the tutorial!!
This turned out amazing!! I have been putting off getting a Cameo for so long… always wondering if I’d actually use it. But I think it’s about time, I need to be able to make this 🙂
Oh I love this! I have never made any cut outs with my Silhouette this large yet but I am so excited to try it out 😀
I am still learning tips and tricks on my Silhouette machine, but it is good to know that vinyl doesn’t adhere to canvas very well and that spray mount helps it stick! So glad I know this beforehand! lol! It turned out so nice!
Carrie
curlycraftymom.com
I love this! I also have been admiring signs and pinning a lot on pinterest. lol.
It turned out great Abby!
It looks amazing! You did a great job.
This is great! There’s a print from Hobby Lobby that I’ve been eyeing but just can’t seem to pocket out $40 for. I think I will try to recreate it myself with my cameo! Thanks for sharing!
I love my Silhouette Cameo. It does so much more than cut vinyl. I’m really tempted to buy the new one they have out.
Love your tutorial…thanks for the inspiration!
Hi, Abby ~ Long time no “see!” ;0) It’s been crazy busy around here…I put in an order for things to slow down once school started, but clearly no dice! I LOVE this method for hand lettering! I’m not nearly patient enough to do it by hand, but I’ve also been pinning the “real” ones like crazy. So, I’m super excited to try this method (once I save a few more pennies for my very own Silhouette…almost there!). I also love the frame that Donnie made for it. I don’t know why, but the thought of making a frame completely freaks out my DIY brain. I’d love to see a tutorial on that! Hope you and your family are doing well!
So glad I’m not the only one who feels like things have been crazy lately! It’s actually become a running joke in our house. Donnie and I keep saying to each other “Next week will be back to normal…” and it never happens! Oh well! We’ll embrace it, I guess! Thank you for your encouraging comments, Tiffany! You always make my day!
~Abby =)
This is a great tutorial! Now I feel like getting a Cameo machine right now 🙂
Gorgeous! Thanks for sharing the scary adhesive trick! I always hated how vinyl didn’t stick to canvas! And yeahhhhh I may have a few Lindsay Letters in the my house. 🙂
SCARY adhesive?! Really? Haha! That should say SPRAY ADHESIVE! LOL
This looks so pretty! Definitely pinning and adding to my to-do list. Does the spray adhesive dry fine on the canvas? I’d be worried that the canvas would be sticky where the letters don’t cover the spray up.
When I downloaded the sil file, the “a” and “i” by themselves are a different font. Did I do something wrong?
Hi, Alecia! So sorry about that! I just opened it on my computer and it looked normal, so I’m not sure what’s going on! I just tried re-uploading the file, so maybe try to download again and see if it works? I apologize for the inconvenience. Have a wonderful week!
~Abby =)
Thank you so much for this tutorial, your finished canvas is lovely! Would you tell me where you found the Sugarbush font? Is it a free or purchased font? Thank you!!
Thank you so much, Mindy! I purchased Sugarbush from Creative Market (https://creativemarket.com/). Hope you have a wonderful week!
~Abby =)
And I just found this shout out, too! You are the best, friend. Clearly I need to read your posts more carefully. 😉
How do I turn a design I create in Studio into a PDF so that I can print it at Staples?
Hi, Vicki! My friend Melissa at Silhouette School Blog has a great tutorial on this here: https://www.silhouetteschoolblog.com/2014/08/converting-silhouette-studio-files-to.html .
Have a great day!
~Abby =)
Does the adhesive spray leave the canvas sticky long term? Or once it dries, it is no longer sticky?
As long as you do a super light coat, it dries and will not be sticky long term. On the first one I did, I accidentally used too much adhesive in a few spots and it stayed sticky longer, so you definitely just want a quick, light coat.
~Abby =)
I’m trying to decide what to buy a Silhouette CAMEO Vinyl Starter Kit Bundle with PixScan Cutting Mat, or aSilhouette America CAMEO-3-AMAZON-BDL-3 Touch Screen, Bluetooth, Vinyl Starter Kit with PixScan Cutting Mat. Advise? Kim
I haven’t used the Cameo 3, but I love my older Cameo. The newer version definitely has more bells and whistles, so it depends on how you think you’ll use it. Melissa from Silhoutte School has tons of info about both versions on her site: https://www.silhouetteschoolblog.com/ . Have a great day, Kim!
~Abby =)
I’m trying to make the same kind of decision! I want a cameo 3 but Ann concerned about some of the reviews I’ve read. What did you end up getting?
I have been trying to do something like this for a while but haven’t been able to your instructions are fantastic you don’t leave any steps out and you explain everything clearly. Also it is beautiful.
Yay! So glad it was helpful for you, DJ!
~Abby =)
what size font did you use in your hand lettered sign?
Also are you planning on doing any 3D boxes or cards with the silhouette cameo?
Hi, DJ! Most of the lettering is 250 pt font, and then I would make certain words smaller to help them fit better into the design. Have a great day!
~Abby =)
This is great! Would I be able to do this with my Cricut mini?
I’ve never used a Cricut mini, but I can’t see why not!
~Abby =)
What font did you use for the welcome sign.
I love all your information.
Im learning so much from you.
I don’t have a machine yet.
Thank you
Hi, Cindie! The font is called Playfair Display. I’m so glad the tutorials have been helpful! Hope you’re having a great week!
~Abby =)
Abby, I absolutely love this! I would happily buy one if you make any to sell:) Do let me know if you do offer any to sell!