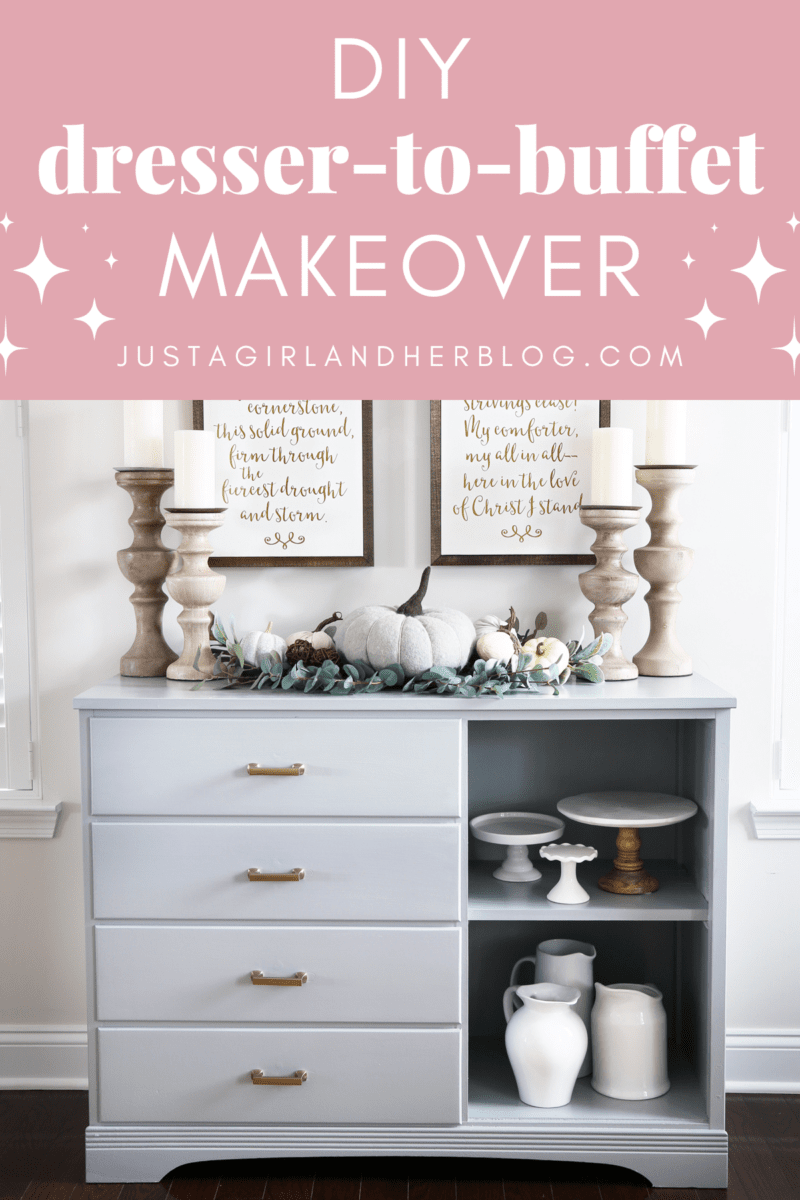
DIY Dresser to Sideboard Buffet Makeover
We turned an old dresser into the perfect sideboard buffet for our dining room in this simple painted furniture makeover!
Ever since we moved into our house, I have been on the hunt for a sideboard / buffet for our dining room. The space under the canvases on the far wall always looked so bare to me, and I just knew that it needed a little something.

The problem was, the space between the windows was a weird size. It was too small for most traditional buffet pieces that I was coming across, but too wide for more of a vertical “cabinet” type piece.
Along with the size issue, I was being kind of picky about what I wanted out of the cabinet. I wanted some hidden storage (preferably drawers) where I could store table linens like napkins, tablecloths, and runners, so the cabinet couldn’t have all glass fronts. But I also thought it would be fun to have a little bit of open shelving where I could create a little display, and the combination was tough to come by.
Finding the Perfect “Sideboard”
As I looked at hundreds and hundreds of sideboards over the past year, none of them seemed to be exactly right. It was getting to the point where I thought I might never find the perfect piece for that space. But then one day I was putting away my boys’ clothes in their room and started eyeing their dresser…
I grabbed a measuring tape and took measurements, and sure enough it was the exact dimensions that I had been looking for, for over a year. And it had the drawer space I wanted. Maybe there was even a way to create an open shelf. And it had been sitting there in front of my face the whole time!
Go figure.
Since the dresser was a little small for the boys to be sharing, I convinced Donnie that we should get them a bigger dresser, and I stole the old one for the dining room!
DIY Dresser to Sideboard Buffet Makeover
This post contains affiliate links. For more information, see my disclosures here.
Painting a piece of furniture is a fantastic way to give it new life. It saves money and keeps an older piece from going to waste as well, so it really is a win-win. And it’s a simple, straightforward project too!
Here are the steps I completed to turn my boys’ bedroom dresser into a sleek and stylish dining room sideboard…
Supplies you’ll need
1. Prep the furniture by sanding.
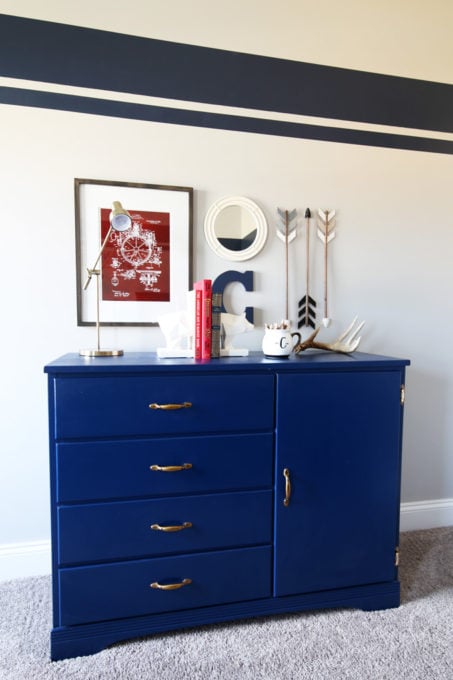
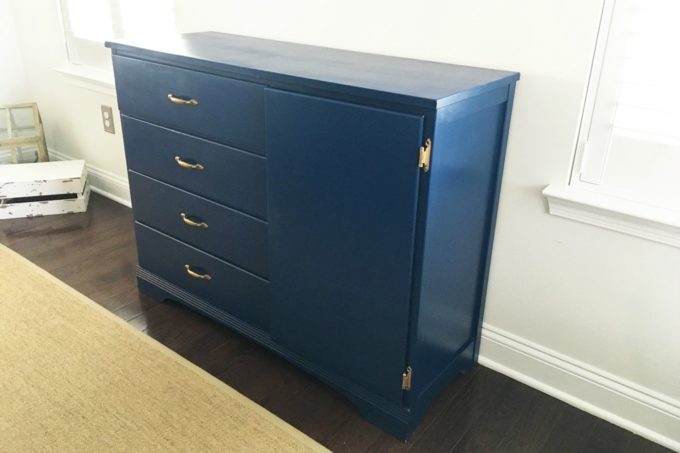
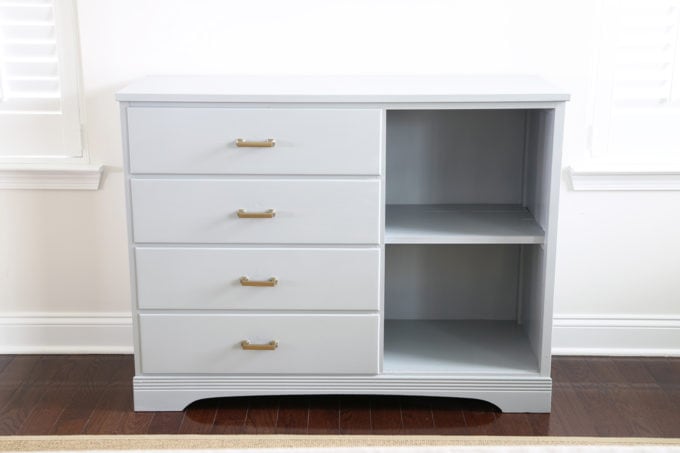
I loved the blue color of this piece when it was a dresser for the boys’ room, but in the dining room, it wasn’t a great fit, so I knew I wanted to paint it. I used Donnie’s sander to rough up the shiny finish a bit first so that the paint would have a solid surface to adhere to.
Since this piece had already been painted, I didn’t need to use a primer. If you’re working with unpainted wood, a primer may be a good idea to give you a smooth base and help hide some of the knots and grain in the wood. And if your surface is laminate or another slippery material, you’ll want a heavy duty primer like Zinsser or Kilz.
After sanding, I wiped down the entire piece with a cloth, water, and some mild soap to get ride of any dust or grime. I wanted to make sure I ended up with a nice, smooth surface!
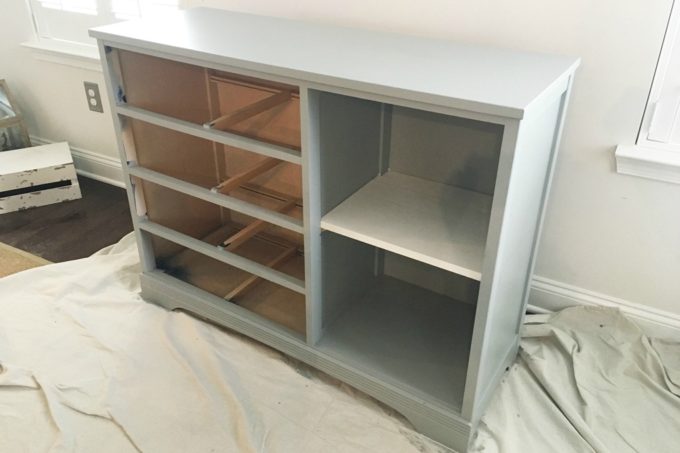
2. Paint the sideboard.
We had just painted Donnie’s office a beautiful gray color called Chain Reaction by Behr and we still had some paint left over, so I just decided to use that for this piece.
I used an angled paint brush to cut in on any corners or small details of the sideboard. But for all of the flat surfaces I used a small foam paint roller to apply the paint in order to achieve a smoother finish with no brush strokes.
3. Tweak the piece to fit your purpose.
Just because a piece of furniture starts out one way, doesn’t mean it has to stay that way! We can always tweak our piece and add to it to make it fit our needs.
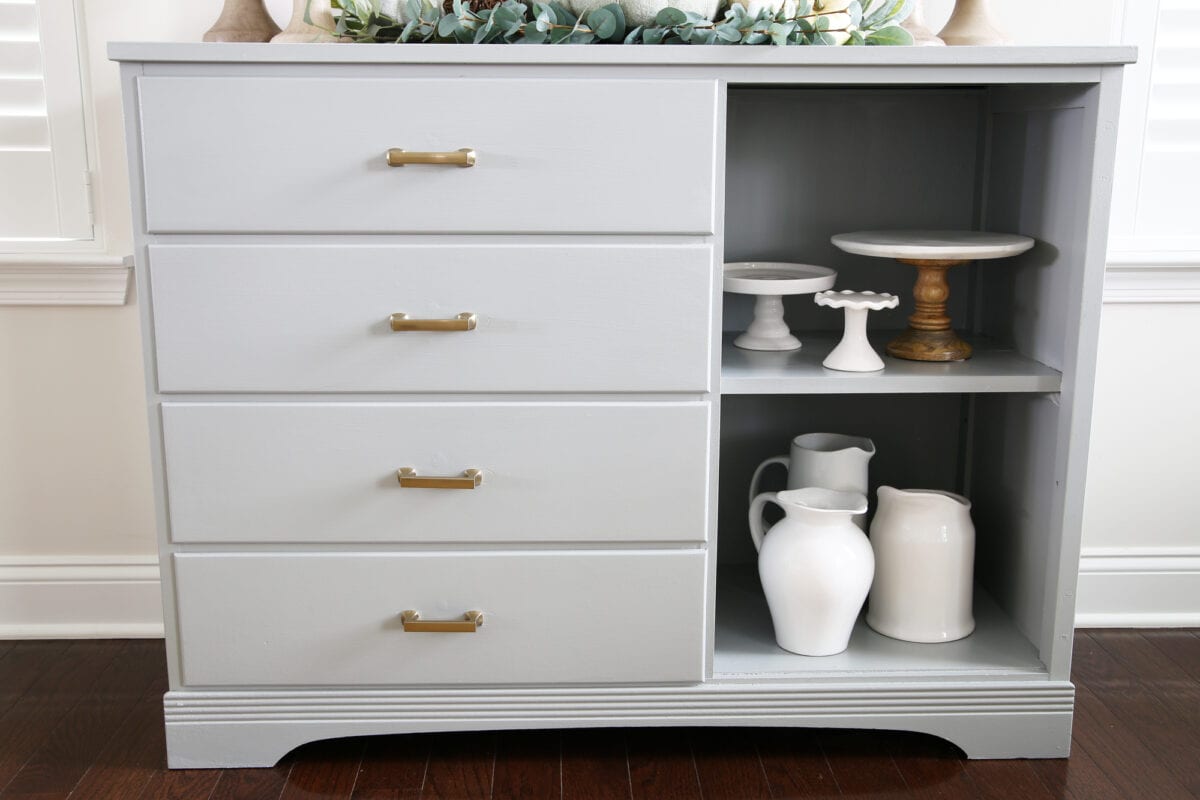
I love styling shelves, so a display area was on my list for this piece. We removed the door on the cabinet part of the dresser and decided to add a shelf instead.
The shelf, which I thought was going to be really simple, actually ended up being a bit tricky. This dresser was a thrift store find, so it is older and doesn’t have perfect angles. When Donnie first cut a board for the shelf that he thought would work, we realized that the spot was sort of warped. It was narrower in the back than it was in the front.
The easiest solution he found was to use a few trim pieces we had leftover from the trim work in our kitchen and put them together to create the shelf. This way, he could make them each the correct length we needed for the different sizes within the space.
After a lot of measuring and trimming, we were able to create a shelf that fit perfectly and painted it to match the rest of the piece.
4. Seal the paint with polycrylic.
Once the piece had been painted, I wanted to be sure the paint would last without chips and scratches if at all possible. The best way I’ve found to do this is to seal the paint with a few clear coats of polycrylic.
Following the directions on the can, I waited 24+ hours for my paint to dry. Then I brushed on a coat of the polycrylic. After 2+ hours, I sanded lightly with 220 grit sandpaper, wiped down my piece, and added one more coat of the poly.
The directions say to wait at least 3 hours before working with the piece after the final coat of polycrylic goes on, but I let it sit overnight just in case!
I was then able to add the new hardware as well.
When I was positive that everything had cured and the new pulls were in place, it was time to…
5. Style the sideboard.
The sideboard was looking pretty good, but it really shined when I added some pieces to style it…
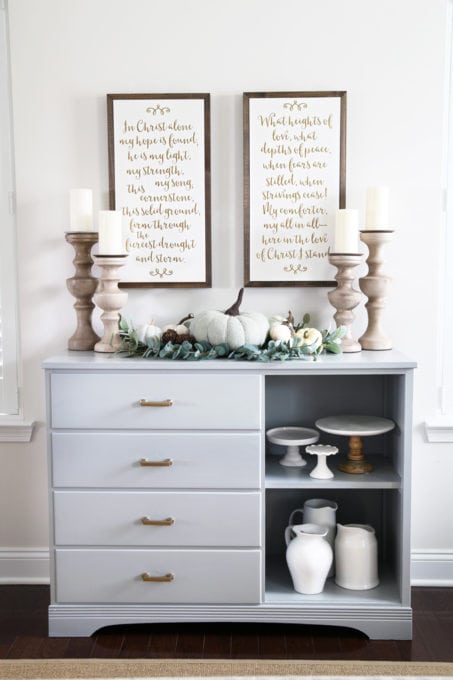
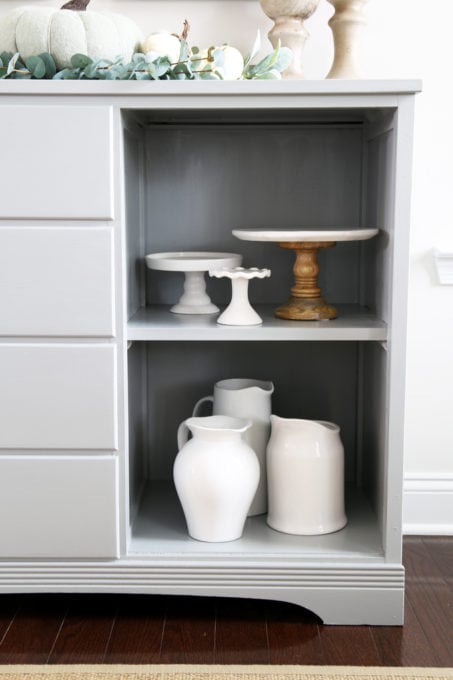
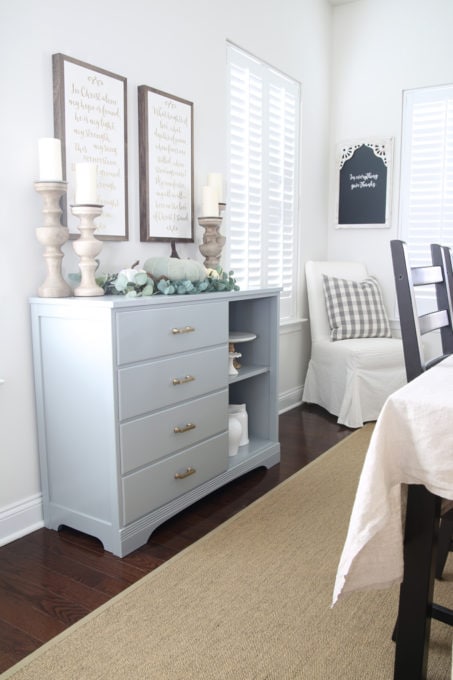
I always love when a piece is really functional for storage but also can be a beautiful display at the same time!

The new shelf and display area ended up being the perfect spot to house a few small “collections”– cake stands and a couple of pitchers that I usually use as vases.
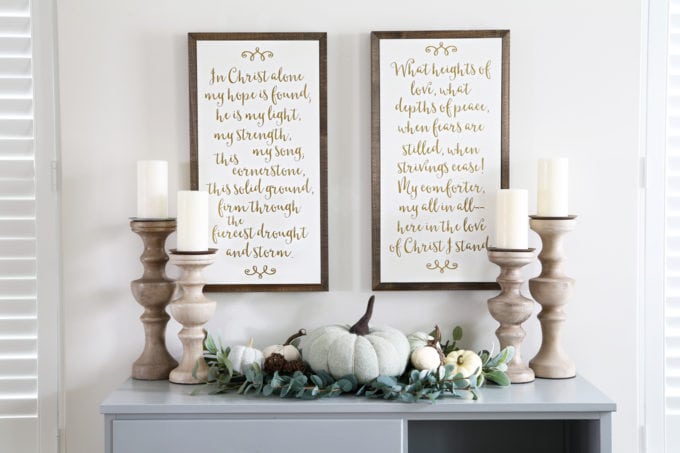
With a cute fall centerpiece on the top, the sideboard became even more of a statement piece in the room!
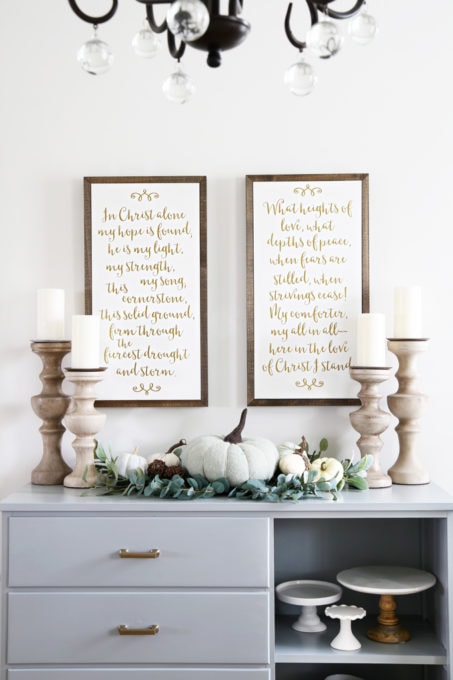
I am always on the lookout for inexpensive greenery because it makes it really easy to pull together a quick (and pretty!) centerpiece! Target’s Dollar spot will have faux greenery from time to time, and Michael’s and Hobby Lobby both have their greenery at 50% off (or more) sometimes, so I always stock up then.
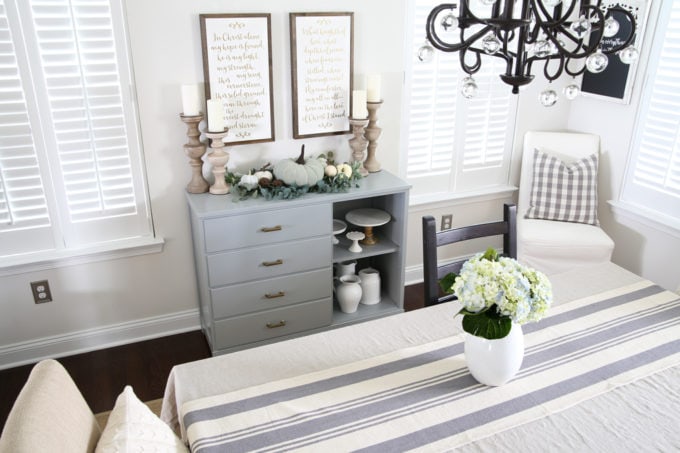
(These canvases were another DIY. I made them with the same method I used in this tutorial.)
I love the addition of this piece to our dining room! It definitely makes the room feel less empty and more welcoming. We still have several more projects to do in this space before we call it “finished,” but we are well on our way!
Let’s take a peek at the before and after…
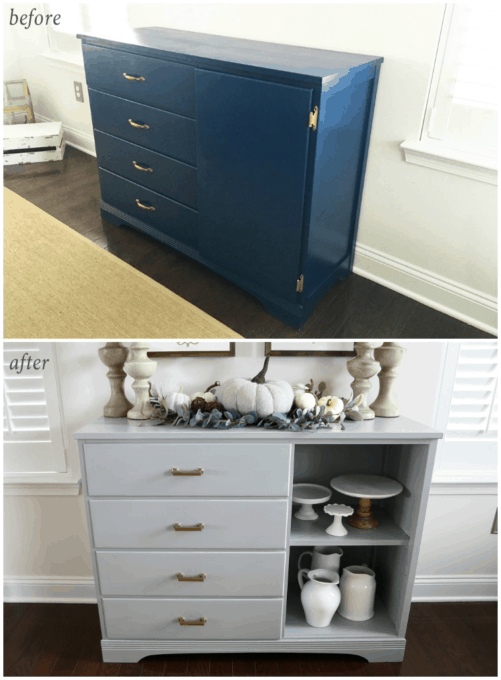
I liked this piece as a dresser in the boys’ room, but I also love that with a few tweaks, it can work well as a sideboard too! I spent about $16 on the hardware, but other than that, I used items I had on hand, so it was a really inexpensive project as well! Win!
DIY Sideboard: Frequently Asked Questions
Want to save this post to revisit later? Be sure to pin the image below so you can find it easily!
Have you done any fun furniture makeovers recently? I’d love to hear about them in the comments!
Thank you so much for following along! Have a great day!

This post contains affiliate links. For more information, see my disclosures here.

I love this, but I am even more drawn to the song lyrics in the wall art Did you make that, too?
I did! I made them the same way as I made the sign in this tutorial: https://justagirlandherblog.com/how-to-make-a-hand-lettered-sign/ . Thank you for your sweet words, Karen! Have a great day!
~Abby =)
Great new addition to your dining room, Abby! Way to shop your home! I myself have the double dresser from my parents’ first bedroom suite in the ’60s in my living room as a credenza. It is mid-century modern in design and all I did was repaint it as it was in very rough shape. I love it and it has so much storage in it. BTW, can I just say that I LOVE YOUR BLOG!!!
Aw, thanks so much, Gwynne! You’re too sweet! Repurposing is the best, isn’t it? It makes me feel so accomplished! 🙂 Have a great week!
~Abby =)
This ROCKS, Abby! So perfect! I love the combination of storage and decor shelving… and you styled it SO nice!
On a side note, my daughter is choreographing a piece to “In Christ Alone” for the finale to their Christmas ballet performance called “The Gift” (think the Nativity in Nutcracker fashion). The finale is always something that is looked forward, too… and this will be no exception. 🙂 (Travis Cottrell version)
Oh, that is so awesome! It is such a beautiful song! Have a wonderful week, Julie! <3
~Abby =)
Abby,
I loved that you repurposed something. It is funny how the best tools are already there. What a terrific idea. It looks great. I always enjoy your posts!!!
Thanks so much, Beth! I was really excited with how it turned out! 🙂 Happy Monday!
~Abby =)
This is re-purposing at it;s finest! I loved how it looked in the boy’s room (I just love that room-period!), but it fits in beautifully in the dining room ! And who doesn’t need more storage in the dining room? Thank you for walking us through the step-by-step — I will pin this for future reference when I am working on a project like this one!
Yes! The added storage has been awesome! Thanks so much and have a wonderful week, Kristine! <3
~Abby =)
where did you purchase your chandelier
It is from Overstock! 🙂
~Abby =)
My parents found an old kids ikea table at a flea market for a few bucks and gave it to my daughter. It was an ugly boys blue color. I painted the chairs and legs of the table teal and the tabletop chalkboard black. She looooves it! It also fits in with the rest of our house decor so I love it.
So awesome! Love simple projects that make a huge impact! 🙂
~Abby =)
It looks beautiful! It’s very clean, simple and classic. Who knew that your child’s dresser was just the ticket!? And I just love how you DIY-ed the framed lyrics to a hymn!!! Well done, Abby!
Thanks so much, Andrea! It was unexpected but so excited with how it turned out! 🙂 Hope you have an awesome week!
~Abby =)
Absolutely perfect!!!
Thanks so much, Kay! Happy Monday! <3
~Abby =)
I love the makeover! I can’t believe you guys even removed the door and turned it into an open shelf! So gorgeous. It appears like Donny is super handy with those things. He made the deck table too, didn’t he?
He is super handy which is amazing! He did build the deck table which is definitely one of my favorites of his projects. 🙂 Have a great week, Isabel!
~Abby =)
I love it and now this will be what I am going to do for my dining room too. I will look for a dresser that has the right size drawers for placemats and table cloths, napkins etc and some open display area and as I have picture on the wall I need one that is no higher than the dining room chairs height. When my granddaughters outgrow the table and chair set then I will use that area for a new buffet. Thanks for the idea.
So glad it was helpful for you, Hollea! Happy hunting! 🙂
~Abby =)
I love seeing this piece repurposed, again, and looking more stunning with each iteration. I’m so jealous of your vision and am smitten with everything you’ve done to the house! <3
Aw, thanks so much, Erin! You’re too sweet! Hope you have an awesome week! <3
~Abby =)
Hello, Abby!
Thank you very much for sharing this DIY Sideboard Buffet! We’ve been having space issues as well, so this is definitely a big help for our planned room renovation soon!
Regards,
Sam
So glad it was helpful, Sam! Have a great weekend!
~Abby =)
Your solution and upcycle was perfect for your space and you styled it so nicely. I have an old buffet (all drawers cuupboard doors) at the foot of my king sized bed for extra storage the room needs. The bench I had there before was kinda stylish but absolutely useless. Storage space is a good thing!
It really is! Thanks so much, Kathy! Have a wonderful week! <3
~Abby =)