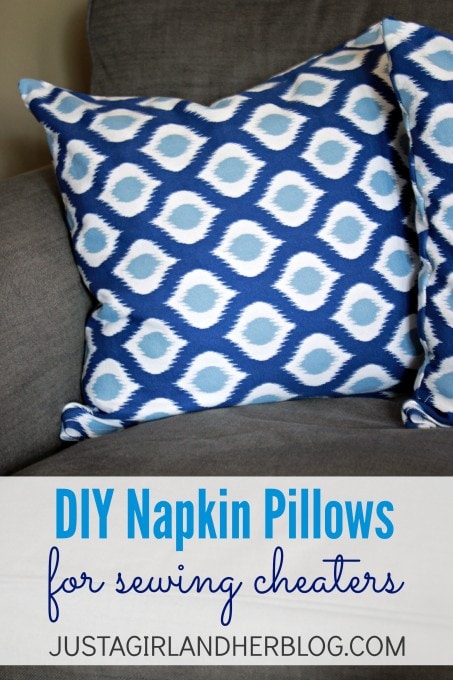
DIY Napkin Pillows for Sewing Cheaters {like me!}
Y’all, it has been one rough week here in the Just a Girl and Her Blog household. I have been flat on my back sick for the past several days, and when mama’s sick, the whole house goes haywire! Not only am I behind on blog posts and answering comments, I am behind on cleaning, cooking, projects, laundry, dishes, and the Cs have watched more TV in the past week than they really should have for a whole month. Ugh. Fortunately, I finally seem to be on the mend, so back to blogging (and cleaning) it is!
Now, if you’ve spent much time on my blog, you know that I’m terrified of my sewing machine. Actually, most sewing machines are terrified of me as well. They tend to break as soon as I walk into the room because they know that if I touch them, they’re going to break anyway. 🙂 Every once in a while, though, I come across a project that involves sewing that I really want to do, so I brave the machine and go for it. If I can find any type of shortcut or easier way around things while I’m at it, you’d better believe I’m going to take it, and that’s what I did with today’s project. To make my napkin pillows, I used…
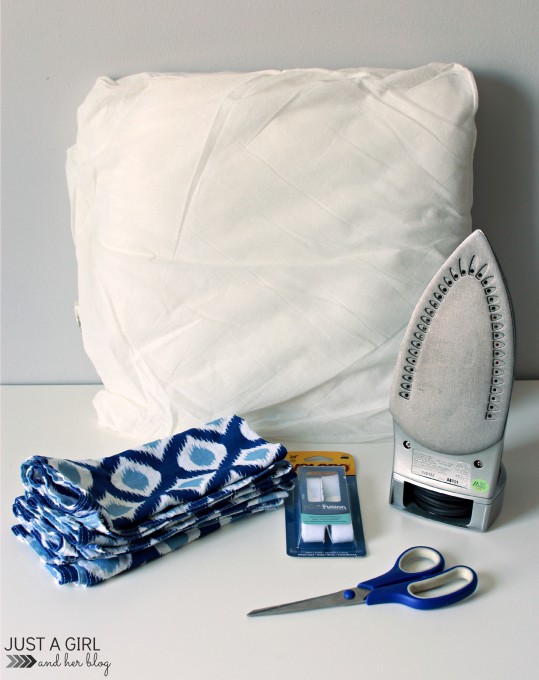
- a pillow form
- cloth napkins {found at TJ Maxx}
- Velcro Fabric Fusion Tape
{affiliate link}
- iron
- scissors
Not pictured:
- pins
- measuring tape
- sewing machine
So here was my conundrum… I had found these super cute napkins at TJ Maxx that just happened to be the perfect colors and pattern to match our living room. I really didn’t want to go through the hassle of cutting them up to create an envelope pillow, but I knew any pillow cover I made had to be able to be removed so I could wash it since the Cs will probably spill something on it the moment it hits the couch. Since I choose not sewing over sewing whenever possible, I decided to use velcro (the iron-on kind) to close up my pillows so I could meet my criteria of 1) not cutting the napkins and 2) sewing as little as possible. See, I told you I was a cheater. 😉
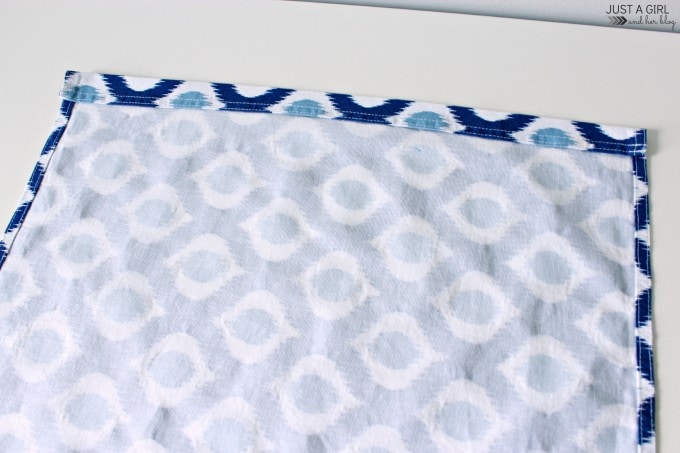
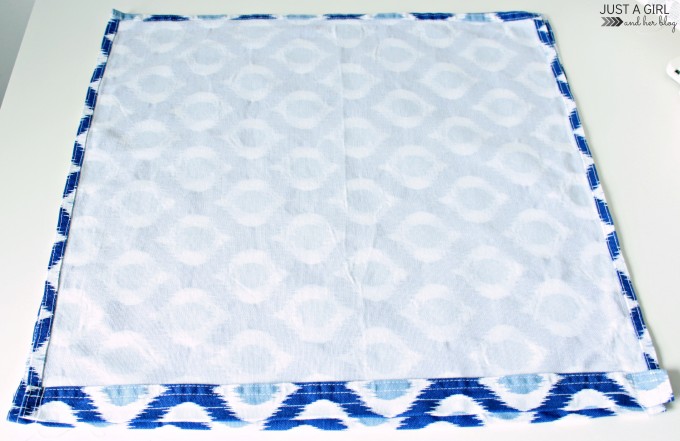
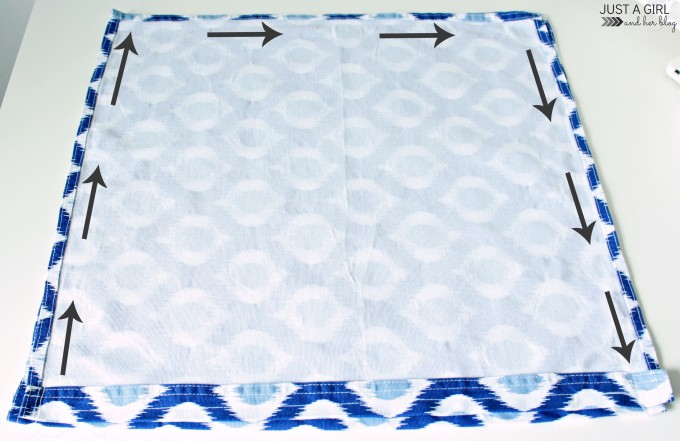
I started out by folding over a one-inch strip toward the back of my napkin, ironing it down, and then sewing straight across it to secure it. This is where my velcro will end up eventually. I did this with two napkins, which will end up being the two sides of my pillow cover.
Next, I put the two napkins together with the backside out, so the parts with the design were facing one another. {Be sure to line up the ends that were folded over an inch.} Measuring for the size of my pillow, I pinned the three sides that weren’t going to be velcro-ed together.
Then it was time to pull out the scary sewing machine. 🙂 I simply sewed a straight line around the three sides that I had just pinned, removing the pins as I went along, of course. And guess what– I didn’t even break the sewing machine! Victory!
Then it was velcro time! I followed the instructions on the package, adhering the velcro to my fabric, then flipping it over and ironing it in place for 90 seconds.
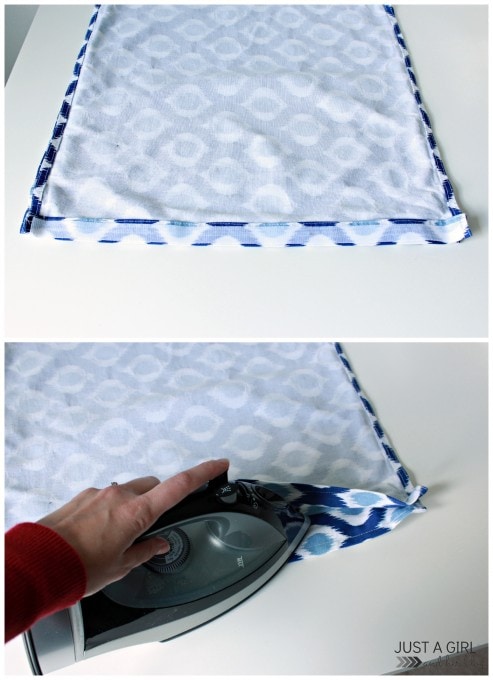
{Confession: that is actually me fake ironing because I didn’t trust myself to wield a hot iron and take a picture at the same time. 🙂 } Once both sides of my velcro were ironed on, I trimmed the top two corners…
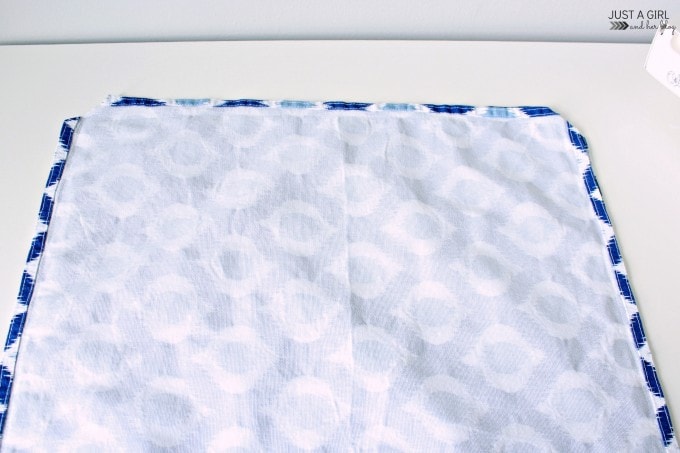
Then all I had to do was flip it right side out and stuff my pillow inside, and I was done!
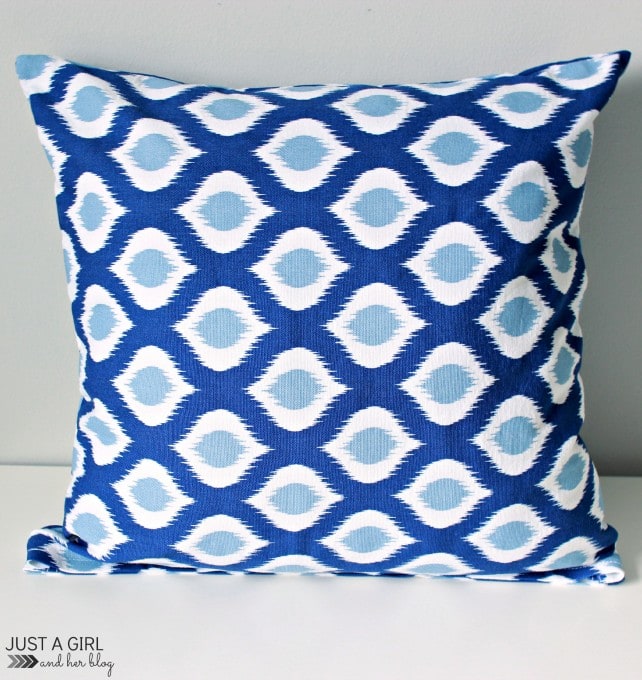
Not too bad for minimal sewing! I haven’t tried this method before, so I’ll have to keep you updated on how they hold up at the hands of the Cs, but for now they’re working out great!
I hope you have a wonderful weekend, friends!
Are you a sewing cheater? Or do you just go for it?
*This post contains an affiliate link. For more information, see my disclosures here.*
Very nice, Abby! I recently made a whole bunch of pillows for my living room’s new sofa in fun patterns and colors. But I didn’t use Velcro — I just stitched my fabric cover closed. I like your Velcro idea, since it will be easier to change out the pillow covers if you want something new!
I was very tempted to do them that way, Lauren! But I knew with the Cs around I’d need to be able to wash them often, lol. Have a great week!
~Abby =)
These are so cute! I can’t believe they are napkins!
Thank you, Shannah! I know I will be looking twice when I pass through the napkin section now, lol! Hope you have a wonderful week!
~Abby =)
These are so pretty!!! I too am scared of sewing machines, and couldn’t tell you the first thing on how to use one! This is a great alternative….you did an awesome job!!!
Thanks, Ally! I’m with you! I try to sew as little as necessary! 🙂 Hope you have a wonderful week!
~Abby =)
Love the pattern of the pillow. I bet it’ll look great on your couch.
Thank you, Julie! And happy belated birthday to you! I see you got some beautiful gifts! Have a great week!
~Abby =)
Thanks for the birthday wishes! Hope your week is great as well!
Girl… I’m a cheater too when it comes to sewing! Give me some fusible iron on tape ANYday! Thanks for reminding me to keep searching for cute napkins to make pillows with. I definitely need a few to spruce up my living room.
Hooray for fusible iron on tape! The person who invented it definitely deserves some sort of medal! 🙂 Happy pillow-making, Miss Ashley!
~Abby =)
I so love these Abby! I have a question though… why trim the two top corners? I’m confused. Maybe because it’s early and I don’t have enough coffee in my system yet lol.
Lol! Thanks, Renee! Great question! When I trim them, I can get them to be “pointy” when I turn the pillow right side out. If I don’t, they stay sort of rounded and don’t look as crisp. I hope that helps! Have a wonderful week!
~Abby =)
All I can picture is a hole in each corner lol!
You are cracking me up! I cut above where the thread is, so I’m just cutting off the extra fabric, none of my stitching. 🙂 I guess I should have explained that part a little more! Enjoy your day, Renee!
~Abby =)
I’m really intimidated by using the sewing machine too–this is the perfect project for me! I love how these pillows turned out! Pinning this and hopefully I’ll get to try this out soon!
I’m glad you’re feeling better!
I’m glad I’m not the only one, lol! Sewing scaredy cats, unite! 😉 Hope you’re enjoying your weekend, Carrie!
~Abby =)
They turned out so well Abby! How crazy brilliant is using Velcro!?! Love it!
Lol… one day I will be as talented as you and be able to whip out an envelope pillow in ten minutes. Until then, though, velcro is my bff! 😀 Enjoy your weekend, Krista!
~Abby =)
I imagine you are far better with a sewing machine than you let on. I would be sad if I did not posses my simple sewing machine skills. Me and my $50 Wal-Mart machine work wonders. I encourage newbies to go visit Joann Fabrics or the like for basic sew class sign up.
Thanks so much for the tips! 🙂 Hope you have a wonderful week!
~Abby =)