How to Install Under Cabinet Lighting in the Kitchen Using LED Light Strips
Learn how to install under cabinet lighting in the kitchen using LED light strips and get the gorgeous, high-end look you’ve been dreaming of!


We’ve been hard at work in the kitchen installing some beautiful under cabinet lighting! Finding the right light setup was more complicated than we expected, so we wrote a whole post about the important things to consider when choosing supplies. (I recommend reading that one first.)
Once we finally had all of the pieces we needed, it was time for installation! Since Donnie was the primary under cabinet lighting installer, I’m going to let him walk you through the process.

By far the hardest part of installing under cabinet lighting in the kitchen using LED light strips is buying the supplies. The actual installation is fairly straightforward, but the hard thing is that most kitchen setups and layouts are different. My installation will not match your installation perfectly, but hopefully this guide will help give you the confidence to tackle this project in your own kitchen.
7 Steps to Installing Under Cabinet Kitchen Lighting with LED Light Strips
This post contains affiliate links. For more information, see my disclosures here.
You can use the following links to skip to each step of the tutorial:
- Supplies
- 1- Prepare Your Area and Understand Your Layout
- 2- Understand How All of the LED Components Connect Together
- 3- Drill Necessary Holes
- 4- Cut Mounting Channels to Length
- 5- Cut and Connect LED Light Strips
- 6- Attach LED Strip Light Mounting Channels to Cabinets
- 7- Hide Cords on the Inside of the Cabinets
Supplies
We purchased our supplies from Flex Fire LEDs. I had a few questions about compatibility between light strips, connectors, and mounting channels and they helped me find the right product with their live chat feature. Here are the supplies we ended up using:
- Accent Series LED Strip Light (3000K color temperature, 24 volt input, 16 foot length)
- 2x LED Plug-in Power Supply Adapter (Added on the coaxial connector with screw terminal, 24 volt system; Note: We chose 24 watt size based on the length of our setup. This article can help you determine how many watts are needed for your specific project.)
- Single Color Solderless Grip Connectors
Note: We purchased C1 connectors with bare wire to connect the light strips to the power supply. In our situation, we had two outlets with two separate power supplies, so we needed two connectors with bare wire. It’s better to get the ones with 36” of wire because the length gives you more flexibility, and they can always be cut down.
The other connectors you need depend on your situation. We have wooden sections that divide the underside of our cabinets from one another, so I needed to bridge this gap with wire. The the pre-made jumper connectors with wire in between are 6” long which is a bit longer than I needed. Instead, I made jumper connectors out of C1 connectors with no wire and the extra wire from unused connectors and extra wire.
Sometimes it’s hard to envision exactly what connectors you will need. I thought I had a good idea in my mind, but once the project started I made some adjustments. Fortunately, connectors are very cheap, so it makes sense to by a variety and more than you need. - Gemini Mounting Channel Kit (mounting channel and frosted cover with accessory kit; Note: These mounting channels work well with the specific LED strips and connectors we chose. The frosted cover doesn’t change the color temperature of the lights, but it gives them a diffused look.)
- Drill
- Scissors
- Wire cutter and stripper
- Legrand wire hiders
- Scotch double sided mounting strips
Step 1: Prepare Your Area and Understand Your Layout
I knew going into this project that I would have two “sections” of LED lighting. The upper cabinet on the right side has a switch controlled outlet that was installed at our request by the builders.
The corner cabinet on the left side of the kitchen also has an outlet controlled by the same switch by the sink.

Abby created this mockup to show where the outlets are located within our kitchen cabinets.
If you don’t have outlets in your cabinets already, you may need to hire an electrician to install them before proceeding with the rest of this project.
In our house, the oven and microwave separates the two sections of cabinets. I decided not to try and bridge this gap but instead have two separate lines of LED lights. The need for a second transformer does add to the cost, but it’s minimal.
To begin the project, I unloaded everything from the two cabinets with the outlets.

Once everything was out, I could better envision where the transformer would plug in, where the wires would run, and what holes I would need to drill.
Step 2: Understand How All of the LED Components Connect Together
I have to admit that when ordering all the supplies for this project, I was still a bit confused about how everything fits together.
Once all the items arrived I laid them out on the counter to visually understand how they all work together.
The power supply plugs into the outlet. At the end of the power supply cord is a coaxial plug-in connector. This plugs into the separate connector with a coaxial connector on one end, and a screw terminal on the other end.
The screw terminals accept the two bare wires and then are tightened down to form a good connection.
The connector has bare wires on one end and then a clamp style connector on the other end that is clamped down onto the LED light strip.
Take a look at the picture below to better understand how it fits together.

That’s really all there is to it in terms of connecting the various components together. Of course, there are other connectors to connect multiple pieces of LED light strips together or to bridge a gap, but those are very easy to understand.
Step 3: Drill Necessary Holes
This step will be different for each person. I did my best to minimize the number of holes I drilled into my cabinets.
I was able to thread the power supply cord down to the bottom shelf through the small gaps on the side of our adjustable height shelves. No drilling necessary.

I did, however, have to drill a hole in the back corner of the bottom shelf of the cabinet.

I made the hole just large enough to pass the bare-wire-end of one of my connectors through the hole.

We just have one cabinet section to the right of our stove and microwave, but on the left side we have multiple cabinet sections. I decided to drill a hole through the cabinet supports to bridge those gaps. This allowed me to better hid the connector wires.

Step 4: Cut Mounting Channels to Length
The aluminum mounting channels come in longer lengths but can be cut down to size.
I decided to leave about an inch of free space on either side of the channels in each cabinet section. This made it easier to install the connectors and wires.
I used an old blade on my miter saw to cut the channels and frosted covers down to size. Another option would be to use a metal hacksaw. Either would work just fine and won’t take much time or effort.

When determining the length of each piece of your mounting channel, it’s important to understand the exact location on the underside of your cabinet.
For task lighting, I think it’s nice to have the lights closer to the front of the cabinets as opposed to pushed towards the back and closer to your backsplash.
I initially made the mistake of just butting up the mounting channels and lights to the very front of the cabinet. I ran into an issue of the front lip of the cabinet casting an ugly shadow on the front edge of our countertop. By moving the channels back by just an inch, the lip no longer caused the shadow.

This is where our final lights ended up being positioned once we put all of the necessary pieces together.
Step 5: Cut and Connect LED Light Strips to Install Under Cabinet Lighting
Now that all of the preliminary work is done, it’s time to start cutting and connecting the LED light strips. Each situation will be a little different, but the basic building blocks are all the same.
Here are some things to consider…
The LED light strips can be cut (at the designated markings) with a pair of sharp scissors. It’s important to cut right on the marking to ensure a good connection.

Don’t cut the LED light strips to fill the entire mounting channel. Some room is needed on each end to accommodate the connector clips on the inside of the channels.

Notice how in the picture above the light strip and both connectors fit inside of the mounting channel, with the wires running through the end caps. Make sure you take this into account when cutting your LED light strips.
The connectors are attached to the light strip by sliding the strip into the connector and then clamping down with pliers until it clicks into place.

The LED light strips have positive (+) and negative (-) markings on each side of the strip. Make sure you are consistent throughout your project. For example if you have the red wire connected to the positive side of the strip, make sure you stick with that for all light strips connected to that power supply.
Depending on which side of the project your start with (right to left versus left to right), you may end up with a situation where you connect a black wire to the positive side of the light strip. This is necessary in some cases and perfectly fine. Just make sure you continue with that for all other sections of light strip connected to that power supply.
Once everything on that particular section of light is assembled and clamped, slide the light strip and connectors into the mounting channel.

One of the more challenging things with this particular setup is that the connectors will not fit into the mounting channel until they are fully clamped onto the light strip.
Once the connectors and light strip are inside the mounting channel with end caps in place, remove the backing from the lights and stick them to the mounting channel.

Test Your Section of Lighting
After you assemble your first section of lighting, I recommend testing it out. To do this, connect bare wires to the coaxial connector by loosening the screw, inserting the wires, and then tightening them down. A wire stripper may be needed to expose the bare wire.

Again, please remember to be consistent with your (+) and (-) wires. In our situation, we had two separate power supplies with two separate sections of LED lighting. In one section the red wire was positive. In the other section the black wire was positive out of necessity. This is fine as long as you are consistent.
Once the wires are securely in place, plug the connector into the adapter and turn on your switch. The first section of lights should be illuminated.

Once you’ve verified that everything is working properly, snap on the frosted mounting channel cover for more of a diffused look.

I should mention here that it’s helpful to make sure you have enough extra slack in your wires when connecting multiple sections together. You can always cut wires down, but it’s a pain to disassemble (although it’s very possible) a section of lighting just to add a longer wire or connector.
Also note that I recommend unplugging the adaptor when working with these lights, but this all very low voltage (24 volts in our case) lighting, which is very nice from a safety standpoint.
Next it’s time to thread the wire from one section of lighting through the pre-drilled holes to the next section. Again, this all depends on your specific situation.

It’s rinse and repeat for all the other sections. The various connectors are all mix and match, and even the connectors without bare wires on both ends can be disassembled to expose bare wires. The design of these connectors make this project very adaptable and fun.
Step 6: Attach LED Strip Light Mounting Channels to Cabinets to Install Under Cabinet Lighting
The aluminum channels include some mounting clips. I did not like the included hardware.

The provided screws were too long for our cabinets and poked through. I bought shorter wood screws of the same size, but they were cheap and I kept shearing off the heads.
Also, the under side of the mounting clips have a weird dent that doesn’t allow the aluminum channels to sit flush against the underside of the cabinet.
I decided to do something completely different. It’s way easier and I’m very happy with the results.
I bought some Scotch Mount Extreme double sided mounting strips.

I cut these strips into small sections and adhered them to the back side of the mounting channels.

When the time came, I was able to easily adhere each section of lighting (they are very light) to the underside of my cabinets. So far I’m very happy with how firm and secure they feel.
Step 7: Hide Cords on the Inside of the Cabinets
We ended up with a lot of slack wire from the connectors and power supply on the inside of our cabinets. At Home Depot, I found a large variety of cord hiders made by Legrand.
I purchased a long straight section (that can be cut down to size) and also some corner pieces.

The wires will be hidden once we fill the cabinets, but these wire channels help to secure everything and make sure we don’t snag any wires.

They were also helpful securing wire on the underside of our cabinets where needed.

Once the covers were in place, we were able to refill the cabinets and enjoy our new under cabinet lighting!

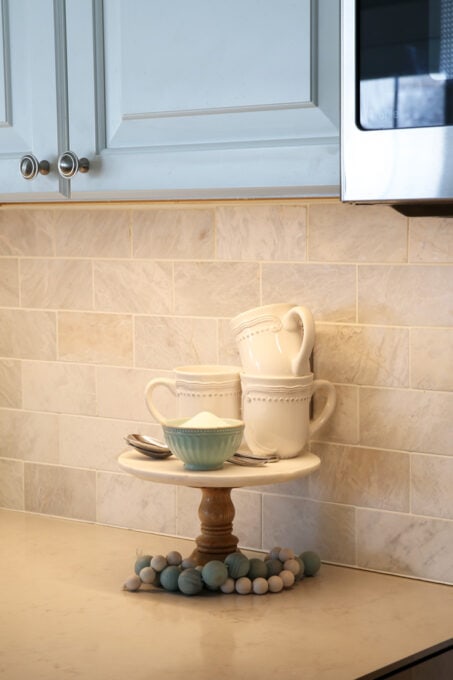
I love how the new lighting really highlights the backsplash and gives the kitchen an inviting warm glow! It feels a little bit fancier in here now, and I’m not complaining one bit! 🙂
Have you installed under cabinet lighting in your kitchen? I’d love to hear your best tips and tricks in the comments below!
And if you’re thinking of completing this project in your own home, be sure to pin this image so you can find this post later:

Thank you so much for following along! Have a wonderful day!

This post contains affiliate links. For more information, see my disclosures here.
Please Help. I am signed up for ultimate Homemaking Bundles 2021 and your course is on it but I can’t figure out what you want as a code. My order # is 251820 on 5/19/2021.
Hi, Barb! I just emailed the customer service team at Ultimate Bundles and cc-ed you on the email! They should be in touch shortly to help with login info!