DIY Tufted Bench
Learn how to make a DIY tufted bench for your dining room or any other space in your home using beautiful fabric that perfectly matches your style!
I’ve always been a fan of pegboards. They’re great for getting organized and keeping things tidy, and they can even help create a beautiful display too! But today, I’m sharing another fun way to use a pegboard– one you may not think of immediately!
Before I start talking about my project, I do have to make a little confession… Well, let me see if you can figure it out. Do you notice anything missing in the following pictures?
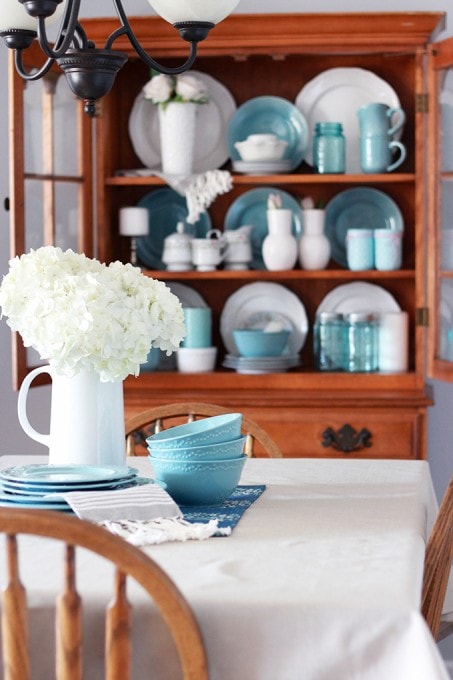
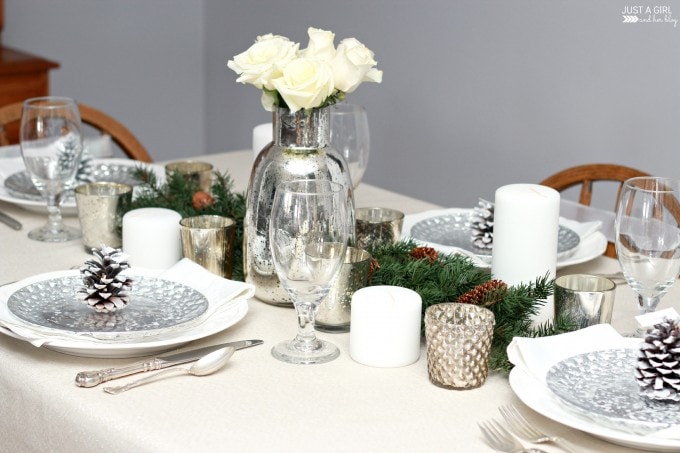

You may have never noticed because I try to get “creative” with the camera angles to hide it, but our dining set only has three matching chairs! The set was Donnie’s family’s growing up, and they had built-in benches in their eat-in kitchen, so they only needed three chairs.
Since we now have the set and obviously have four people in our family, poor Connor has always sat on an uncomfortable folding chair. I knew I had to rectify that, so I thought I would make my little guy a cushy bench to sit on instead!
How to Make a DIY Tufted Bench Cushion Step-by-Step
This post contains affiliate links. For more information, see my disclosures here.
Supplies You’ll Need
Here’s what we used to make our tufted bench…
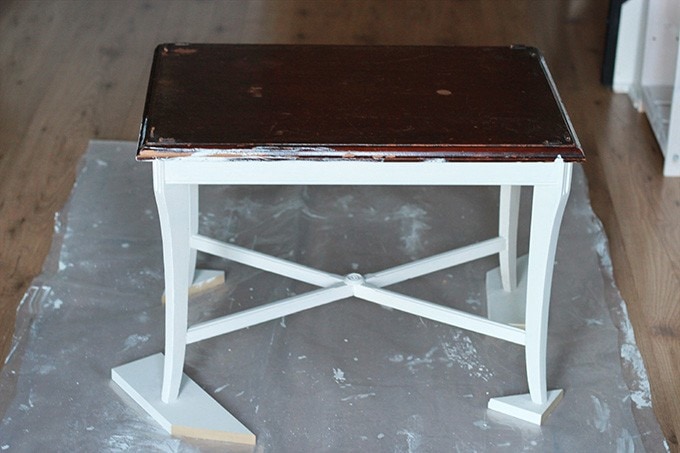
I was talking to my sister one day about my plan to make a bench for Con, and she said, “Oh, you can have this old bench from my house! We won’t use it.” Score! Free bench!
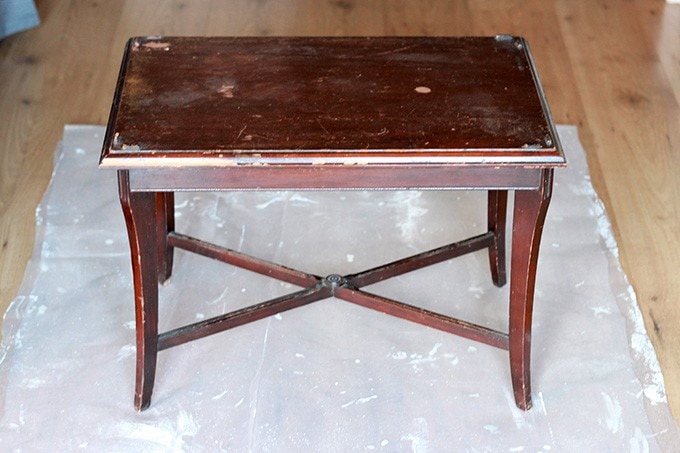
1. Paint the bench.
The top was in kind of bad shape, but the bench itself was pretty solid, so I knew I could turn it into something beautiful! I started by painting the bottom of the bench with Behr Marquee’s Cameo White. I knew I was going to be covering the top, so I didn’t bother to paint it.
That was the easy part– on to the top! I had always wanted to try tufting, but was too nervous to actually go for it. This piece was so small, though, that I figured it would be a great piece to start on.
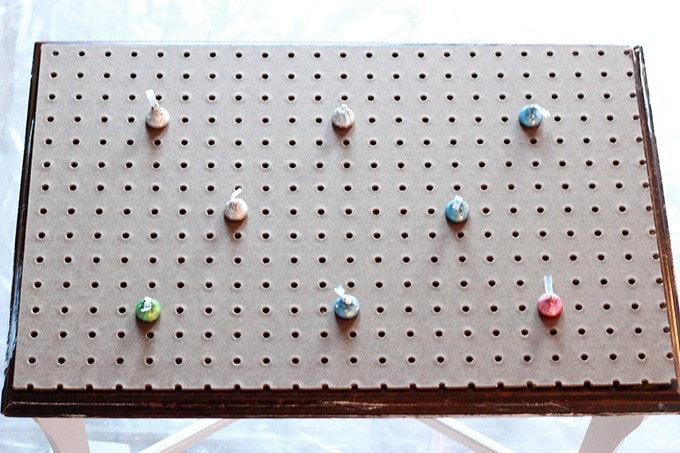
2. Cut the pegboard to size for the tufted bench.
I had seen many, many tutorials (like this one) where people used a pegboard as the base of their tufting because having the holes already drilled makes it easy to perfectly place the tufts.
It looked easy enough to me, so I snagged a piece of pegboard, had them cut it down to my preferred dimensions at the store, and brought it home to get to work. I started by planning out how I would space the tufts… and obviously I used Hershey’s Kisses to mark my spots. Because chocolate. 🙂
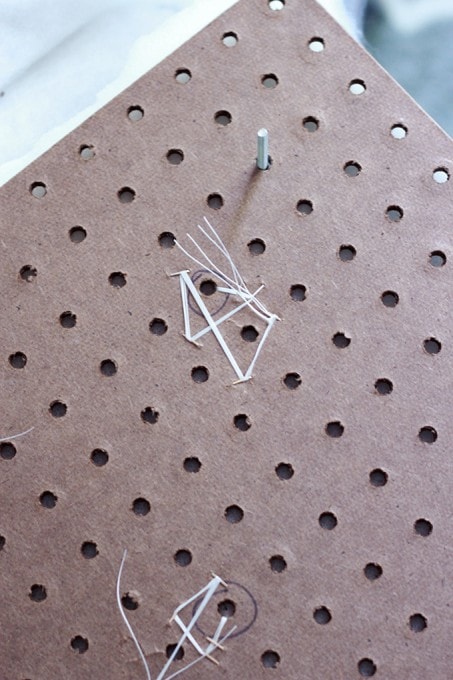
3. Mark the holes in the pegboard.
I circled my selected pegboard holes with Sharpie (1), removing the Kisses so I could eat them, of course. (It actually ended up being helpful to circle the holes from both sides of the pegboard.)

4. Size the cushion and cut the tufting areas.
I had picked up some 2″ poly foam at the store to use as my cushion, so I cut it to the correct size, and then placed my pegboard over it so that I could mark the spots where my tufts would be (2). I then used an X-acto knife to cut holes in the foam at the tufting spots (3).
5. Make the buttons.
Next, I needed to make my buttons. I simply used a small portion of my fabric + the handy dandy little button covering kit that I had picked up at the craft store, and I had created my 8 buttons in just a few minutes.
(Side note– this was my first time making buttons, and I had no idea how easy it was! Must find more button-making projects!)

6. Assemble the tufted bench.
Before I could put it all together, I had to figure out how we were going to attach the tufted pegboard to the bench. Donnie ended up drilling a few holes in the bench, using the pegboard as a guide, and we put bolts through the pegboard before we tufted, which would eventually fit into the holes in the bench and be secured by nuts from underneath the bench.
With the bolts through the pegboard, I used spray adhesive to attach my piece of foam to the top of the board, and placed my batting and fabric on top of it. From there, I doubled up my upholstery thread on my long needle and stuck it up through one of my tufting holes from the bottom of the pegboard, up through the foam, through the button, and back down through the foam and marked hole on my pegboard.
Then, I pulled the thread as tight as I could while Donnie used the staple gun to staple it in place. We made sure to pull it and staple in all different directions so that it was secure, and then we tied it off.
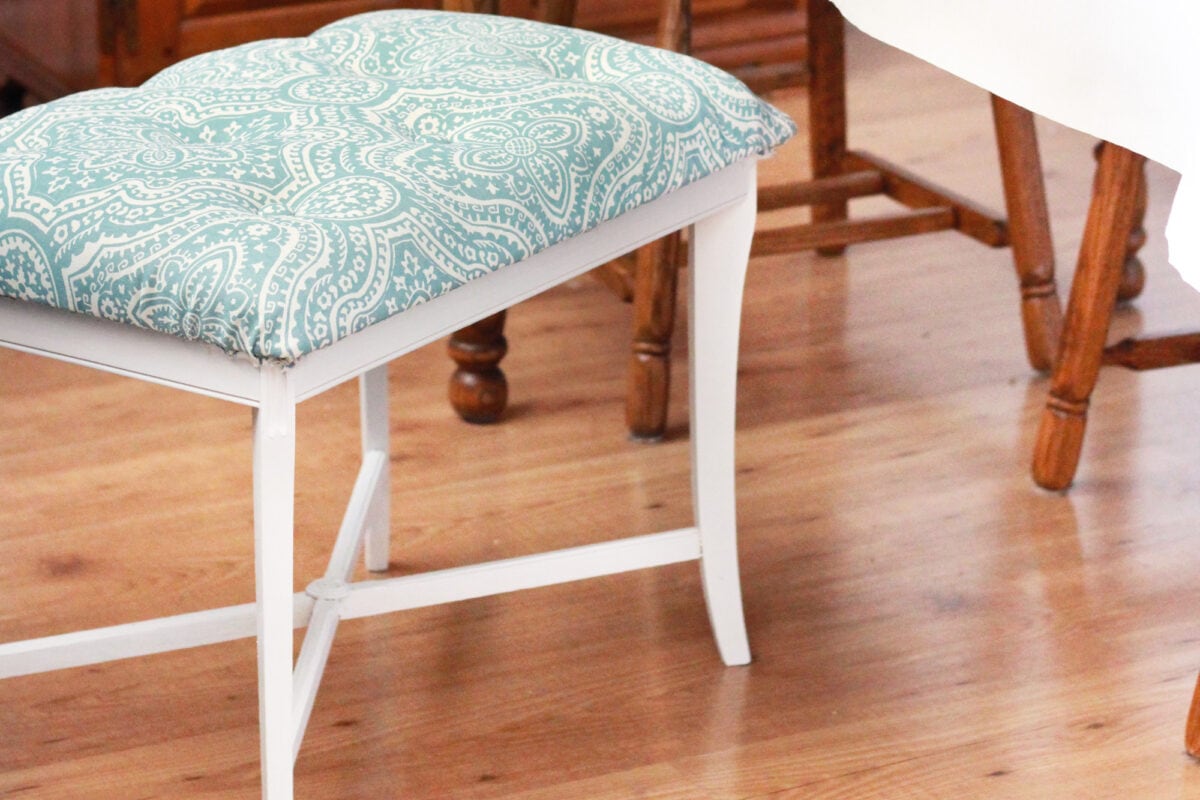
We repeated the process for each of our 8 tufts. Then we just pulled the fabric and batting taut around the edges of our bench and stapled to our hearts’ content to secure it! 🙂 I trimmed off the excess batting and fabric, and we had…

…our beautiful bench! I’m so excited that I will no longer have to try to hide the fact that we only have three chairs at our table, lol! And Connor is beyond excited to have a comfy bench of his very own!
DIY Tufted Bench: Final Thoughts
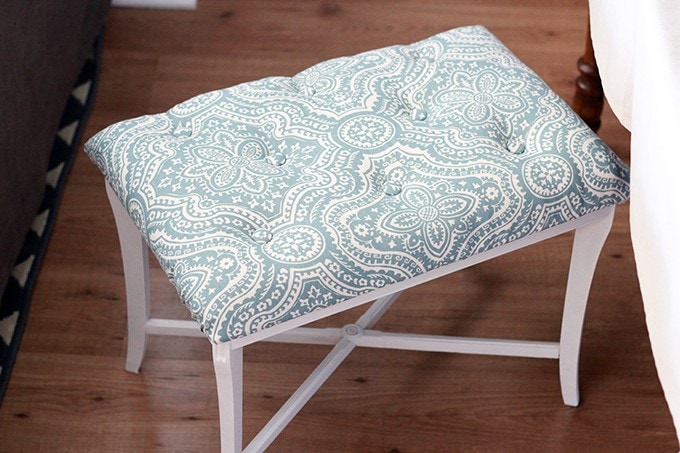
Being a total newbie at the whole tufting thing, I was kind of nervous about how it was going to turn out, but I love it!

Want to see the before and after? My favorite part!
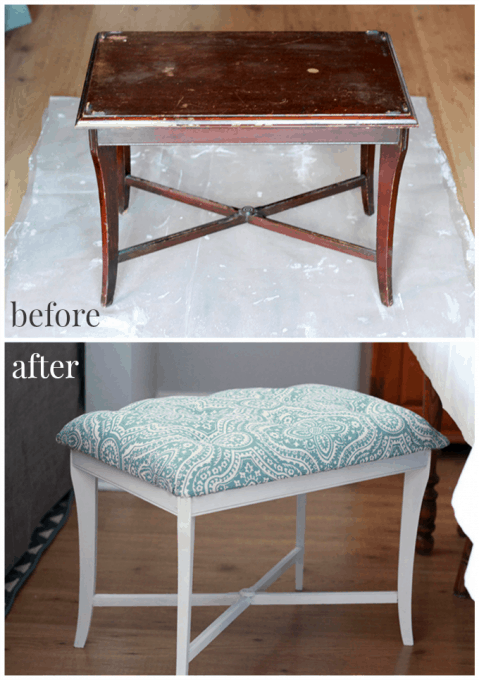
How I love bringing an old, worn out piece back to life! So much better!
I had never made a tufted bench before, but I’m so glad we decided to go for it. We picked up a few new skills and ended up with a custom piece that will grace our home for years to come!
Tufting Bench Cushions: Frequently Asked Questions
Want to save this post to revisit later? Be sure to pin the image below so you can find it easily!

More DIY Projects
Have you ever made anything fun out of pegboard?
Thank you so much for following along! Have a wonderful week!

This post contains affiliate links. For more information, see my disclosures here.
Hi Abby! What a great idea for the use of pegboard! The buttons/tufting add so much “more” to the bench! And who knew there was such a thing as a button covering kit?! <3 this project!! ~Dianne
I know! I had never used the button kit either and I couldn’t believe how easy it was! And now I want to put buttons on everything!!! 🙂 Hope you’re having a great day, Dianne!!
~Abby =)
What a great make over!!! I LOVE it! I want to do something similar with my piano bench. You did a great job!
Very nice, Abby! I might have to try this! Our piano has a really old scratched up bench and I have been wanting to pretty it up! (If my piano-playing daughter won’t mind.) I love how your bench came out! I will have to try out the button kit. I have never heard of that before and am not sure how it works.
I have a sneaking suspicion that this was once a piano bench too! The button kit is super easy. You basically cut out a circle of fabric, press it into the mold they give you with the front of the button, tuck the fabric in, and press on the back of the button– simple! Now I just need to find more places to use cute buttons! 🙂
~Abby =)
I love this!! What a great idea. I’m loving the fabric on it!!
This inspires me to possibly make an ottoman for my living room 🙂
xo,
Seng
sengerson.com – lifestyle blogger and family photographer
Abby, what a dramatic before & after, I love it! I’ve been looking for a very specific ottoman for my living room with no luck. You have just inspired me to make my own!
You can do it!! It’s tons of fun! 😉
~Abby =)
This is pure genius! What a great trick to evenly space the tufts. I bet your boys will be fighting over who gets the comfy seat now lol. SO pretty! XO
Spoken like a true boy mom. They have totally fought over the bench at every meal since I’ve brought it downstairs–ugh! At least it’s a hit, lol!
~Abby =)
This is so cute! I adore the tufting and so smart to use the pegboard for that.
awesome idea! never thought to use the peg board…genius!
I can’t wait to come home this winter and go thrift shopping! Not having an area to do projects makes me so sad! But when we return to America for Christmas I plan to get crafty! This will look amazing in my grandmothers new living room she just had remodeled!
So cute Abby!! And I adore that fabric!
Nancy
Wow, the bench turned out great! That pattern with the colour are so gorgeous! Tufts can be pretty tricky, I once tried making them for my mom’s store. 🙂 Beautiful work!
THOUGHTS IN TIFFANY BLUE
I really like the colors. You make it look so easy to do. Thanks for sharing.
So! Perfect! – I love that your little guy has his very own comfy spot at the table! Great job.
What a huge change for an overlooked little bench. It’s adorable. I love how you have pulled some the blue accents in the room onto the bench through the fabric, but kept it fresh with the white base. If I were your sister I would totally want that bench back!
Nancy
Lol– she might! I may have to hide it the next time she comes over! 😉 Thanks so much for stopping by, Nancy!!
~Abby =)
Great job Abbey! I love it!
This piece turned out so beautifully, Abby! Thanks so much for joining us in this month’s challenge!
Thank you guys for having me! It was so much fun!
~Abby =)
I was looking at your picture and wondering how you used peg board in it, lol. Completely makes sense now! Love how your bench turned out!! Also, I’m very intrigued by your button making kit 🙂
Lol! When I sent the picture to Erin, I had to tell her “There is a pegboard in there, I promise!” I was worried she would think I totally messed up the theme! 🙂 And yes, button making kits are my new bff– they make it so simple! Have a great day, Lindi!
~Abby =)
This turned out beautiful (and for your son’s sake…manly? :))!! I love the fabric. I had no idea you could use pegboard in tufting, that’s so clever! And I love that button kit, I didn’t know about that, either! Woohoo, I’m learning so many new things today. 🙂 So glad you joined us this month for the challenge!
Lol! Even with the not-so-manly fabric, the Cs have been fighting over who gets to sit on it at every meal, so I’m calling it a success! 🙂 Thanks so much for having me for the challenge! It was so fun!
~Abby =)
I love that fabric! I just finished a big time chair reupholster and even thought I like the way it turned out, never want to do one again. Doing something like this bench is more my kind of fabric DIY. I think the use of the peg board for the bench was a great idea!
What a beautiful transformation!! Simply stunning Abby! Well done.:)
This looks so pretty, Abby! I love your choice of fabric! What a great way to use pegboard – and give new life to an old piece of furniture!
uummmmm are you kidding me with this?! It looks perfect, I absolutely love it. And I’ve actually never heard of using pegboard in a bench makeover but it makes so much sense. Beautiful job!
So very darling! I love that fabric – do you know the brand/make? Would look very cute in my soon-to-be new office!
Wow Abby! You sure gave that old bench a new life! It’s so pretty! I love the pattern and colors!
Super neat idea, Abby! When I saw your picture, I was thinking pegboard?? I’ll have to keep that in mind! Have a great weekend! Xo
Abby, I adore the bench! I had never heard of using pegboard to help with the tufting. I’m gonna have to do some pegboard research. Thanks for sharing this clever makeover!
This is the cutest little bench! I came over because the fabric and color are so cute but I love the story! Connor must be so happy to have a comfy place to eat dinner! Haha!
P.S. careful with that button maker… they get addictive 😉
What a great idea Abby! This will make tufting so easy. I’m thinking a tufted headboard is in my future…Thanks for the inspiration and for joining our monthly challenge!
This is such a sweet bench. So pretty!
Using pegboard to help with tufting is pure genius Abby!!! I’m so happy you could join us this month and so thankful for your awesome project, love it!!
This is a great transformation!! I need to make something like this for my living room, just for extra seating. I love this. <3
Found via the Home Stories A to Z linky party 🙂
What a cute bench! That’s so special the table was Donnie’s growing up and now you guys can use it – and with the addition of such a stylish bench! Cute fabric!
I absolutely love your choice of colors! Gorgeous! Who knew it could really be easy to DIY? Thanks for sharing your tips with us.