How to Build a DIY Framed Mirror
Learn how to make a DIY framed mirror for your bathroom in just a few easy steps!
Our townhouse is the definition of “has good bones, but needs a lot of help cosmetically.” We knew that when we moved in and have been working on transforming the entire house one room at a time. I’m thrilled to say that we’ve finally made it to my little haven, our primary bedroom.
When we first started working on our primary bedroom, one project I knew I wanted to complete was framing in the vanity mirror. It’s a fairly simple project, so I was excited to make a big impact without a huge amount of work.
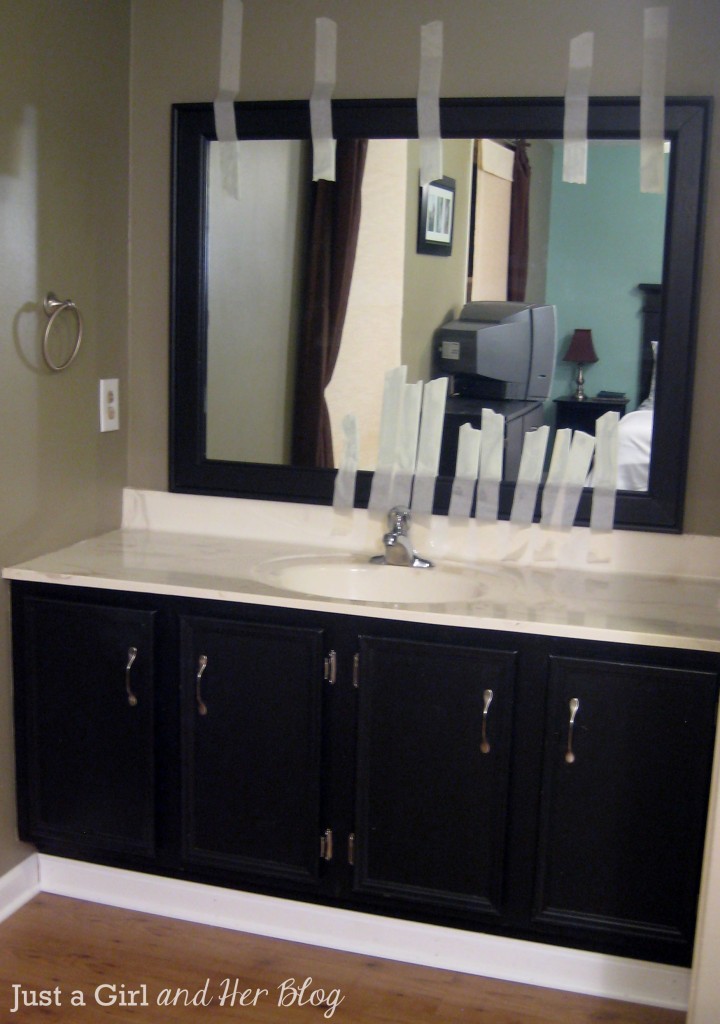
We started out with just your average, plain, builder-grade mirror:
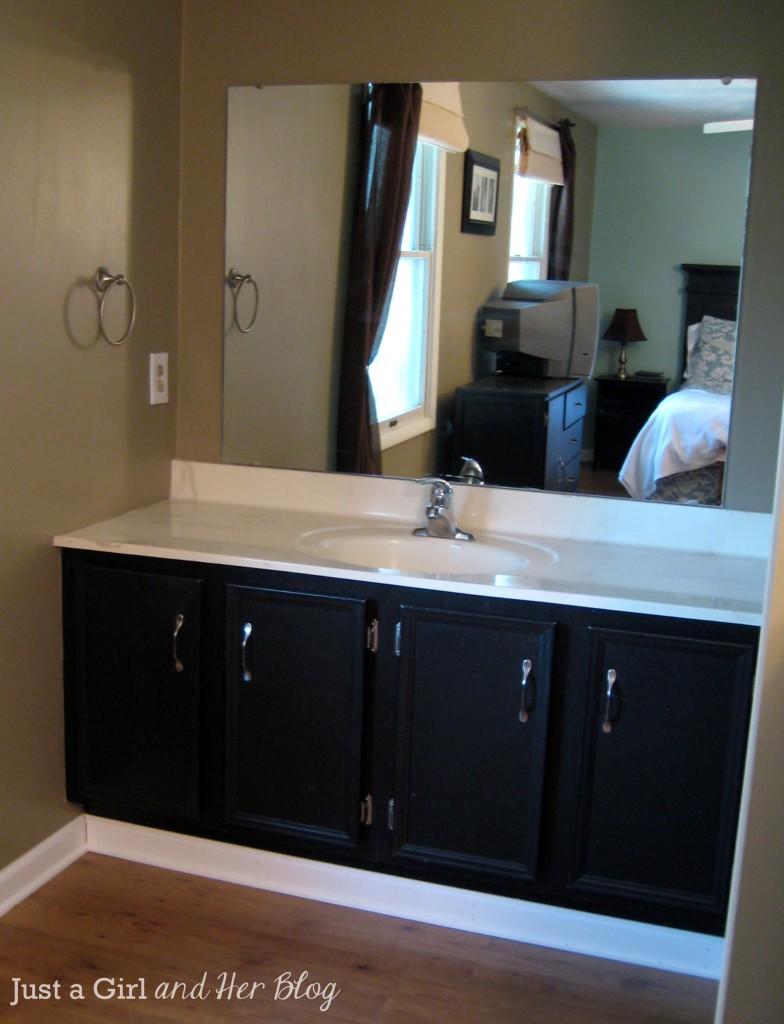
But I knew we could give it a little facelift with this simple DIY framing project! Here’s how we did it…
How to Frame a Bathroom Mirror Step-by-Step
This post contains affiliate links. For more information, see my disclosures here.
1. Gather your supplies.
The first thing we did was make sure we had all of the tools and supplies necessary to frame in the bathroom mirror.

DIY Framed Mirror Supplies and Tools
2. Make your cuts on the baseboard pieces.
After we had gathered our supplies, we needed to cut down the baseboards we were using to construct the frame for the mirror.
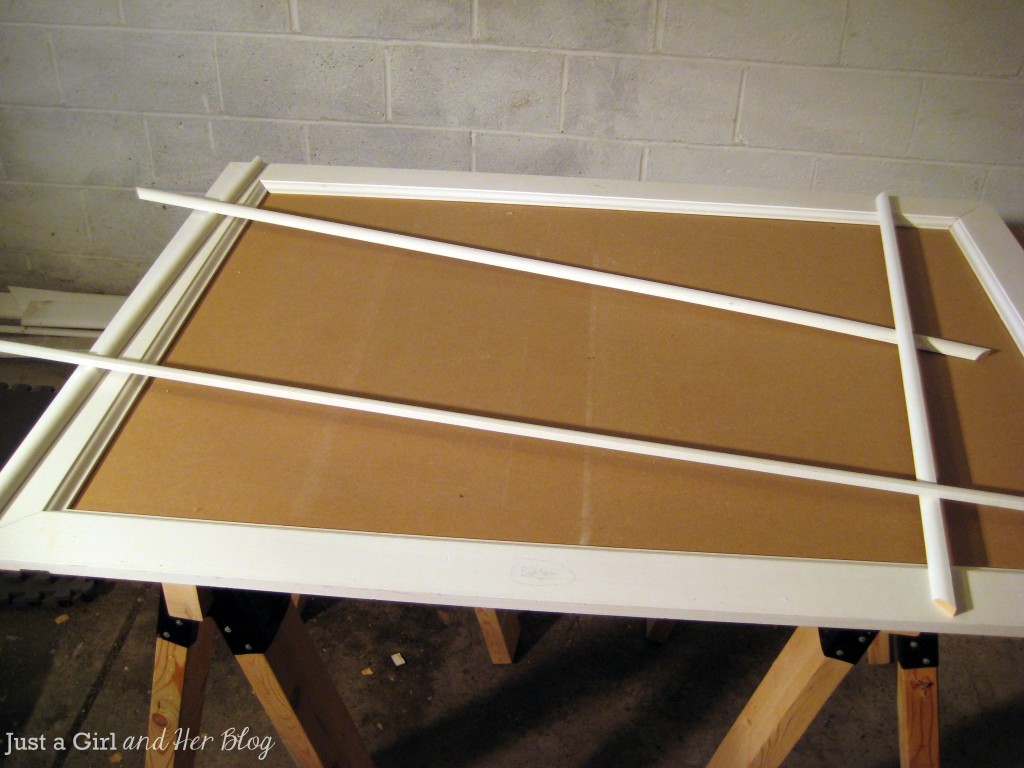
We measured the outer dimensions of our mirror and used the miter saw to cut our baseboard pieces at a 45-degree angle, with the outside edge the same dimensions as the mirror.
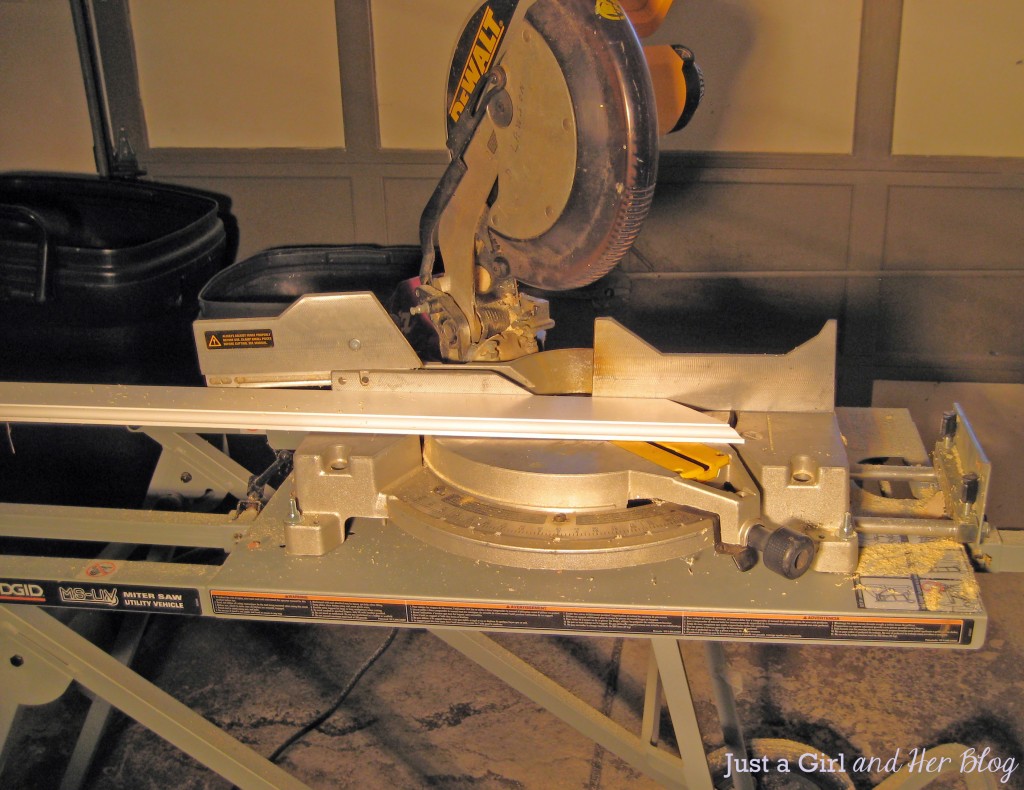
The inside length of baseboard ended up shorter than the length of the mirror to compensate for the angle cut. When we finished cutting our baseboard pieces, they looked like this:
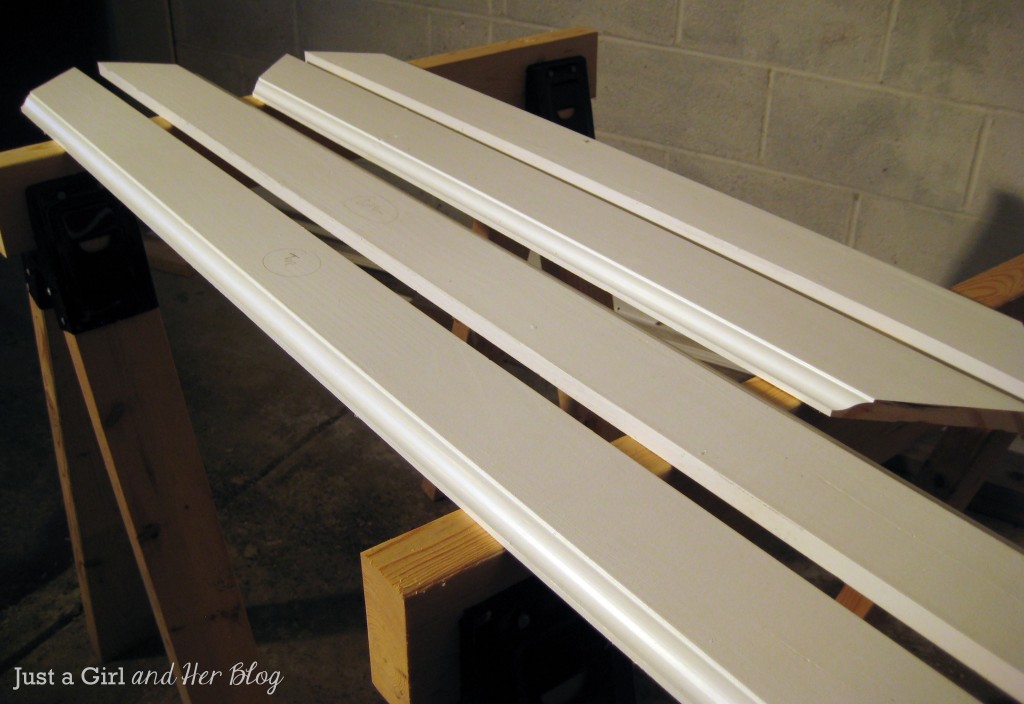
3. Double check the cut boards.
After the framing pieces were cut, we double checked to make sure they fit by physically holding them up against the mirror before we did anything else. We didn’t want to make it further along in the process, only to realize that we had the wrong sizing for our frame!
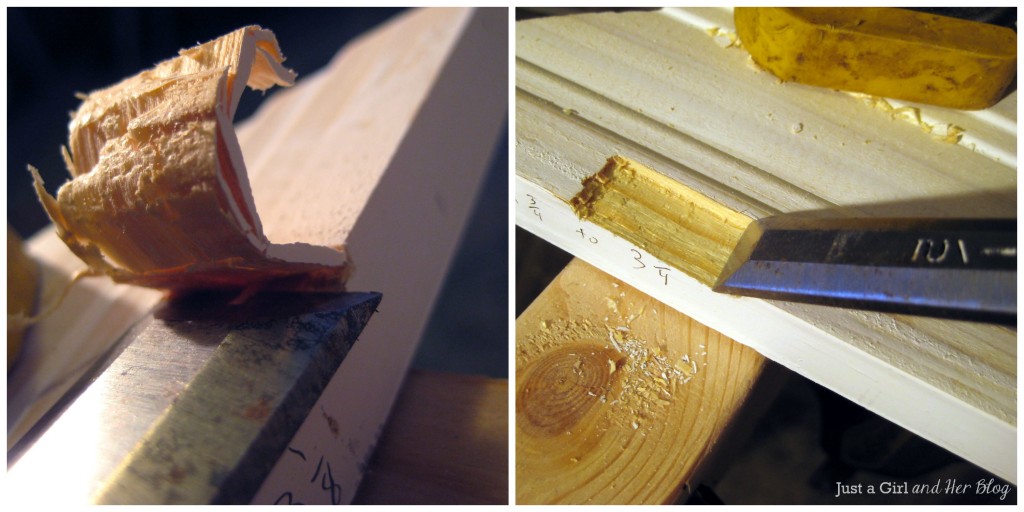
4. Make notches for the mirror clips (if applicable).
At this point, we also had to adjust our framing pieces for the mirror clips. Oh, the clips…

If your mirror was hung without clips, you win! Go get yourself a prize! 😉
Since our mirror did, in fact, have clips, we had to mark our baseboard pieces at the spot where the clips hit. Then we were able to chisel out a notch for the clips so that our frame would sit flush against the mirror.
Donnie used a sharp 1/2″ wood chisel to create the notches– it only took a few minutes!
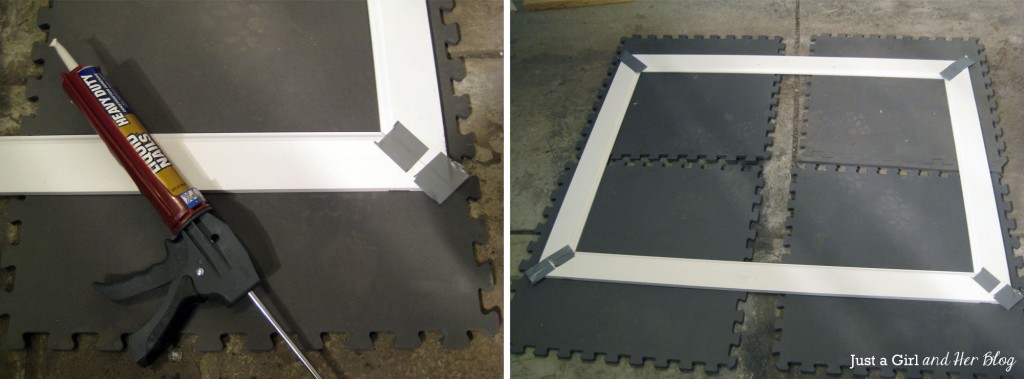
5. Assemble the frame for the mirror.
Now that our baseboards were cut and chiseled, they were ready to glue! We used Liquid Nails to adhere the framing pieces together. Then we duct taped the corners to hold them in place while they dried overnight.
6. Add shoe molding, if desired.
You don’t have to add shoe molding if you prefer a flatter face for your mirror frame. We wanted to add some dimension and thought it gave our frame a more finished look, so we decided to add the layer of shoe molding to the base of the frame.
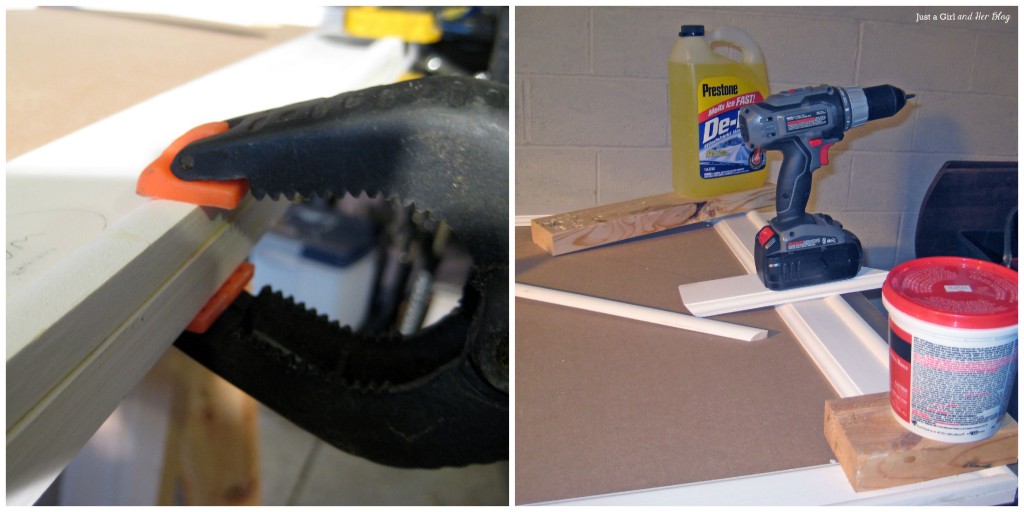
Once we measured and cut our molding, again using a 45-degree angle, we used wood glue to adhere the molding to the frame.
We then clamped the molding to the baseboard pieces to ensure that they would adhere. (If you run out of clamps, you can just start stacking stuff on the pieces like we did. 😉 )
We were sure to allow the glue to dry completely before we did anything else to the frame.
7. Paint and hang the DIY mirror frame.
When the wood glue had finished drying, it was time to paint. I tried to take the easy route and just paint the front of our frame. But I soon found out that since the mirror is reflective (duh!), we could see the the edging of the back of the frame, so we needed to paint both sides.
Once our coats of paint were completely dry, we hung the frame on the mirror using Liquid Nails.
Liquid nails tips
- Don’t spread the Liquid Nails too close to the inside edge of the frame or, again, you will be able to see it in the mirror’s reflection.
- Once our mirror was affixed, we used masking tape to help hold it to the wall overnight while the Liquid Nails dried.
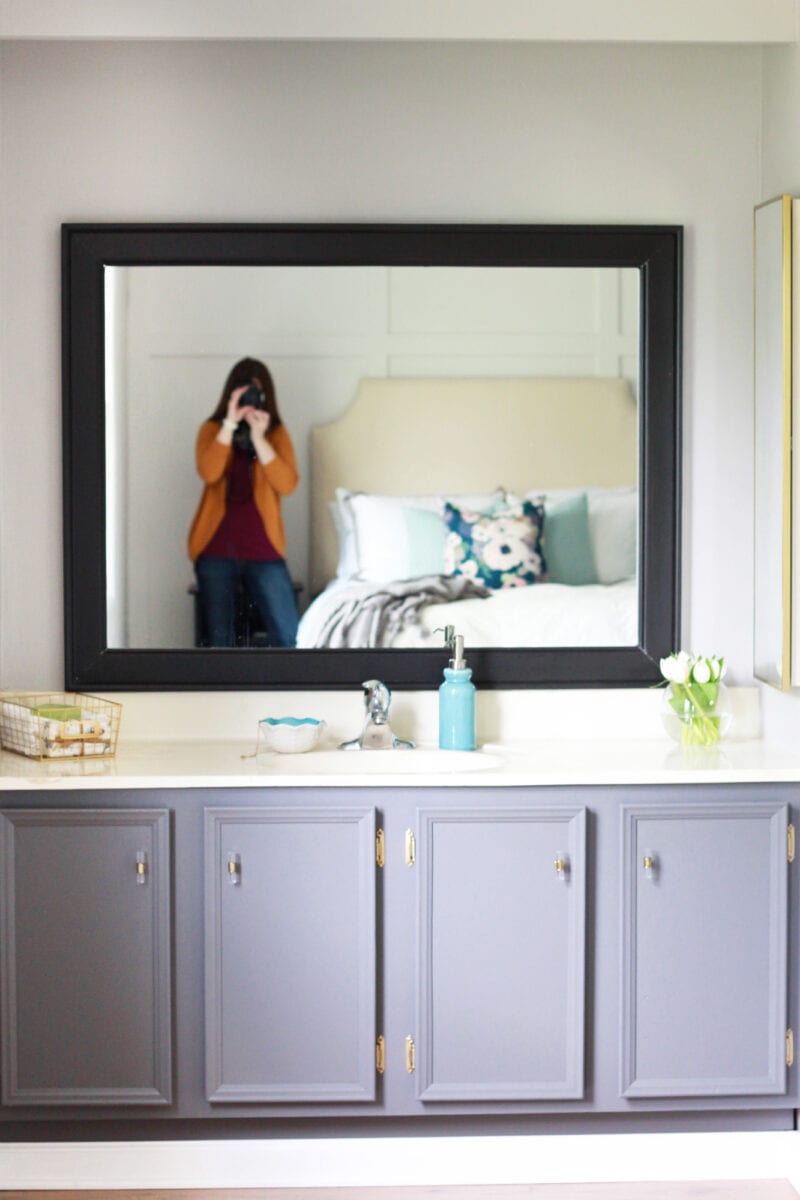
8. Enjoy your newly framed Bathroom Mirror!
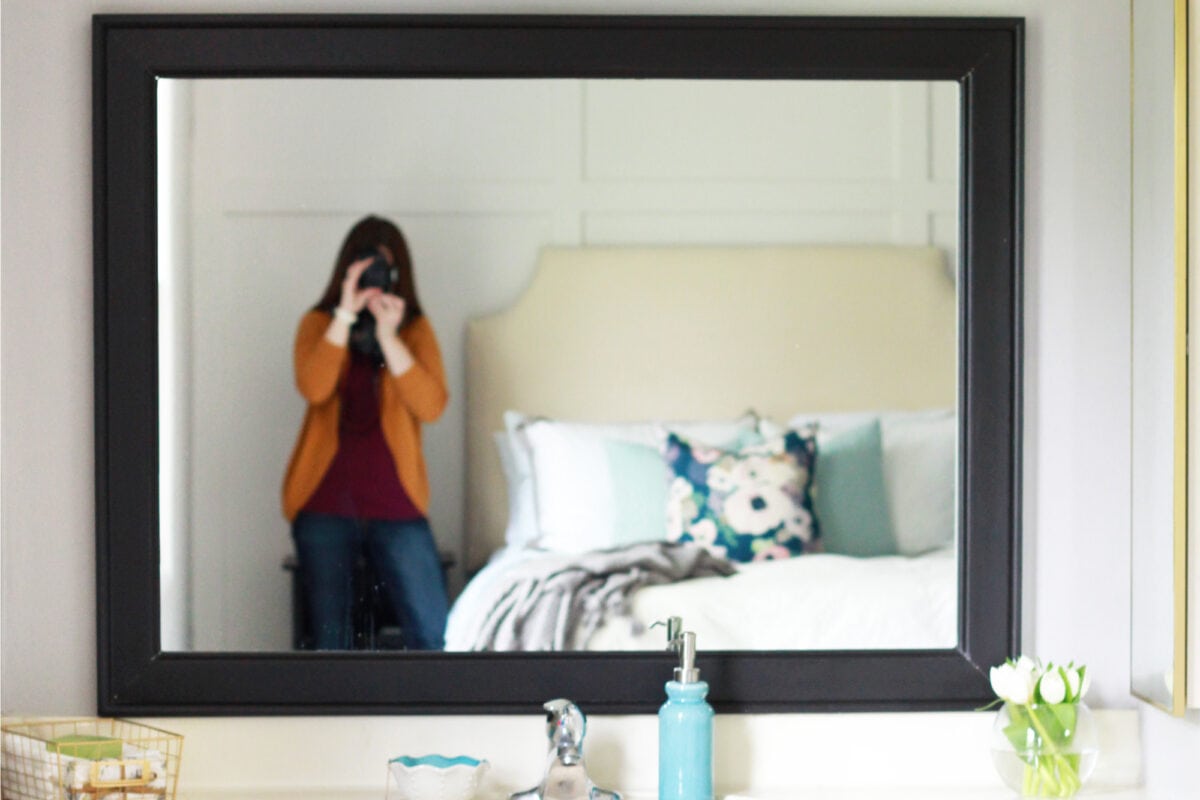
In the morning, I nervously pulled off the masking tape, hoping none of the paint would come with it. It didn’t, I was relieved, and I had a beautiful framed-in mirror that I just loved! Happy dance!
Just because it’s my favorite part of any transformation, let’s take a look at the before and after!
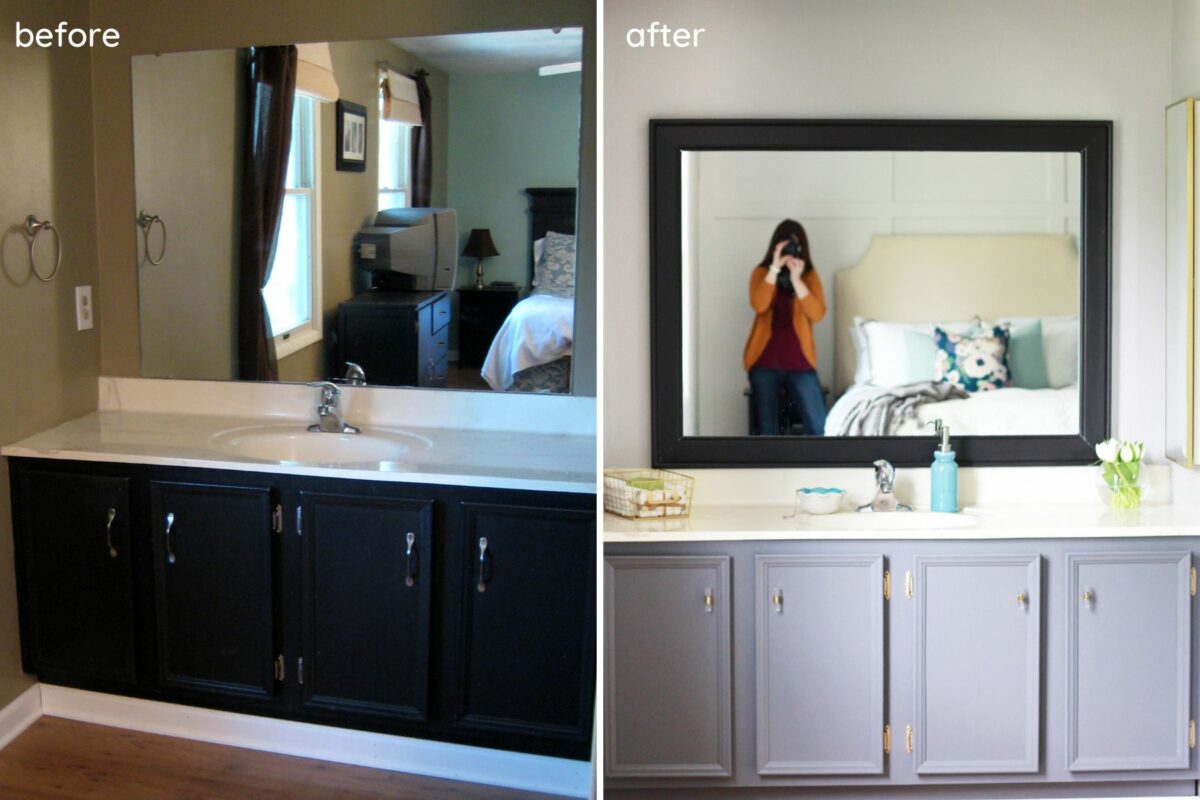
Love! I’m always amazed at how such a simple project can end up making a big difference in the space. If you have a builder grade bathroom mirror that could use a little pick-me-up, this is a great project to try! (You can learn more about how we transformed the bottom part of the vanity here.) We hope this tutorial will be helpful for you!
Want to save this post to revisit later? Be sure to pin the image below so you can find it easily!
Have you done any fun DIY projects lately?
Thanks so much for following along! Have a wonderful day!

Disclaimer: We are not professional carpenters, just homeowners who love to DIY whenever possible! Please be safe and attempt all projects at your own risk.
This post contains an affiliate link. View my disclosures here.

It looks fantastic! It’s amazing how a few pieces of wood can create a much more updated look. This is on my (ever growing) to do list so I’ll have to pin this so I can easily access your tutorial. Thanks for sharing!
Thanks, Emily! Just read about your 40 bags in 40 days challenge on your blog and LOVE it! I need to do some serious purging around here, too! Thanks for reading!!
~Abby =)
Turned out awesome! I have the same bland mirrors in both bathrooms and have wanted to add frames to give it a more polished look. Great tutorial, especially about the mirrors clamps. Thanks!
Thank you, Audra! It is a fun update to do! Thanks so much for stopping by!
~Abby =)
I am so doing this in all my bathrooms! I love your instructions! Using YOUR guide when I do this…very helpful. And not to mention, looks super simple! Thank you for taking the time to share us all the details for doing this! (=
Thank you, Gloria! I think you’ll really like your results– I know I feel like our bathroom looks so much more “finished.” Thanks for stopping by the blog!
~Abby =)
The mirror looks great! Life to the full, Melissa
Thanks, Melissa!
~Abby =)
This turned out great! We have a mirror like what you had to begin with. Do you think you can send your husband over to make ours look just as beautiful as your new one :-).
I’ll send him right over! 😉 Really, he should just quit his day job and go around framing in mirrors anyway. Haha. Thanks so much for reading!
~Abby =)
It turned out beautiful!
Thank you, Megan!!
~Abby =)
it looks great! I have two similar mirrors in my bathroom and I have wanted to frame thwm for a while. I never thought about the how the frame would sit outside the clips, so thank you for the tips 🙂
You are most welcome, Trine! You should go for it–it’s so worth it! Thanks for visiting the blog!
~Abby =)
This is great! It’s awesome how much difference just a frame can make! I would love to have you share this at my link party going on! Im your newest facebook follower! I have two little boys too….they sure make life crazy huh? 🙂
https://www.pincushioncreations.com/2013/03/homemade-by-you-43.html
Thanks so much, Katie! I linked up! Heading over to Facebook to “Like” you back! Happy Wednesday!
~Abby =)
FABULOUS! Awesome improvement! XO, Aimee
Thanks so much, Aimee! We’re loving it!
~Abby =)
Great tutorial! I’ve been wanting to do this for my home’s master bedroom, but have been afraid to tackle this project. Mostly because I have bulky (not flat) clips, and I am not sure how to deal with them!
Thank you! That is a toughie! If you can’t chisel out a space for the clips, the only other thing I could think to do would be to take down the mirror, remove the clips, and glue the mirror directly to the wall. :-/ I wish I knew of some magical, easy solution!
~Abby =)
Oh Abby! The frame changes everything! WOW!! Such a great look!
Thanks so much for sharing this at The DIY Dreamer… From Dream To Reality! I’m looking forward to see what you link up tomorrow evening! 🙂
Thank you so much, Christine! I really admire the way you take the time to look at and comment on everyone at your link up! I’ll be there tomorrow night! Have a great day!
~Abby =)
This project looks great! I’m hoping to do this in my master bathroom this summer! I’ve got this pinned for when we’re ready to do the project!
Thanks, Carrie! Good luck with your project!
~Abby =)
On the Framed Bathroom Mirror, did you you attach it to the wall or the mirror? My mirror goes all the way down to the vanity backsplash. I’m not sure this would look right. What do you think?
Hi, Ruth! It is attached to the mirror. Mine goes to the vanity backsplash as well, and I think it works! Good luck if you decide to try it! Have a great week!
~Abby =)
Abby, I love this frame around your mirror. I am redoing my powder room and I have a question for you. My sink is a real light pink so I went with that color to go off of. I went out and bought my paint and got a pink for the walls and white for my ceiling. My vanity is wood grain color and the base boards & door is white….What color should the Mirror Frame Be? I thought white but my husband thinks it should match the vanity. What do you think? I also seen you use a frame in your powder room and used fancy corners on the mirror. That was nice too. Please help! Thank so much.
Kathy
Hi, Kathy! Thanks so much for stopping by my blog! I don’t know that there’s one right answer to your question– it’s really a matter of personal preference! In my master bathroom, the mirror frame matches the vanity (both are black) and in our powder room the vanity is wood grain and the mirror frame is white, so we’ve done both! Before I start a project like this, I usually search on Pinterest or do a Google image search to look at what other people have done. I usually find myself being drawn to one particular “look,” and that’s what I end up going with. I’m sorry this is sort of a roundabout answer, but I hope it helps! Have a wonderful week!
~Abby =)
Hi Abby….I must say that this is the nicest mirror update I have seen yet! I may have to talk to hubby about this one. We have actually been looking for new mirrors. I did want to ask you if you know where you got your handles for your cabinets? Or possibly what they are called? I really love those, they are so different than the average ones I see everywhere.
GREAT JOB!!
Thank you so much, Shirley! I believe we bought the pulls at Lowe’s. They are similar to these: https://www.lowes.com/pd_361766-81227-P13101V-SN-C_0__?productId=3474649&Ntt=drawer+pulls&pl=1¤tURL=%3FNtt%3Ddrawer%2Bpulls&facetInfo= . Hope you’re having a wonderful week!
~Abby =)
:Looks awesome and great tips. Three of our bathrooms have the plain builder mirror including clips that need updated.
Thanks so much, Elizabeth! Happy framing! 🙂
~Abby =)
Just wanted to se if the frame is still holding up, everyone I spoke to said not to use liquid nails on the mirror. Did you apply the liquid nails directly to the mirror?
Hi, Mel! Almost two years later, the frame is holding up perfectly! We have had absolutely zero issues with it, and yes, we put liquid nails directly onto the mirror. Thanks so much for checking out my blog! Have a wonderful week!
~Abby =)
Hey Abby,You gave me the courage to go to Home Depot and purchase what I need and make this beautiful transformation… Love it…Be Blessed…. Catherine
Yay! Happy framing! 🙂
~Abby =)
Total transformation! Beautiful!
I have the same saw – but I haven’t used it yet! It has sat on the floor of my craft room for 6 months and reading your post has fired me up to pull it out and get on with some of the projects I have been putting off. I have used one before but under ‘supervision’ – now it’s time to step up the plate, get over my fears and make the most of this big boy
I love that you added the quarter round to the edge! I want to do the same thing to two mirrors with the same counter issues. But if the frame is the same size as the mirror, don’t you see the edge of the mirror along the outside of the frame?
Good question! No, we really don’t see the mirror. You can always make the frame overhang the outside edge of the mirror if you are worried about seeing the glass.
We are about to embark on this project. Fingers crossed! I had one question. Do you think you’ll still be able to remove your mirror easily? We also have the bulky clips and are worried that taking the mirror down won’t be possible without damaging the frame. What are your thoughts?
I did this project a few years ago so it’s hard to remember but I think the mirror is up there permanently now.