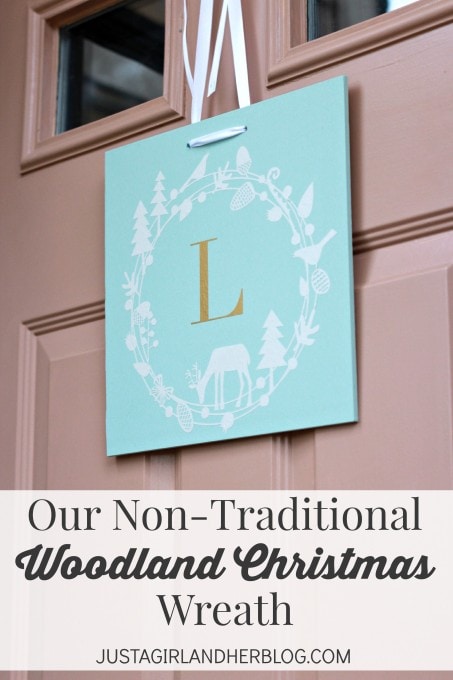
Our Woodland Christmas Wreath
This post contains affiliate links. For more information, see my disclosures here.
It is no secret that I’m pretty much obsessed with my Silhouette CAMEO, so today I thought I’d show you an example of one of the many, many things you can create with it!
How to Create DIY Christmas Door Decor
Now I make at least four wreaths per year (one for each season, and sometimes I make extras) and share them on the blog, so I am always trying to think of new and different twists on the traditional wreath.
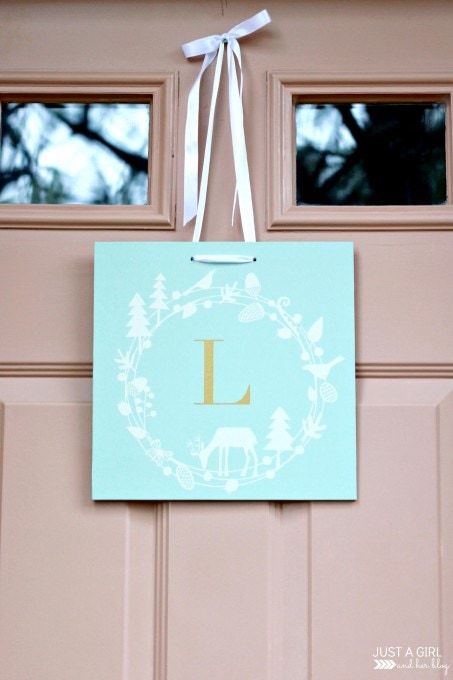
For this one, I decided to play a little game. I went to the craft store and picked out a surface– a 12″ x 12″ piece of plywood– and challenged myself to create some sort of Christmas door decor with it. A square piece of plywood isn’t normally what you see hanging from someone’s door, but hey, that’s what makes it more fun! 😉
Step 1- Gather supplies for DIY door decor.
Here are all of the supplies I used to create my non-traditional “wreath:”
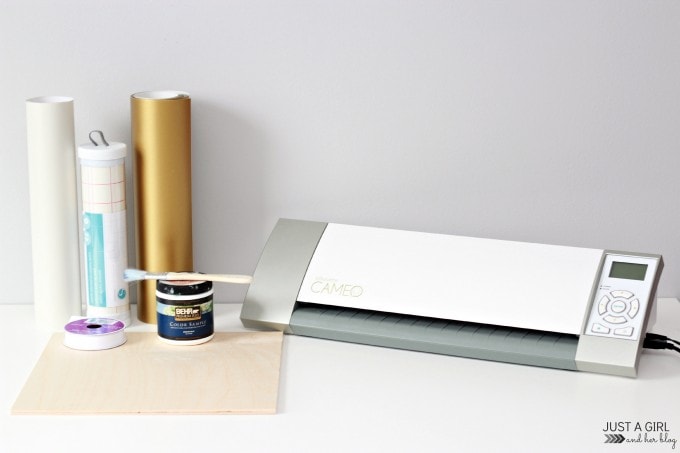
- White Adhesive Vinyl
- Transfer Paper
- Gold Adhesive Vinyl
- Ribbon
- Paint (I used a sample of Behr’s Marina Isle that I had in my stash.) + Brush
- Piece of Plywood
- Silhouette CAMEO
- Drill (Not Pictured)
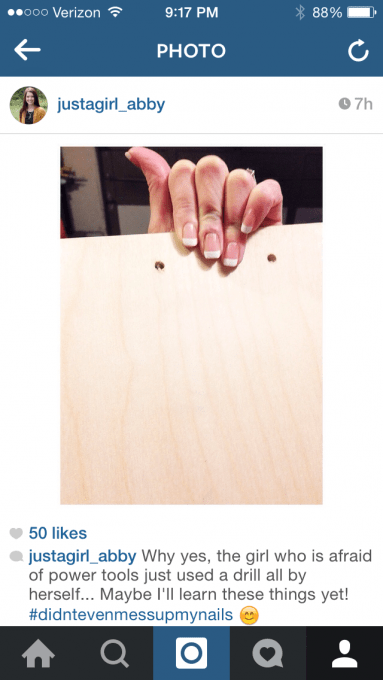
Step 2- Drill two holes.
The first thing I needed to do was drill some holes in the plywood so I would be able to hang it up eventually. Donnie used to work from home, so I could have him do this type of thing for me whenever I was working on projects during the Cs’ naps and it all went fine.
But he doesn’t work from home anymore, so if I wanted to work on my project that day, I was going to have to do it myself. After watching a couple YouTube videos and consulting with Donnie via text to change out the bit, I successfully drilled two holes in my board and promptly celebrated on Instagram. 🙂
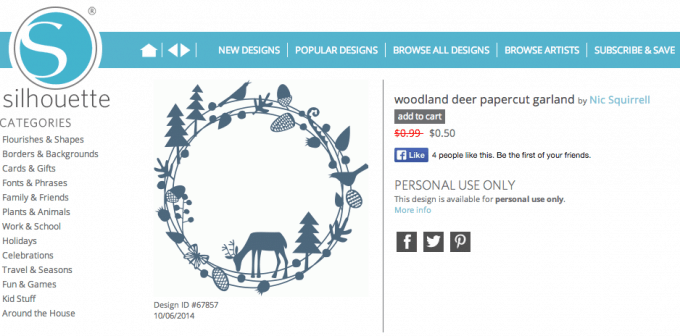
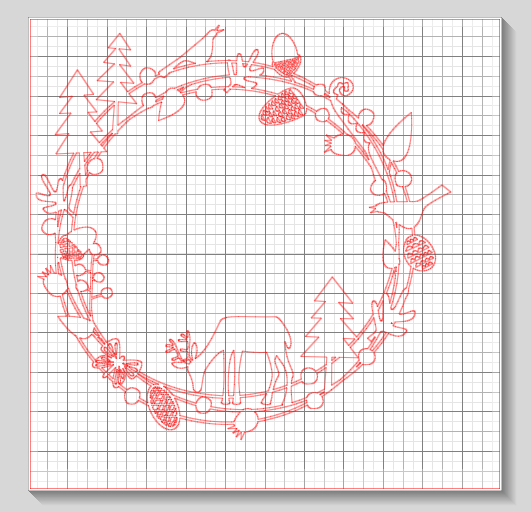
Step 3- Create your design in Silhouette Design Studio.
I then painted the board and while it was drying, I got to work on my design. When I stumbled upon the Woodland Deer Papercut Garland in the Silhouette Design Store, I immediately knew it was “the one.” 🙂 (And it didn’t hurt that it only cost $0.50 since all designs are 1/2 off right now! Woot!)
I sized my design the way I wanted it in my Silhouette Studio software.
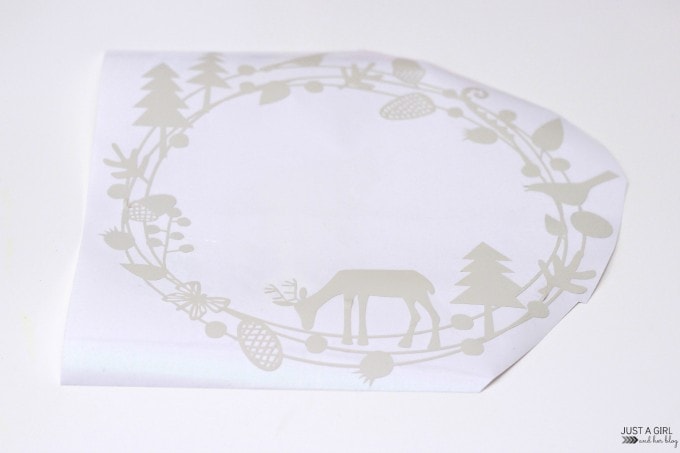
Step 4- Cut out the design with the Silhouette cutting machine.
Then I set my machine to work cutting out the design for me. (If you are attempting this project, I placed my vinyl on the cutting mat and used the normal vinyl settings of speed 8, thickness 9, and blade 2.) Once I weeded out the excess vinyl, I was left with this:
Step 5- Transfer the design over to the board.
In order to get this design over to my now dry piece of painted plywood, I used transfer paper. The longer I use my Silhouette, the more I realize how important it is to line up my design on the transfer paper grid.
When I do this, placing my design where I want it (in this case in the center of the plywood) is super easy because I can use the grid as my guide. So first I place my design on the transfer paper, which is sticky, and use a scraper tool to make sure it sticks to the paper. You’ll notice my design is now backwards.
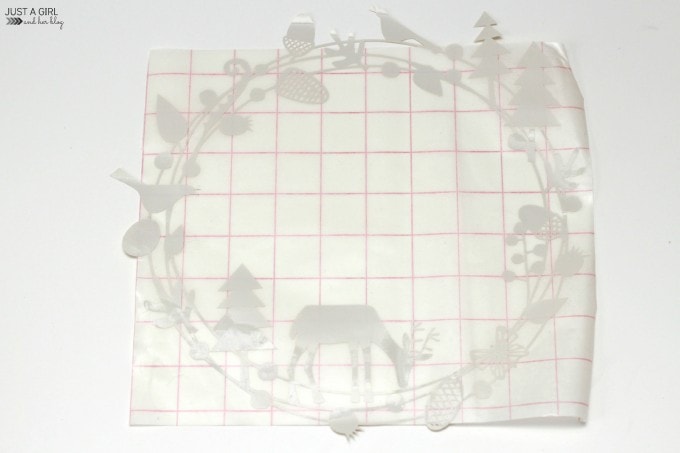
That’s okay, though, because when I flip it over onto my board, use my scraper tool to make sure it sticks, and peel away my transfer paper, it is exactly the way I need it to be!
I repeated the cut/weed/transfer process with the gold “L” I wanted to place in the center of my design.
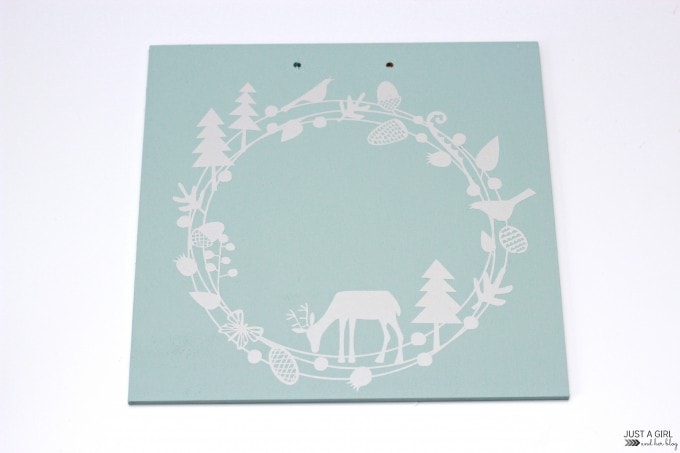
Step 6- Add a ribbon and hang!
I then threaded the white ribbon through the holes, and my woodland Christmas wreath was ready to be hung on my door!

Yippee! SO easy! I love that the Silhouette makes projects like this one possible! I never would have been able to hand paint/draw/cut out this design, but the machine makes it simple.
Thanks so much for following along! Have a wonderful day!

This post contains affiliate links. For more information, see my disclosures here.
Love your wreath and I would love to win a Silhouette!
You’re right, it would be near impossible to paint that by hand. I can’t believe how cute that design is, Abby! So a great take on a traditional wreath! Totally my style! I’m crossing my fingers I get a Silhouette for Christmas, hahaha
Stephanie @ Mommyzoid
I *JUST* ordered the Cameo on Monday (who could resist those crazy low prices?) and I cannot wait to use it! Your wreath is SO pretty, I’m wishing my machine was here yesterday so I could make one too 😉 LOVE it Abby!!!
Great tutorial. Love your wreath. It turned out so nice and you make it look so easy! Kathy
Cute wreath! And thanks for the giveaway. I just asked you a question on an old post, not sure if you will see it. Basically my question is whether or not the Behr “gray shimmer” paint has a purple-y tone to it. Thanks!
Your non-traditional wreath is SO pretty! I’ve got the Silhouette on my Christmas list, so fingers crossed! Thanks for the giveaway!! 🙂
Your wreath is adorable! Thanks for the giveaway!!
Love the different style wreath- so fresh and new! And LOVE this giveaway!
How pretty! Love the woodland theme, so sweet! 🙂
Your wreath is lovely, thanks for sharing.
I love your wreath and would love to have my own silhouette portrait! I love all the cool things you can make with them. Would love for you to link up your wreath at The Wednesday Round Up!
A Silhouette is definitely on my wish list. So many things you can make with it!! I love your nontraditional wreath too!
Thanks for the great giveaway, Abby! I love your non traditional wreath, amazong what can be done with these machines! It is on my Christmas list this year, but not sure it is in the budget this year. Crossing my fingers I win 🙂
I appreciate this chance to win….I just discovered this type of crafting and would love to have one!
Thank you so much for the giveaway! This would make my year! I’m starting a scrapbook for my first little one (overdue so she’ll be here any day!) and would love something like this to make crafting easier! 🙂
Crossing my fingers too- I keep asking Santa and he hasn’t brought one yet 🙂 Thanks for the chance!
This is so pretty, Abby. I love the gold letter with the frame. Such a unique wreath.
Thank you, Kim! You are the Silhouette queen, so that means a lot! 🙂 Have a great week!
~Abby =)