How to Make a Cute DIY Scarecrow
Learn how to make a simple, cute outdoor scarecrow step-by-step, using only a few supplies!
Are you a big Halloween decorator? I’m generally not, but when a friend asked me to create a scarecrow for our MOPS kids to use for an activity, I just had to give it a shot!
It turns out that making a cute little scarecrow was easier than I expected it to be! If you’re looking to create a scarecrow for your fall or Halloween decor, here are the steps we used to make this one…
How to Make a Cute Scarecrow for Outdoors
1. Gather your supplies.
Before we started creating anything, we had to make sure we had everything we needed to put together our scarecrow.
Scarecrow Supplies
2. Cut and assemble the boards for the frame.
I had never made a scarecrow before, so I started perusing the web for ideas and came across the method of making a scarecrow frame over at Creative Homemaking.
I made a few tweaks since I wanted my scarecrow to be child-sized, and Donnie and I came up with this:
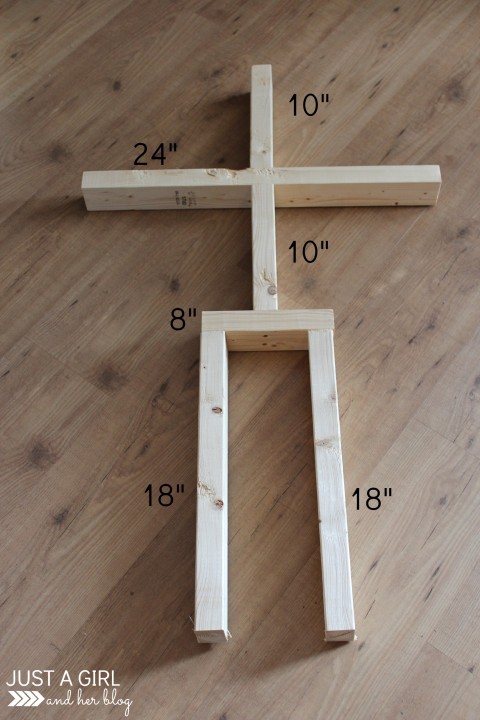
Donnie used 2×3 boards + wood screws to create the frame for our little scarecrow. As you can see from the diagram above, we used a 24″ piece of wood to create the arms, with 10″ pieces of wood above and below the horizontal arms piece to create the “core” part of the scarecrow.
We used an 8″ length of wood for the “hips,” and two 18″ pieces of wood to form the scarecrow’s legs. It only took Donnie a few minutes to whip up this frame, and the project only got easier from there!
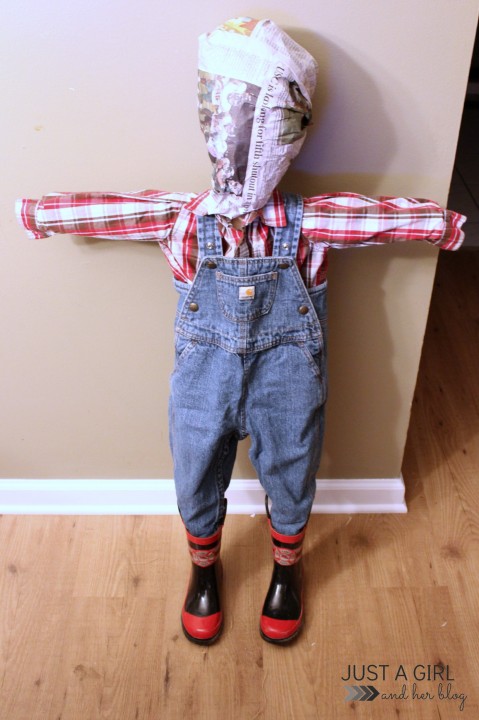
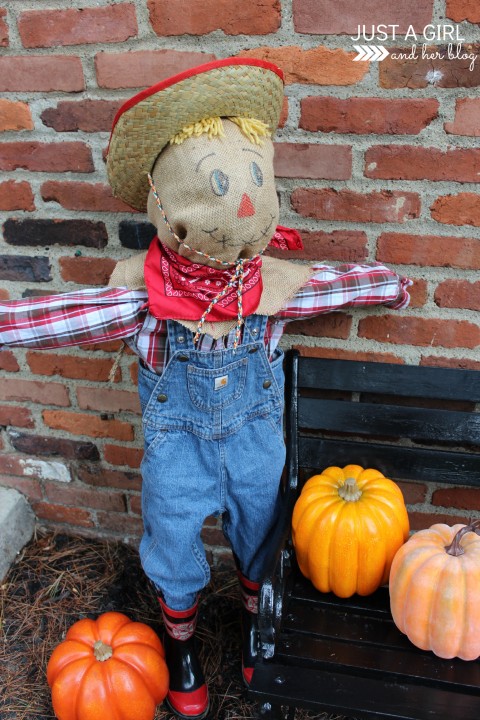
3. Dress the scarecrow.
After the frame was finished, I swiped some clothes from my boys in order to “dress” the scarecrow.
For the size of our frame, I used my 2 year-old’s shirt and pair of overalls, which worked well. The rubber boots belonged to my 5 year-old and were sturdy enough to hold the scarecrow frame upright.
stuffing your scarecrow
The overalls I used hung loosely enough that I didn’t feel like I needed stuffing for my scarecrow. If you like the look of a puffy scarecrow, hay or straw can be added for a fuller look. Straw is much easier to work with and less messy. Plus, during the fall season, it’s very easy to find!
4. Create the scarecrow’s head.
To create the head shape for my scarecrow, I wrapped newspaper around the top piece of my frame until I had the look I wanted, and then I used duct tape to secure it in the back.
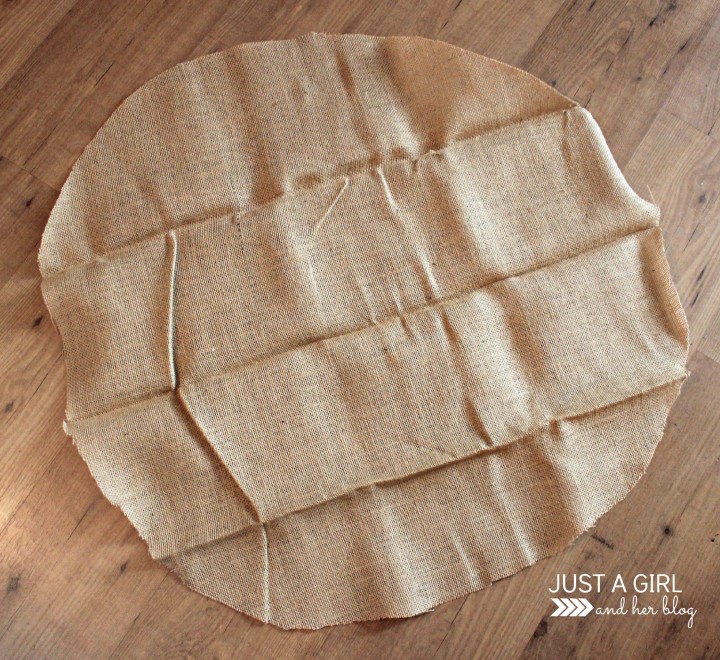
Next I cut out a big circle from burlap to cover his face. My burlap circle was about 28″ across. It definitely does not have to be perfect– just long enough to cover the newspaper and gather at the “neck” area so it can be secured.
I secured the burlap around his “head” with a small piece of rope and tied a bandana around his neck for some extra cuteness. I drew a face with Sharpies, and gave him a little tuft of yarn hair using this simple tutorial.
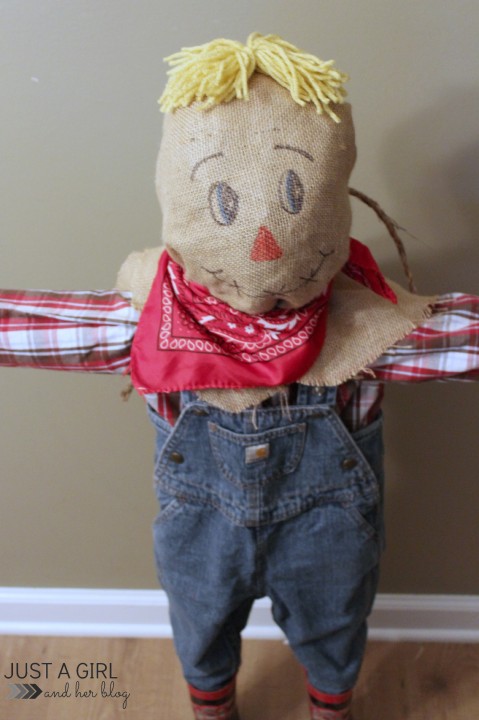
Then all I had to do was add his cowboy hat, and my little guy was ready to go!
5. Enjoy your cute little scarecrow!
I can’t say that I had ever attempted to create a scarecrow before, but it actually ended up being easier than I expected! It didn’t take very long to make, and the kids at MOPS definitely got a kick out of it.
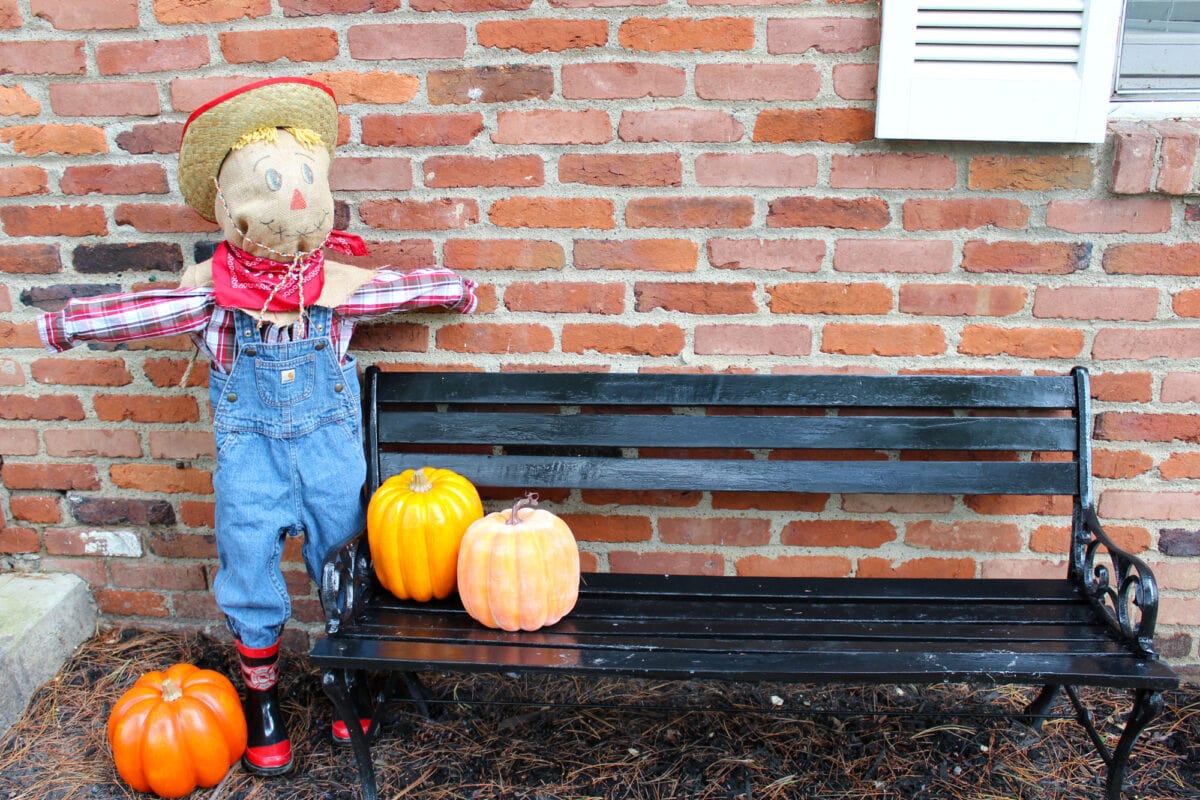
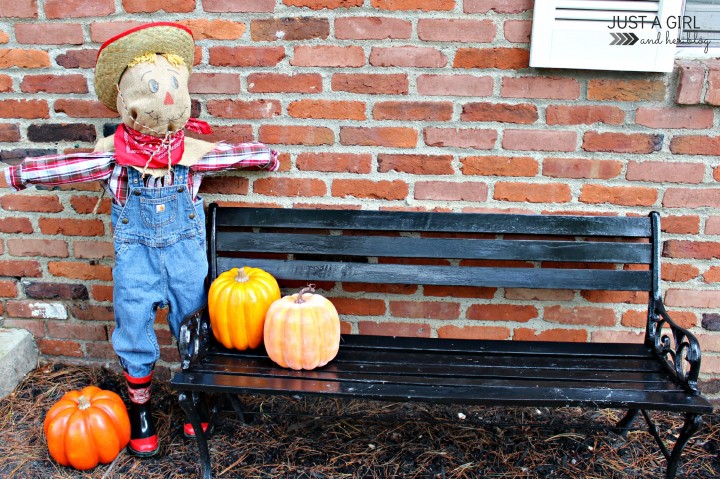
I tried to put the scarecrow to work guarding my new shiny black bench before I handed him over to the MOPS kiddies, but he mostly just stared off into space. 😉
Most of the time I think scarecrows are pretty creepy, but this little guy actually turned out to be kind of cute! If you’re looking to add some simple fall decor this year or are in need of a scarecrow for kids’ activities like I was, I hope this tutorial will be helpful for you!
Want to save this post to revisit later? Be sure to pin the image below so you can find it easily!

Do you go the scary or cute route for Halloween? Or do you do a little of both?
Thanks so much for following along! Have a wonderful day!

Abby, what an adorable little scarecrow and I just love his darling little face! Pinning! Thanks for sharing and hope you have a happy Thursday!
Thank you so much, Cindy! You are so sweet. Hope you’re having a wonderful week!
~Abby =)
Abby, he is absolutely adorable and he has the sweetest face! I told you I had enough spooky for both of us 🙂 Have a great day! XO
You totally do! Love it! Thank you, Christy!
~Abby =)
He’s really cute Abby! And he looks so good next to your new bench 🙂
Thank you, friend! Hope you’re having a wonderful week!
~Abby =)
This is so cute, Abby! Yesterday, I found overalls that my little guy has outgrown, and I knew I could use them again–thanks for the inspiration!
Dee 🙂
Thanks, Dee! Yes, it’s a perfect project for old overalls! Have fun making your scarecrow!
~Abby =)
Abby these scare crows are so cute! I always enjoy DIY projects and this one seem like something I could handle! I am definitely pinning this! 🙂
You can definitely handle it! This one was easy peasy! (Especially bc hubby built the frame for me! 😉 Have a wonderful weekend, Ciara!
~Abby =)
Thank you Abby, Yea I think I could probably do it! You have a nice Weekend too! 🙂
your scarecrow is adorable, he is too cute and looks great against your painted black bench 🙂
wish you a great weekend Abby! 🙂
Thank you, Ingrid! He was a fun little guy to put together! Hope you’re having a wonderful week!
~Abby =)
You are such a stinker, never made a scarecrow before. Then you are even more of a genius and more talented. Your scarecrow is awesome, I’ve seen lots but yours is by far a hoot. Love his face and he’s doing great job of protecting your awesome bench.
I was a scarecrow a few years ago when a few of us at SS dressed up as Wizard of Oz folks. We had so much fun. The only thing we didn’t have was a witch but she cancelled at last minute on us. They have a big thing in downtown Grand Junction for Halloween. Lots of fun for all ages. We walked around all day in our costumes and even got our photo in the weekly free paper. Our boss took photos of us the next day. It was really hard for me to have to leave there, was working under a Federal put seniors back to work program.
You need to go into business making things like that. You are so good and your imagination is incredible. Happy days ahead
Thank you, Jane Ellen! What a fun group costume idea! Sounds like you guys were a hit! Hope you’re having a wonderful week!
~Abby =)
This scarecrow is so adorable! It is a great idea and looks fairly simple to make, too. We stuffed some old clothing to make our scarecrow. He is sitting on a wicker chair on our front porch, looking out over the mums and pumpkins.
Ooh that’s a good idea too! Thanks so much for stopping by, Barbara! Have a great week!
~Abby =)
How cute! I will have to keep this in mind for next year decorations…looks very easy to make. Thanks for sharing.
Thank you, Toni! Yes, he was very simple to make! Hope you have a wonderful week!
~Abby =)