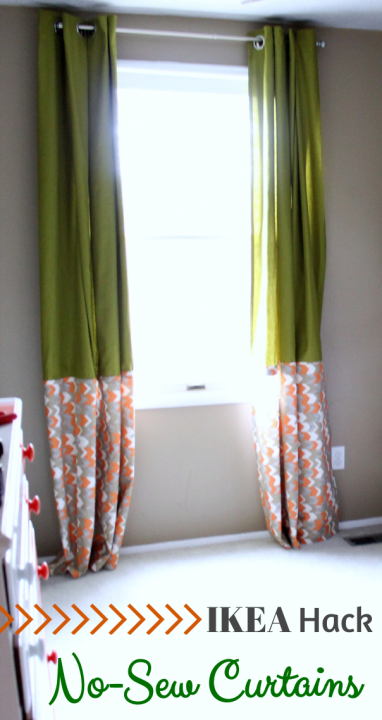
IKEA Hack: No-Sew Curtains
*IKEA Pittsburgh provided the curtains for this project, but of course all opinions are my own! :-D*
If you’re new to the blog, we are currently in the middle of a total room overhaul for our boys, ages four and two. We’ve partnered up with IKEA Pittsburgh to create a transportation-inspired room, and we’ve been working and working to get it finished! I knew I couldn’t do an IKEA room without an IKEA hack, and these curtains gave me the perfect opportunity.
When I was picking out items for the room, I immediately fell in love with these bright green Mariam curtains, which coordinate with the Cs’ bedding. They were beautiful on their own, but I wanted to make them unique to my boys’ room, so I decided to give them my own little twist. After the whole appliqued pillow saga, I wasn’t about to turn to the sewing machine again, so this was a no-sew project. {I love me some hem tape!} Here’s what I did:
Step 1- Gather Supplies
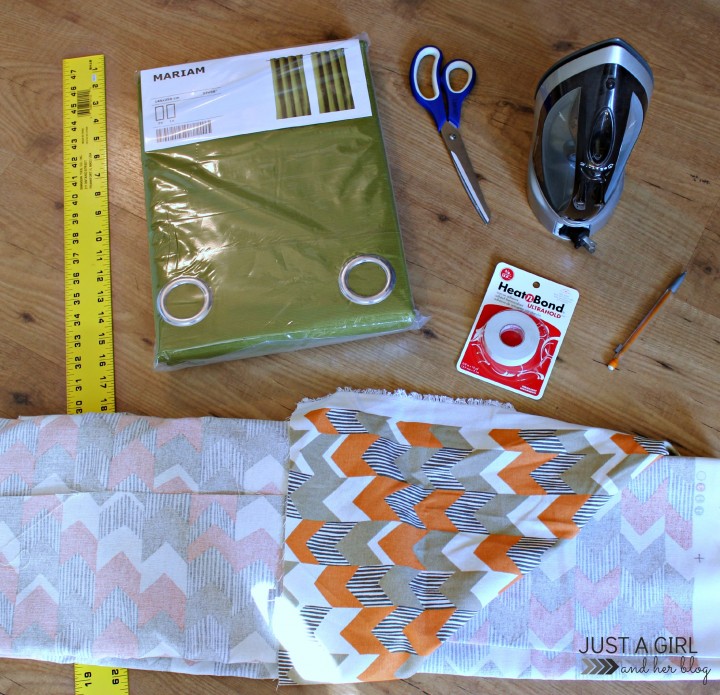
You will want to have…
- Measuring tool {We ended up using a tape measure as well, not pictured.}
- Two curtain panels
- Scissors
- Iron
- Pencil
- Heat’n Bond Ultra Hold Iron-On Adhesive
; I used two rolls. {Amazon affiliate link}
- Fabric of your choice {I used about 3 1/2 yards; your yardage will vary based on the width of your curtain panels and how high you would like your fabric to go.}
- Your mom {Seriously, this was so much easier with two people. Plus, my mom is much more mathematically minded than I am– HELLO, English major– so she was a huge help with all of the measuring, etc. I think she’s going to stop visiting pretty soon, though, because every time she comes over I make her help me with a project. I appreciate you, mom!!}
Step 2- Figure Out Your Measurements
If you haven’t done so already, this would be a good time to figure out what size you need all of your pieces to be. I measured the height of the Cs’ room and figured out that I wanted my final curtains to be 90″ long. I wanted 57″ of the Mariam curtain and 33″ of my fabric to show when all was said and done. {You will also need an allowance for your hem tape and some overlap. See next steps…}
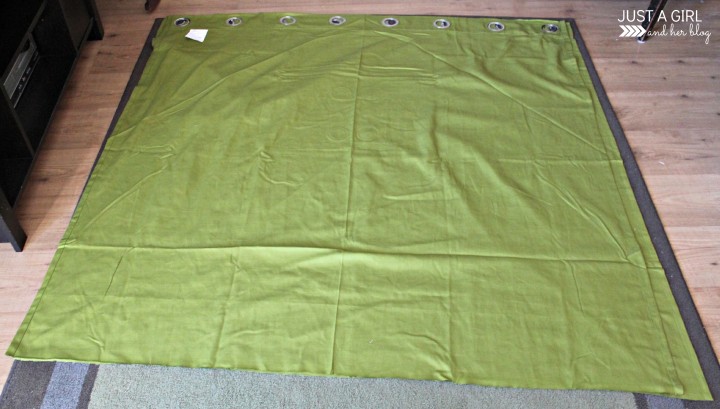
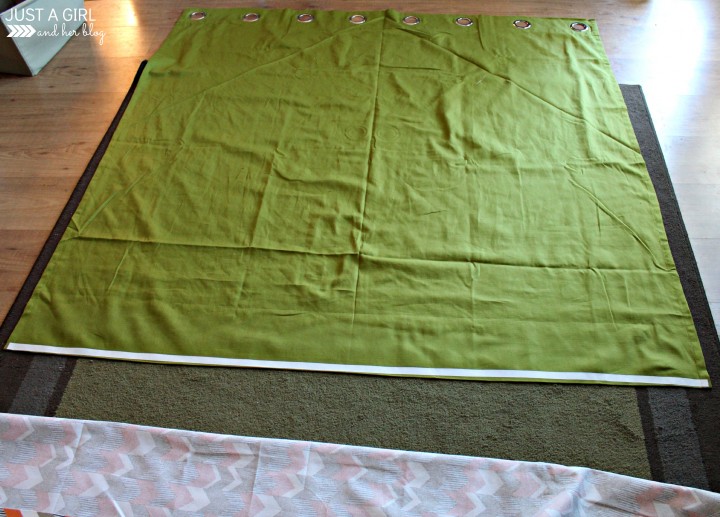
Step 3- Measure and Cut Curtain Panels
I measured 57″ down the panel and added an inch for the Heat n’ Bond tape, giving me 58″. I marked it out and carefully cut each panel. Fortunately the Mariam curtains are 98″ long, so I had plenty of room to spare!
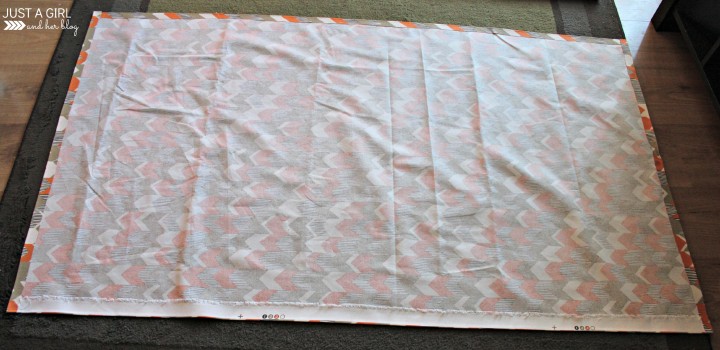
Step 4- Measure and Cut the Fabric
I said previously that I wanted to have a length of 33″ of my fabric showing on my final curtain. I added an inch at the top and an inch at the bottom for hemming, plus an inch for overlap with the curtain, giving me 36″. I wanted my fabric to be the exact width of the curtain panels, so I measured the width of the curtains, which were 57″ across, and added an inch on each side for hemming, giving me 59″ for my fabric width.
{Tip: Always measure your panels, even if the size is listed on the packaging. They may not be exact, and sometimes two panels in the same package can even be slightly different from one another.} So to review… I cut my fabric 36″ long by 59″ wide.

Sidenote: I was completely giddy when I found this fabric at fabric.com. It was a great price, it matched the colors of the room perfectly, AND it mimicked the chevron shapes I used on the pillows. I call that a win-win-win!!!
Step 5- Use Heat ‘n Bond to Hem Curtain Panels
Cut the tape just slightly shorter than the width of your panel and line it up on the bottom edge of the back of the panel. With the adhesive side down, use an iron on medium heat {no steam} to press on each portion of the hem tape for two seconds.
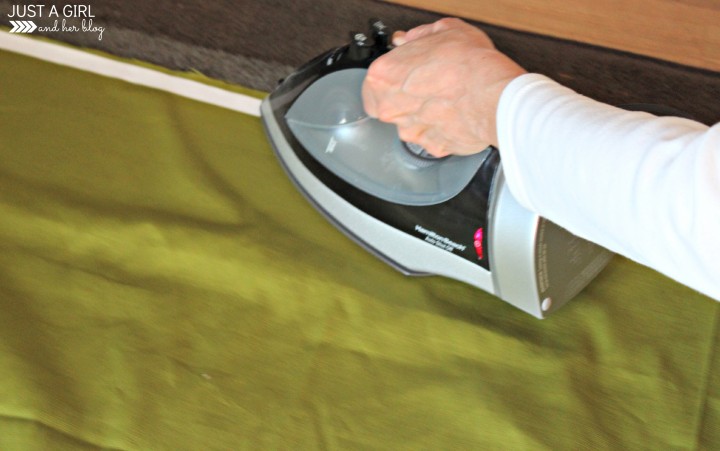

Let it cool, and remove the paper backing. Fold over your curtain until your hem is the desired width, then iron each section of the hem for eight seconds {longer for thicker fabric} until your hem has been adhered.
Step 6- Hem All Four Sides of the Fabric
Repeat the steps above to “hem” all four edges of your fabric. You will want to pay especially close attention to the width to make sure the width of the hemmed fabric matches up with the width of the curtain panel. You will also want to make sure the two hemmed fabric pieces are the same length so that they hang the same way when attached to the curtain panels.
Step 7- Adhere the Fabric to the Curtain Panel
Cut a piece of Heat ‘n Bond tape to the width of your curtain panel. Attach it to the bottom edge of the front side of the panel using the same ironing method as above.
Remove the paper backing. Then adhere the back of the fabric to the tape on the front of the curtain panel, holding the iron on each section for 8+ seconds. {Mine took a little longer because of the thickness of the fabric.} Be sure you use the same amount of overlap on both panels so that your curtains line up when hung. When everything is attached, you have your completed curtain! Give your mom a high five! {Or give yourself one if you were brave enough to try this alone! ;)}
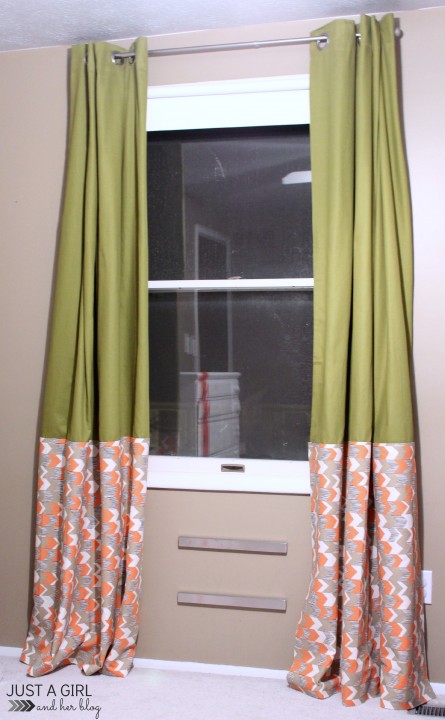
And the beautiful sun-shiny shot:
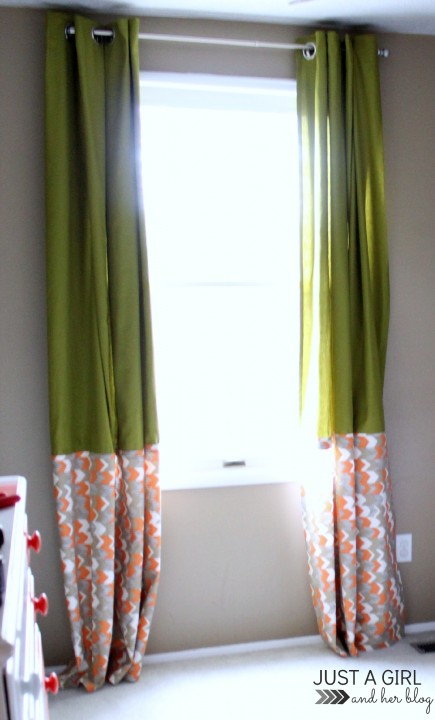
See, who needs a sewing machine?! Not this girl! {Okay, you do need a sewing machine for some things. But not for these curtains!} I was just so tickled with how they turned out, and I think they will be a fabulous addition to the Cs’ new big boy room! I’m up to my eyeballs in paint and fabric right now, but it’s coming together! If you want to follow the room transformation from the beginning, check out these posts:
Have you ever attempted no-sew curtains?

*IKEA Pittsburgh provided product for this post. This post also contains an affiliate link. For more information, see my disclosures here.*
I’m all about no-sew since I don’t sew. 🙂 Wonderful instructions!
I hear ya! I choose not sewing over sewing whenever possible! 😀 Hope you’re having a wonderful week, Miss Alli! Happy Halloween!
~Abby =)
No sew are two of my favorite words! I seriously break out in a sweat just looking at a sewing machine LOL! Your tutorial is easy to follow and I am pinning for future reference!
Girl, we are two peas in a pod. I think if sewing machines had legs they would run away when I enter the room! Thanks so much for the pin! Hope you’re having a great week! Happy Halloween!
~Abby =)
Who needs a sewing machine? Pish-posh!
You did an awesome job on the boys’ curtains. I can’t wait to see the completed room!
That’s what I’m saying! No sewing machine needed here! 😉 Thank you so much, Ashley! Hope you’re having a great week, friend! Happy Halloween!
~Abby =)
The boys’ room is coming along so well! Love that you added the patterned fabric.
Thank you, Anu! It’s getting there! Not too much longer until the big reveal! Yay! Hope you’re having a great week! Happy Halloween!
~Abby =)
How fun—love the colors—I love to sew, but I still love projects where I don’t have to…does that make sense hahaha 🙂
Thanks, friend! You need to come over and teach me some of your mad sewing skills. You always make the cutest stuff! Hope you’re having a wonderful week!
~Abby =)
Yay to heat bond tape! It really is the best. Super cute fabric you chose. Love it!
Woohoo! Yes, I feel like kissing the person that invented Heat ‘n Bond. It’s my new BFF. 😉 Hope you’re having a wonderful week, Miss Tiffany! Happy Halloween!
~Abby =)
anything no sew, sign me up! they look great!
Amen to that! I encourage no-sew whenever possible! 😉 Hope you’re having a wonderful week, Megan! Happy Halloween!
~Abby =)
you did a beautiful job with these no sew curtains Abby! love them; can’t wait to see more of this space 🙂
Thank you, friend! It’s coming together! I’m hoping to reveal the whole thing very soon!
~Abby =)
Even though I sew, I love no-sew projects so I don’t have to break it out. It is a great idea on how to personalize curtains.
Thanks so much, Yvonne! I certainly didn’t miss the stress of a sewing machine, lol! Happy Halloween!
~Abby =)
These are amazing, Abby…great job! I love seeing no-sew projects involving fabric because sewing and I are not friends! 😉 I can’t wait to see the big room reveal…looks like everything is coming together nicely!
I’m glad I’m not the only one who avoids the sewing machine! 😉 I will choose not sewing over sewing whenever possible! 😀 Hope you’re having a wonderful week, friend! Happy Halloween!
~Abby =)
Wow, they love amazing. I want to try this. I love the detail of your tutorial. 🙂
Thanks so much, Tiff! You could totally handle it! Have a wonderful week!
~Abby =)
They look great!! And you know I am a “no sew” girl…right up my alley! 😉 Great tutorial!
Hope you have a great week Abby!
xo
Nancy
Hooray for no-sew! 😀 Thanks so much for stopping by, friend! Have a great week!
~Abby =)
The only kind of sewing I do is no sewing ;). Great fabric! The colors coordinate perfectly.
Amen, sister! No-sew all the way! Thanks so much for stopping by! Hope you’re having a wonderful weekend!
~Abby =)
They are so cute Abby and I love a good no-sew project too:) love the arrows!
Thanks so much, Krista! I couldn’t believe it when I found the coordinating fabric! Hope you’re having a wonderful day, my friend!
~Abby =)
Great tutorial! I need to add length to some curtains hanging in my craft space but keep putting if off because I don’t feel like dealing with the sewing machine…not overly confident in my sewing skills. I may just get them done this weekend using your tutorial. Thanks!
I vote no-sew whenever possible! Lol. Good luck with your project– sounds like it’s going to be cute! Have a great weekend!
~Abby =)
I love your blog! Thank you so much for all the inspirations! The no-sew curtains are so cute and I’d love to try something similar in my son’s room. Would you happen to have the name of the chevron print fabric from fabric.com? Thank you!
Hi, Keturah! The fabric is called Richloom Nino Chevron Tangerine. Thanks so much for your sweet words! Have a wonderful week!
~Abby =)