How to Paint a Striped Wall {A house full of sunshine}
Ooh, do I ever have a treat for you guys today! I am absolutely delighted to welcome my friend Karen from A house full of sunshine to share a super helpful tutorial with you all! Karen comes to us alllll the way from Australia, though I wish she lived much closer so we could hang out in person.
She is truly one of the sweetest people I’ve “met” in blogland, and she just so happens to be an amazing decorator as well!
_______
Hi, friends! I’m Karen and I blog over at A house full of sunshine. Abby has kindly let me stop past her beautiful blog today to talk to you about a project I’m still just buzzing with excitement over!
See, I’ve just finished transforming my son’s bedroom from this lacklustre, colorless space:

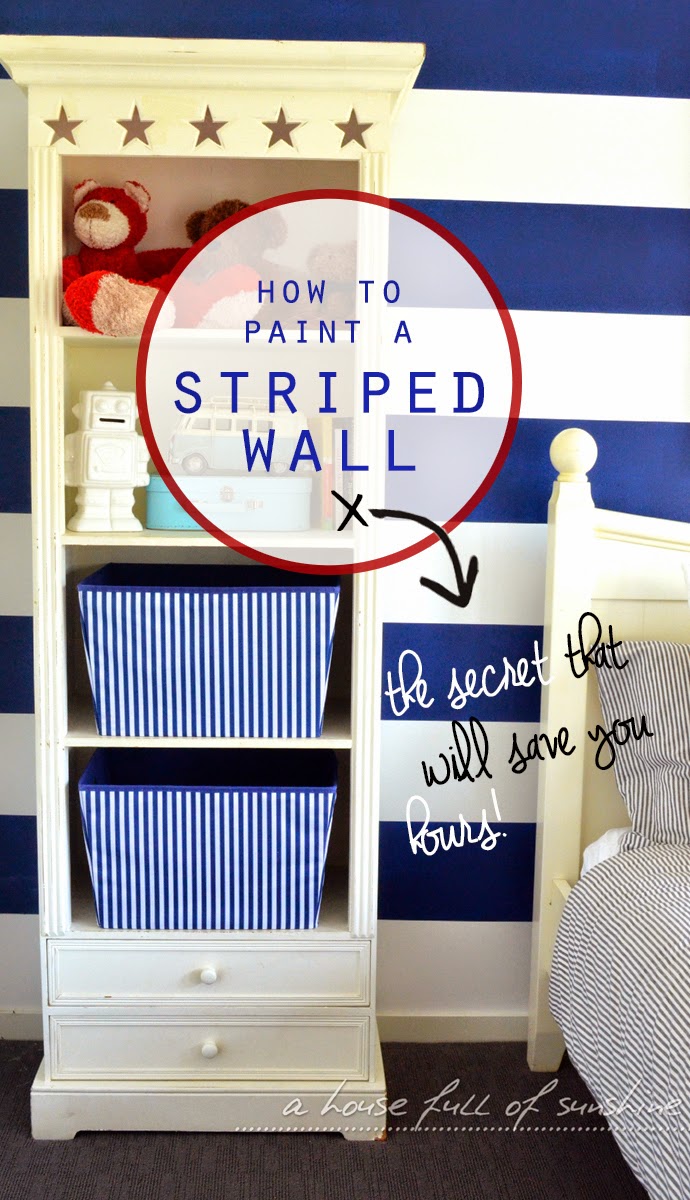
Into this:
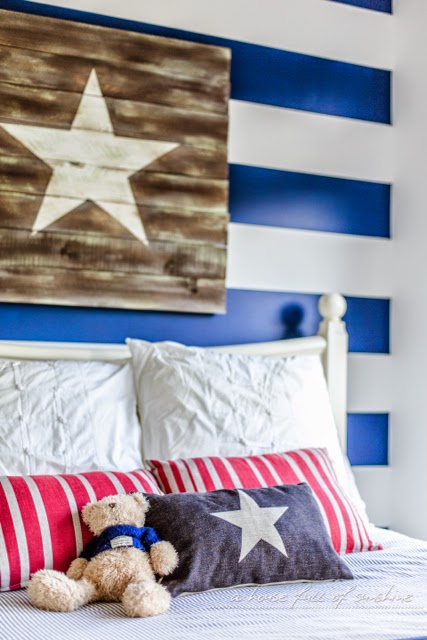
Bit of a difference, right? I added some new bedding and a few accessories, including the striking DIY weathered star wall art, but the main transformation came from painting that bold navy-striped feature wall.
This is not the first time I’ve used a striped feature wall as the focal point to transform a space. Last time I used it was in a surprise nursery makeover for my extremely special baby nephew, who was born at 24 weeks with his twin sister (you can read all about their story and see the before and after of the nursery here. Fair warning, it is a really sad story.)
Since that time, though, I’ve learned a new trick of the trade that saved me hours this time around. I wish I’d known about it sooner!
But let’s start at the beginning.

How to Paint a Striped Wall
Step One
The first step is to figure out how wide to make your stripes. Because this depends entirely on the dimensions of the room, I can’t give you a hard and fast answer. But I can tell you how to easily work it out.
First, you need to measure the height of the wall. We have high ceilings, so our wall is 8.4 feet, or 101 inches tall, from the top of the baseboards to the bottom of the crown molding.
A good dimension for a nice broad stripe is between 6-8 inches wide. The next part involves a bit of trial and error. You’ll need to take your wall height measurement and divide it by the number of stripes you think you’ll need, and check if the answer falls between 6 and 8 – which is the width you’re trying to achieve. If not, adjust up or down accordingly.
It’s not as complicated as it sounds. I’ll walk you through it.
In this case, I knew that dividing a 101 inch wall into ten stripes would work out to a width of 10.1 inches each, which is too wide. So I began by plugging in numbers greater than 10.
101 inches divided by 12 stripes worked out to 8.4 inches per stripe, which was close, but a little too wide still.
101 divided by 13 stripes, however, worked out to 7.7 inches each – perfect!
That makes for a total of 6 navy stripes and 7 white stripes. I could also have done it the other way around, with 7 navy stripes and 6 white, but you know what? I really didn’t fancy taping off all the baseboards and crown molding, so I decided to place the white stripes first and last. (I’m either lazy or a genius. Don’t tell me which, ‘kay?) (Oh, and this saved me time, for sure, but that isn’t THE big time-saving secret. That one’s coming up.)

Step Two
Time to mark the wall. I measured off intervals of 7.7 inches up the left-hand side of the wall and marked them with a pencil. Every second stripe, I made a small cross to show me which stripe would be painted. (Make sure you do this, otherwise it gets confusing when you get to the next step!)
There’s no need to measure again on the other side – just use a long (1 yard) spirit level, and rule straight across the wall with your pencil. Because baseboards and walls usually aren’t dead straight, this is actually more accurate than measuring up the wall from two separate points. And, it’s super fast! (But that’s still not THE time-saving trick.)

Step Three
Okay, enough teasing – it’s time to spill the beans.
The next step involves taping up the stripes with painter’s tape. Here’s where you can either add 3+ hours to the job, or work smart and save that time.
The first time I blogged about how to paint a striped feature wall, I recommended painting over the edges of the painter’s tape with the base wall colour in order to seal the edges and prevent bleeding. It worked brilliantly – the method gives perfectly crisp stripes with no bleed-through. But, it takes time. Up to an hour to paint over all the tape edges with a roller, and then at least 2-3 hours drying time before you can re-coat (more if it’s cold).
This time, I had a secret weapon. Frog tape. The stuff is gold, and no, I’m not being paid to say that. They totally need to sponsor me, though, because I can’t stop raving about them to everyone on the world wide interwebz – ha!
If you have been living under a rock and haven’t heard about the magical powers of Frog tape, let me enlighten you. The sticky stuff on the back apparently contains some sort of super-duper polymer binding agent that reacts with wet paint to form an instant edge-lock and prevent any paint from bleeding through.
I know, I know, I raised my skeptical eye-brows too when I first read the little blurb. I mean, really? Sounded dubious to me. Like those pseudo-scientific diagrams they put on shampoo ads where you see little globules of nourishment traveling up the hair shaft and encasing it in a shiny sheath of light. I mean, super-absorbent polymers – suuuuuuure.
But. People. The stuff actually works. If you use Frog tape at this point, you can totally skip the extra step of sealing over the tape with paint. You’ll achieve exactly the same crisp, sharp edges, with half the labor. Uh-mazing.

You’ll notice in the picture above that some of the stripes look closer together than others. That’s because you need to apply the tape on the outside edges of the stripes that will be painted. This is where those little pencil crosses you made earlier are going to come in really handy.
Step Four
It’s time to paint! This is the fun part, where you really start to see the transformation taking place. Use a small foam roller and be careful not to overlap the outer edges of the tape.
I live in Australia, so I used an Australian brand of paint – Dulux “Blue Lobelia.” (A similar shade for U.S. readers would be Benjamin Moore’s “Midnight Navy“.)
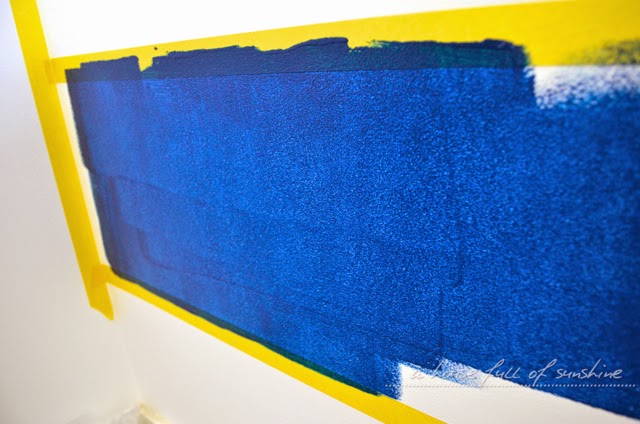
Blues are notoriously transparent and often require extra coats to achieve good coverage. You can see how mottled this is looking after just one coat. At this point I was convinced I’d need to do three coats, and of course allow for drying time in between – what a time suck!

However, two coats did the trick beautifully! Phew.
Step Five
Time to peel off the tape. Do this while the top coat is still wet, to avoid pulling dry paint off the wall.
As you can see, the Frog Tape worked perfectly! No bleeding whatsoever.


For such a simple project (I did this in a day – first coat in the morning, top coat in the afternoon), it made an enormous impact on the room. Here’s another glimpse of where we ended up!
This post is already very picture-heavy, but I have a full room reveal on my blog, with loads more pictures and fun details for you to check out – I hope you’ll stop past and take a look!
Thanks so much for having me here today, Abby!
_______
Isn’t her son’s room awesome?! Have a wonderful Wednesday!

Thanks SO much for having me, Abby – and thanks for your lovely words! It’s such a treat to be here. 🙂 xo
Great tips! I especially like the one of using the top & bottom stripes as the base color, that’s brilliant. I’ve never tried a striped wall before, so honestly have never even thought about that aspect of planning.
I’ve always loved the look of striped walls (especially for kids’ room). However, my boys have striped bedspreads and I didn’t know how it would look. Seeing the inspiration of your room with all the stripes and how they look together, might just have me reconsider trying this!
Thanks so much – so glad this was helpful! Yes, I think stripes can look great together, as long as you mix it up a bit – eg. I used a really broad, bold stripe on the wall, but a very light, fine pinstripe on the bedding. That keeps it from becoming overwhelming. If the stripes on your bedding are quite prominent, it might look good to go with a more tone-on-tone stripe on the wall so it gives a subtle effect. Good luck with it, and thanks for your sweet comment!
Brillian Karen! Geesh you had me bitting my nails waiting for the big reveal! (that’s so not cool LOL!). I’ve heard of frog’s tape, but was also skeptical, but now I’m all in.
thanks so much for sharing! awesome post!
LOL! Thanks Julie, so glad this was helpful! xoxo
Ive been toying with idea for a few months, now youve made it seem easy, thankyou for taking the time to show me how x
Frog tape is my life saver when painting our walls as well! You have outlined the steps very clearly. Awesome post! I’m sure this will help those who are still confused how.
Thanks so much, Ben!
~Abby =)
Thanks for the tips on the frog paint! Just FYI, if you want stripes between 6-8 inches, you can divide by 6-8 to get the number of stripes. It’s much faster that way… Coming from a numbers nerd who can’t decorate to save my soul! ? You decorate beautifully!
Lol! Thanks so much for the tip, Kelli! Hope you’re having a great start to your week! <3
~Abby =)