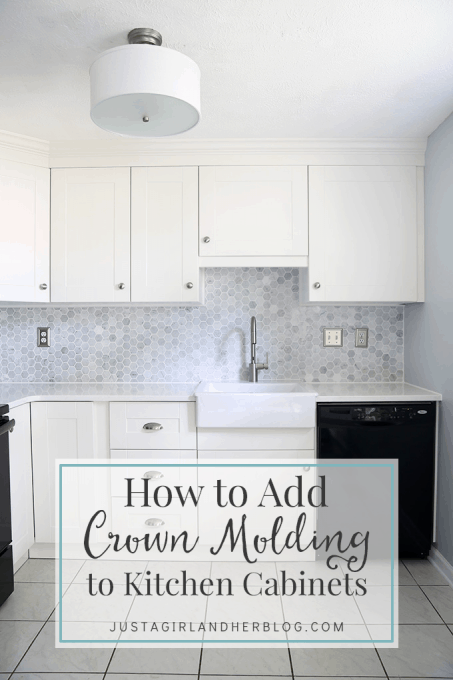
How to Add Crown Molding to Kitchen Cabinets

Donnie and I have kind of developed this routine when it comes to DIY projects. I come to him excitedly with the most brilliant idea, which almost always involves him building something. He immediately tells me, “No, we can’t do that. It’s too hard.” But I know better. 😉 So I very subtly (okay and sometimes not so subtly) drop little hints to help him along and get him warmed up to my idea. I send him beautiful pictures of similar projects on Pinterest. I send him links to other tutorials and say, “See! It’s not that hard!” Then eventually I just start talking about the project like it’s already happening. And usually he gives in. Because he’s an awesome husband like that. 🙂
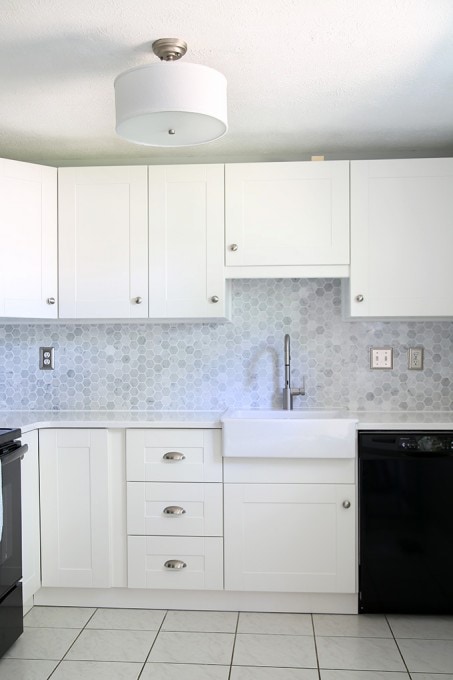
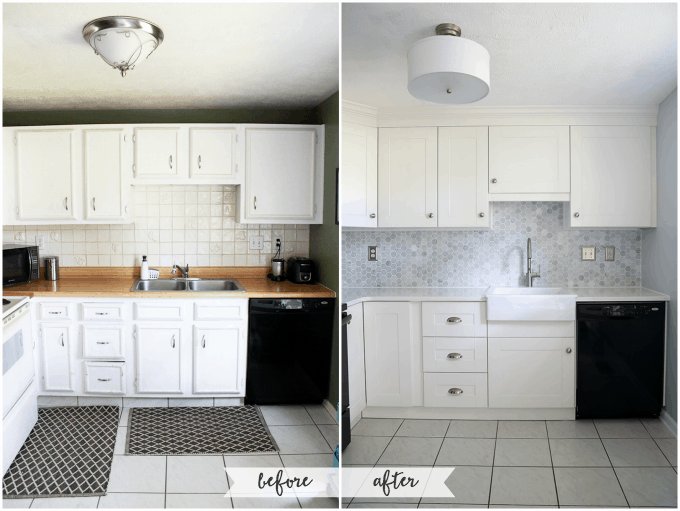
This exact scenario played out when I began talking about wanting to close the gap between the top of our kitchen cabinets and the ceiling. See, in our old kitchen, we had this space that was large enough to look like it should hold something but not large enough to actually hold something, and it really bugged me.

I tried putting stuff up there from time to time, but nothing ever looked right, so it mostly sat empty, staring back at me and taunting me with its emptiness. {Also sometimes I’m a bit dramatic… 😉 } But when we decided to put in a brand new beautiful kitchen, I saw my opportunity to say bye bye to the weird, awkward gap! I almost didn’t think it was going to happen. At one point Donnie was pretty convinced that it would never work. But as the aforementioned routine usually goes, he ended up going for it and {spoiler alert!} even admitted that it was way easier than he thought it would be! Yay! Since he’s the one who did the grunt work for this project, I’ll let him walk you through it…
This post contains affiliate links. For more information, see my disclosures here.

Our kitchen ceiling height put us in a difficult position after installing our IKEA kitchen cabinets. If our ceiling was a bit higher we could have used taller wall cabinets. If our ceiling was lower we wouldn’t have had a 5 1/2” gap between the top of our cabinets and the kitchen ceiling.
Throughout the entire kitchen renovation Abby kept hinting that she wanted me to fill in the gap. I kept trying to tell her that filling in that large of a gap was much harder than it looked and was not a simple project. Eventually I gave in… that’s how it usually happens. She’s pretty convincing!
As it turns out, this project wasn’t nearly as hard as I thought it would be. For a non-expert like me it was about a 6 hour job in our small kitchen.
Tools and Materials:
- 2×3 boards
- 1×6 MDF boards
- MDF crown molding
- Miter Saw
- Table Saw
- Ryobi Air Strike 18ga brad nailer
- 1 3/4″ 18ga brads
- 3/4” 18ga brads
- Elmer’s wood glue
- Crown molding jig
- Tape measure
- Square
- Ryobi One+ Cordless Drill
- Ryobi One+ Impact Driver
- 3” cabinet screws with Torx head
- Behr Home Decorator’s Collection Swiss Cream satin finish paint
- DAP 20-minute dry acrylic caulking
Because of our somewhat wavy ceiling, our gap varied between 5 1/4” and 5 1/2”. I used a table saw to rip down a few 1x6s to a 5 1/8” width.
I decided to anchor everything into the cabinets themselves instead of relying on floor joists in the ceiling. The chance of a parallel running joist matching up with our trim was unlikely.
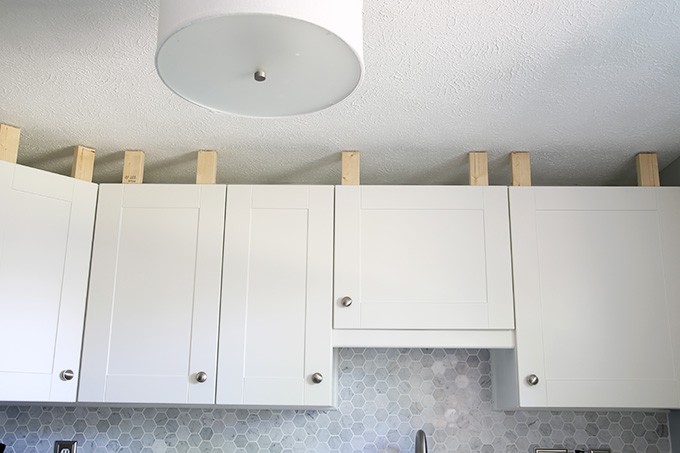
I cut straight 1x3s and placed them every few feet on top of the cabinets. I pre-drilled through the cabinets and then used 3 1/2″ cabinet screws to attach the braces. The cabinet screws were great. I chose a Torx (star) head because I tend to strip Phillips head screws when applying pressure over my head. The length really made a firm base to start the trim installation. I was pleased with how solid everything felt.
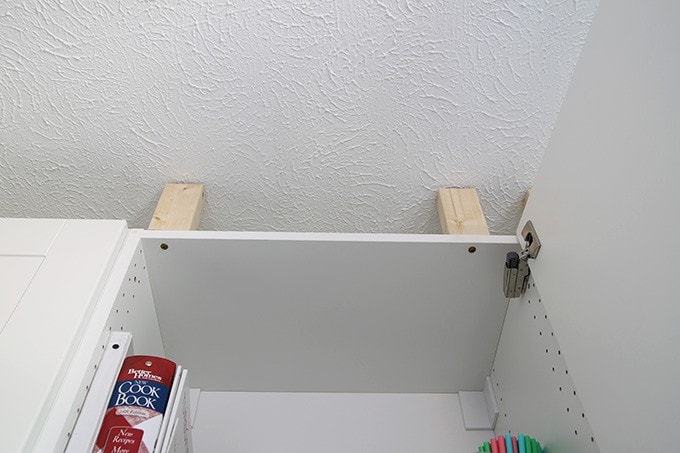
I installed the 1x3s to sit flush with the front of the cabinet frame. That way when the rest of the trim work was attached, it would sit flush with the front of the cabinet doors and give a more finished and custom look.
Next I installed the ripped down MDF 1×6’s with my 18ga Ryobi Airstrike Brad Nailer (no compressor or air hose needed!). I used 1 3/4” brads. The corners were mitered and glued above our two-angle corner cabinet. Fortunately my chop saw is pre-notched for 22.5 degrees as well as 45 degrees.
Make sure to use wood glue on the corners or anywhere two pieces come together. If you skip this part, the joints will tend to pull apart over time.
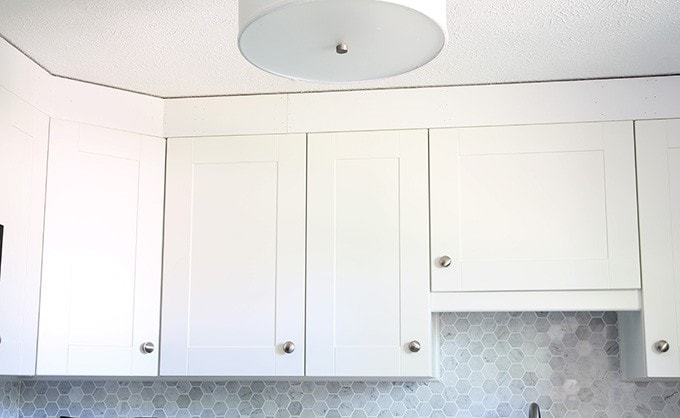
I now had a nice flat header above my cabinets with a tiny gap at the top. It was looking better already!
If you’ve ever done any finish woodwork, you understand the complexity of crown molding. Baseboards are simple — hold the board against the saw fence and adjust the angle accordingly. No big deal. With crown molding it seems like there are 10 considerations to make for every single cut. Not only do you have to be aware of an inside corner, outside corner, right board, or left board, you also have to magically hold the crown molding up against your miter saw fence at just the right angle or else your corners will never fit together.
I expressed my angst to my dad, and like he usually does, he had the perfect tool for my problem. He let me borrow this little crown molding jig that turned a tricky job into a breeze.

You make a few adjustments on the jig to match your specific crown molding and then you are set. The jig itself has a nice visual guide to help when cutting. You just have to look at the picture and position the jig on your saw accordingly. Is it an inside corner or outside corner? Is the cut on the left side of the trim piece or the right side? Just follow the picture for perfect crown molding cuts. I will certainly be purchasing one of these for my next crown molding project!
I chose MDF instead of real wood for our crown molding. My personal opinion is that cheap wood is inferior to cheap MDF — and with as much as we’ve invested in the kitchen already, I certainly wanted make this project as inexpensive as possible! Cheap wood tends to split, crack, and warp when compared to MDF. The pre-primed MDF crown molding I purchased was under $1/foot, and all of the boards were perfectly true and free from any surface blemishes.
I attached the crown molding to the ripped down 1×6” with 3/4” brads. Because the only attachment point was the bottom of the crown molding (nothing into the ceiling) I made sure to use a nail every two or three inches. As usual, there was not one split or crack with the MDF. Again, make sure to glue and nail the mitered corners and joints.

Because I’m a disaster with caulking gun, I used the small squeeze tubes of caulking for this detailed type of work. There’s no need for super durable and waterproof silicone caulking this high up on the ceiling. It’s harder to use and harder to clean. I used DAP 20 minute dry white acrylic caulking. Abby patched the nail holes and we were ready to paint!
We were a little nervous about finding the perfect paint color since our cabinets are off-white, but we tested a few paint samples and finally determined that Behr Home Decorator’s Collection Swiss Cream is the perfect match to our IKEA GRIMSLOV off-white cabinet doors. Because durability is less of an issue up high compared with baseboards, we chose a satin finish. The less light that reflects off the surface, the better the trim will look. Every imperfection is noticeable on high-gloss surfaces.
It only took two quick coats of paint on our pre-primed MDF to get a nice finish. I think the color match is nearly perfect!
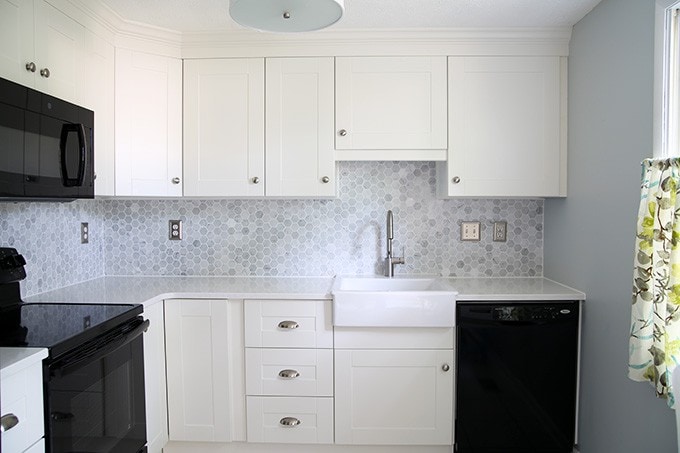
Looking back, Abby was right– the trim work to fill in the gap above our cabinets made a big difference. It feels much more “finished” now, and I am really glad we decided to go ahead with this project!
Such a difference, right?! {Plus it is always kind of fun for me when Donnie admits that I was right about a project… 😉 }
As you can see, we are *so* close to being able to call this space “done!” Yippee!!
Update: The kitchen is finished! See our DIY white kitchen reveal here and my honest IKEA kitchen review here!
Thank you for following along with our kitchen reno! Have a wonderful week!

This post contains affiliate links. For more information, see my disclosures here.
Looks amazing!! such a cute little space!
Thank you so much, Virginia! Hope you’re having a wonderful week!
~Abby =)
The kitchen looks amazing! I love the crown moulding. It really completes the space. I’m sure you’re antsy for it to be done. Good luck with the finishing touches!
You are so right!! I can’t wait to call it finished! Thanks so much for stopping by, Samantha! Have a wonderful week!
~Abby =)
this might be off topic, but i love love love your backsplash!! xx Lita
https://www.myfancynotebook.wordpress.com
Lol! Thank you so much, Lita! Hope you have a wonderful week!
~Abby =)
That gap probably would have bothered me too. It looks fantastic now!
I’m amazed at the difference. I love remodel jobs. There is such satisfaction at the end. Great job!
Abby, I love how this turned out! I did the same thing when we renovated our kitchen last year. I’m not a fan of that dust-catching empty space!
Looks wonderful. I also have crown molding kitchen cabinet. It really completes my kitchen.
This was very helpful. Thank you for sharing this information. I’m in the process of installing cabinets from Ikea and have run into issues with the rail installation. Getting it level is quite challenging. But now thanks to your tips I feel a little more confident. If you have any more details you can share for filler pieces or the size of hardware ( screws) used to anchor the rail that would help too .
I found as many studs as possible and then just used long wood screws. Where I could find studs I used big zinc drywall anchors. If the wall was not perfectly straight I used standard wooden shims. Hope this helps!
What did you guys do for under cabinet lights? I love Ikea cabinets and used them in my kitchen install 7 years ago. The only thing that bugged me was the light rail piece that Ikea has you screw into the cover panels that extend down past the cabinet box.
Hi, Jenn! Since our kitchen was so small, we only used an under cabinet light above the sink, and we used a little trim piece to cover it. Sorry! Hope you’re having a great week!
~Abby =)
The results with crown molding are always very beautiful and modern . I will run to change mine.
I love looking through a post that can make men and
women think. Also, thanks for allowing for me to comment!
Hey. I’m actually did the same kitchen from Ikea. Same color and same doors as yours. Couple of questions I have for you. How well did the 1×3 hold up with only putting one screw through the cabinet? Also was there a gap that could be seen when opening the cabinets between the new Med board and cabinet? I only ask cause the cabinets sides are a smidge higher than the cabinet shelves. Thanks
Thanks, Abby and Donnie ,
Did you two have to install fillers to any of your cabinets.
I’m not seeing any info on how to properly add them.
I’ve read four or so IKEA DIY Cabinet articles and they all let “Pros” do the last steps…
What do you mean by “fillers”?
The pieces that fill in any lateral spaces between cabinets and walls, as needed.
I am glad I am not the only one who stores the vacuum in the pantry!
I have a Dyson canaster and also used the IKEA storage system, which I love so much!
Isn’t it the best? LOVE it! Have a great day!
~Abby =)
Hi,
Your kitchen looks great! Can you please tell me how you affixed the 1×5″ vertical pieces above the cabinets to the cabinets and/or ceiling? We’re also doing an ikea kitchen using their filler strips and hoped to avoid nailing into the front of the ceiling filler/moulding. We’re also trying to scribe to the ceiling flush and then fill any tiny gaps with caulking.
Because we’re using IKEA’s filler, we didn’t want to nail holes into the front b/c we’re not sure how to fill those holes and paint without it being obvious. So, we were thinking of gluing the filler strip to small pieces of wood like you used above the cabinets. But, we’re just not sure the best way to affix the wood pieces to the cabinet and ceiling.
Thanks for your help!
If you’re talking about the vertical posts, I attached them using cabinet screws from inside the cabinets. For the 1×5’s I just used my nail gun and attached them from the front to the 1×3 vertical posts. Hope that helps!
Looks awesome! Well done
Thanks so much!
~Abby =)
I think it came out really nice. Great Job !!!!
Thank you, Jeff! Hope you’re having a great week!
~Abby =)
Hi – this looks great! Just one little helpful hint – when using caulk for crown molding – always get one that says “flex” on the able. As your house ‘settles’ regular caulk will pull away from the joints. Alex Flex Paintable Caulk is a really good one for crown molding.
Thanks so much for the tip, Tina! Hope you’re having a great week! <3
~Abby =)